13
Installation and
Setup
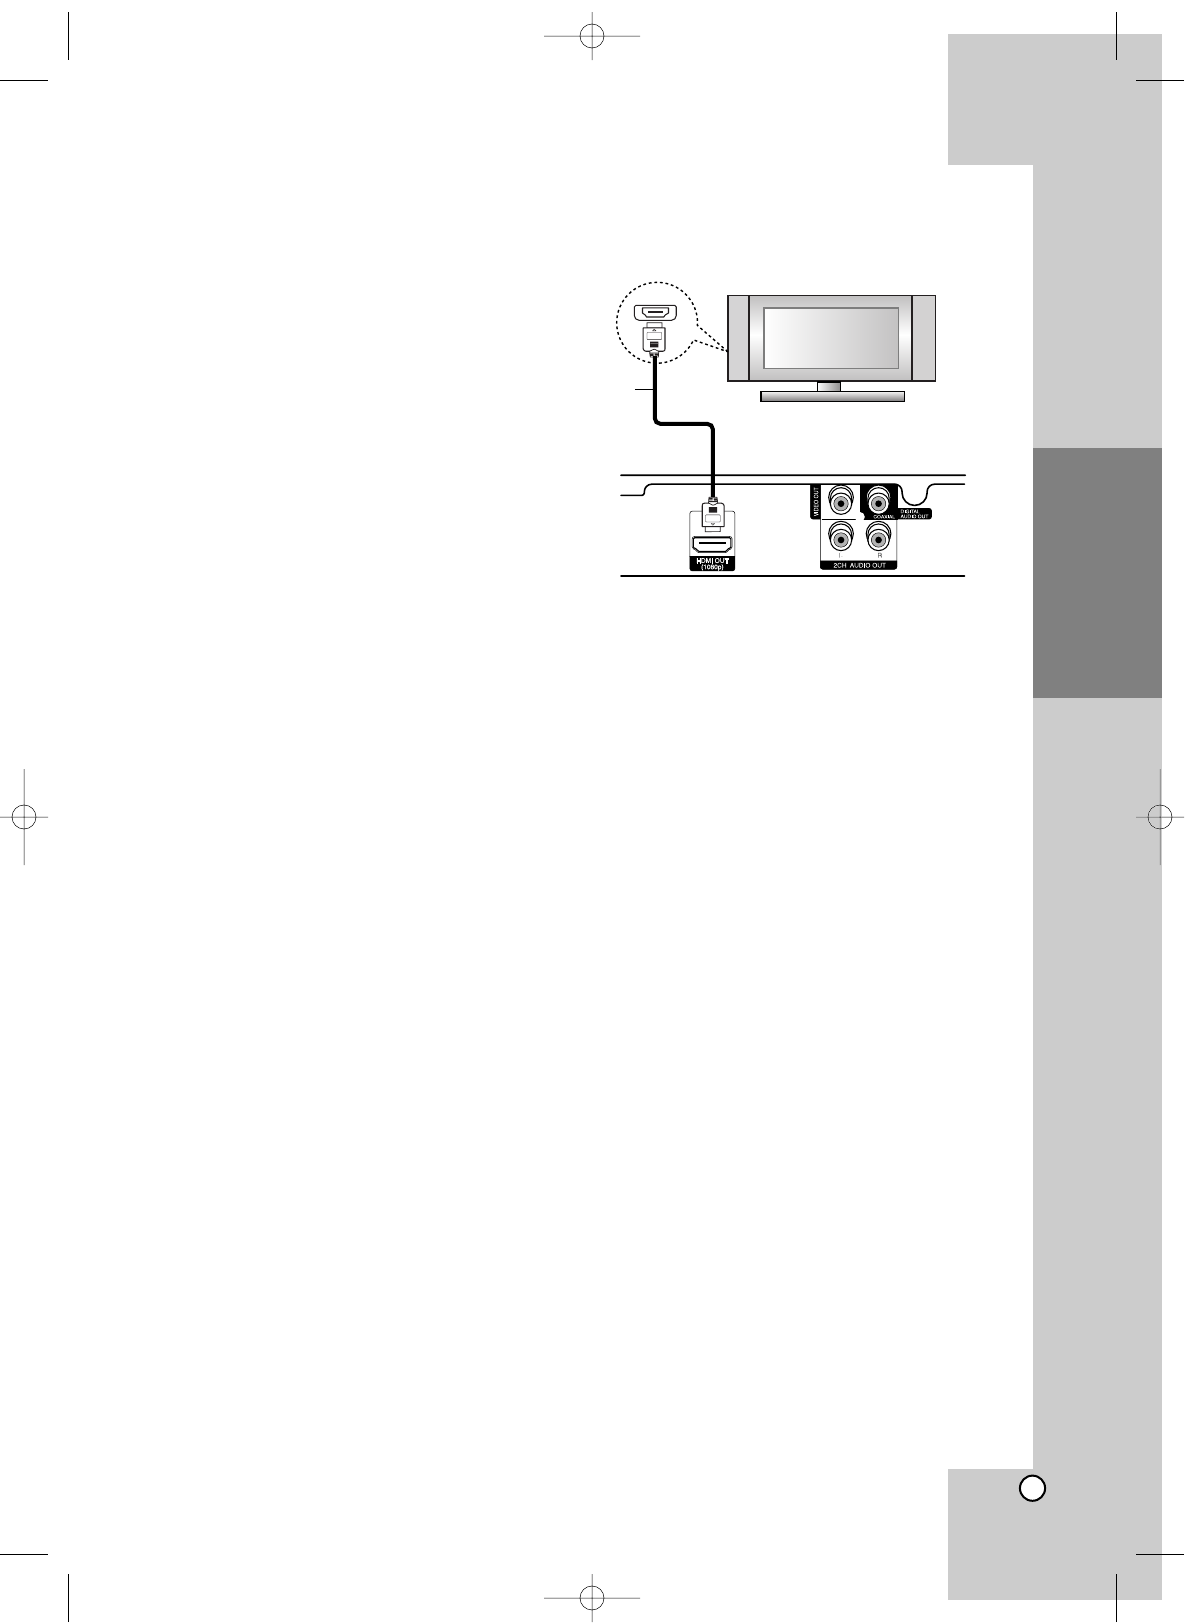
HDMI connection
If you have a HDMI TV or monitor, you can connect
it to this player using a HDMI cable.
1. Connect the HDMI jack on the player to the HDMI
jack on a HDMI compatible TV or monitor (H).
2. Set the TV’s source to HDMI (refer to TV’s
Owner’s manual).
Notes:
You must select a HDMI audio output and a
maximum sampling frequency that your TV
accepts using [HDMI] and [Sampling Freq.]
options on the setup menu (see page 18).
If a connected HDMI device does not accept the
audio output of the unit, the HDMI device’s audio
sound may be distorted or may not output.
Tips:
• When you use HDMI connection, you can change
the resolution for the HDMI output. (Refer to
“Resolution Setting” on page 16.)
• Select the type of video output from the HDMI
OUT jack using [HDMI Color Setting] option on the
[Setup] menu (see page 17).
Cautions
Changing the resolution when the connection has
already been established may result in malfunc-
tions. To solve the problem, turn off the player and
then turn it on again.
When the HDMI connection with HDCP is not veri-
fied, TV screen is changed to black screen. In this
case, check the the HDMI connection, or discon-
nect the HDMI cable.
If there is noise or lines on the screen, please
check the HDMI cable (length is generally limited
to 15ft).
Additional Information for HDMI
When you connect a HDMI or DVI compatible
device make sure of the following:
-Try switching off the HDMI/DVI device and this
player. Next, switch on the HDMI/DVI device
and leave it for around 30 seconds, then switch
on this player.
- The connected device’s video input is set cor-
rectly for this unit.
- The connected device is compatible with
720x480p, 1280x720p, 1920x1080i or
1920x1080p video input.
Not all HDCP-compatible HDMI or DVI devices
will work with this player.
- The picture will not be displayed properly with
non-HDCP device.
- This player does not playback and TV screen is
changed to black screen.
Rear of the player
HDMI
HDMI compatible TV
H
Installation and Setup
BD320-JN_BUSAJJK_OM_ENG 8/31/09 12:16 PM Page 13


