


3 www.k2mounts.com
Installation
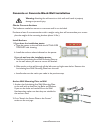
To mount to a wood stud wall, continue below. To mount to a concrete wall, go to page 4.
Wood Stud Wall Installation
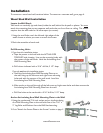
Locate the Wall Studs
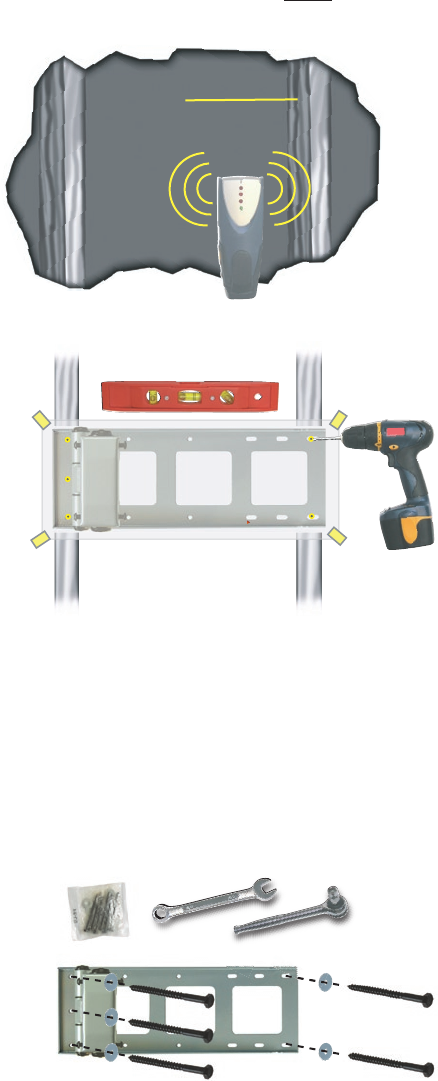
Wall studs run vertically (up and down) inside the wall, behind the drywall or plaster. You must
attach the mounting plate to two separate wall studs that run from oor to ceiling. This mount
requires that the wall studs be 16 inches apart (on center).
1. Using the stud nder, mark the left and right edges of the
studs closest to where you want to mount the screen.
2. Mark the centerline of each stud.
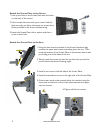
Drill Mounting Holes
1. If you have the installation poster:
a. Tape the poster to the wall with the ACTUAL SIZE
TEMPLATE side showing. Line up the mounting holes with
the centers of the wall studs. Level the Articulating Arm/
Wall Mounting Plate.
b. Drill where indicated with a 3/16” drill bit, 2 1/2” deep.
If you do not have the installation poster:
a. Hold the Articulating Arm/Wall Mounting Plate up to
the wall, lining up the left-most and right-most mounting
holes and with the centers of the wall studs. Level the
Articulating Arm/Wall Mounting Plate.
b. Make marks on the wall through all the left-most and right-most holes and then remove the
Articulating Arm/Wall Mounting Plate from the wall.
c. Drill ve holes at the marks with a 3/16” drill bit, 2 1/2” deep.
Anchor Articulating Arm/Wall Mounting Plate to the Wall
1. Using the ratchet and 7/16 inch socket, anchor the Articulating
Arm/Wall Mounting Plate to the wall with ve of the 7/16” x
2” Lag Bolts and Washers from the Wall Hardware bag.
2. Go to “Attach the Screen Plate to the Screen” section on page 5.
2" x 4" 2" x 4"
If you have 16" on-center
studs or are mounting to
concrete, drill were indic ated.
Turn over for installation instruc tions.
ACTUAL SIZE TEMPLATE