8
Hooking up the unit
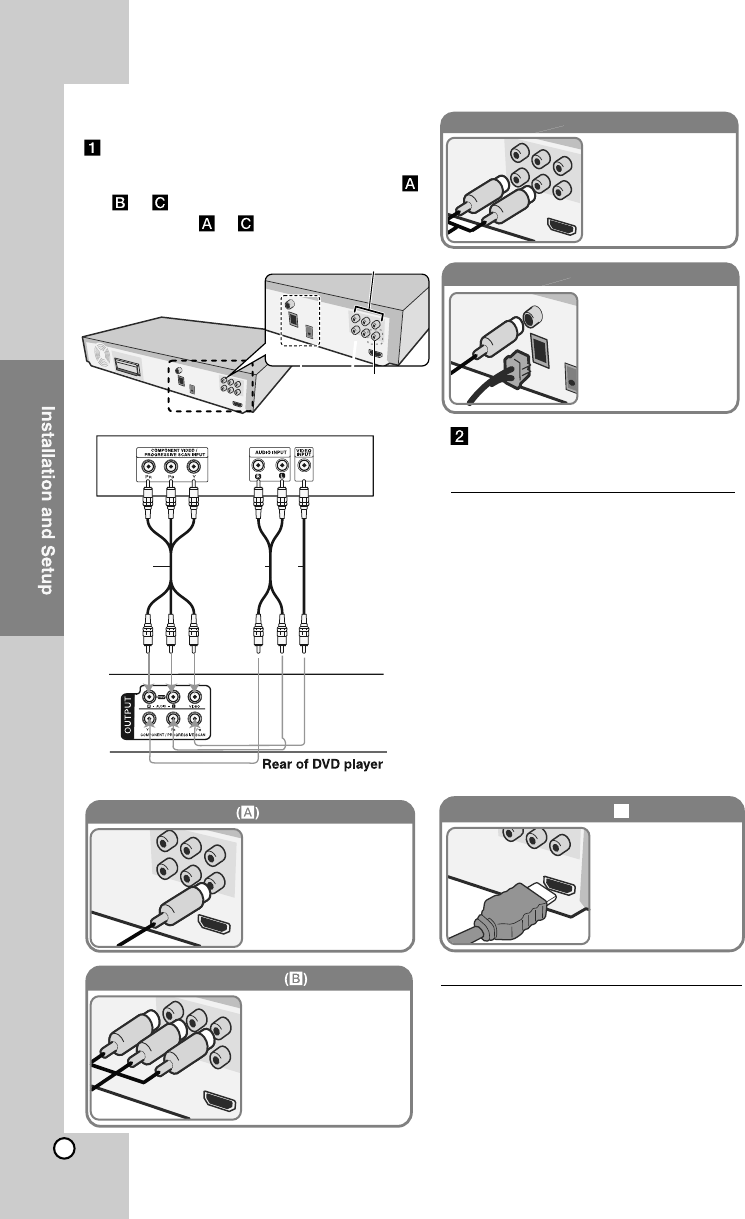
Connect jacks on the unit and your TV (DVD
player or Digital Device etc.) using the cables.
Check the jacks of your TV, and choose the ,
or connection. Picture quality improves
in order from
to
.
(A)
(B)
Video Out connection
Connect the VIDEO
OUTPUT(MONITOR) jack on
the unit to the corresponding
input jack on your TV using a
Video cable.
Component Video connection
Connect the COMPONENT
VIDEO (PROGRESSIVE
SCAN) OUTPUT jacks on
the unit to the corresponding
input jacks on your TV using
a Y PB PR cable.
Audio In connection
The unit’s Audio jacks are
colour coded (red for right
audio and white for left
audio). If your TV has only
one output for audio (mono),
connect it to the left (white)
connect it to the left white
audio jack on the unit.
AM FM connection
AM - Connect the AM loop
aerial to the DVD receiver.
FM - Connect the FM aerial.
The reception will be its best
when the two loose ends of
the aerial are in a straight and
horizontal line.
Plug the power cord into the
power source
Resolution Setting
You can change the resolution for
component video and HDMI output.
Press RESOLUTION repeatedly to select
the desired resolution - 480i (or 576i),
480p (or 576p), 720p, 1080i, 1080p. The
resolution may not be selected depending
on the connection or TV.
•
Depending on your TV, some of the
resolution settings may result in the
picture disappearing or an abnormal
picture appearing. In this case, press
RESOLUTION repeatedly until the
picture re-appears.
You can set 1080p video resolution to enjoy
Full HD picture quality. (Full HD up-scaling)
HDMI Out connection ( )
Connect the HDMI
OUTPUT jack on the
unit to the HDMI input
jack on a HDMI
compatible TV using a
HDMI cable.
C
Available resolution according to connection
Displayed resolution in display window and
outputted resolution may different according
to connection type.
[HDMI OUT]: 1080p, 1080i, 720p and 480p
(or 576p) and 480i (or 576i) [COMPONENT
VIDEO OUT]: 480p (or 576p) and 480i
(or 576i) [VIDEO OUT]: 480i (or 576i)
B C A


