


9
Notes on HDMI Out connection
•
If your TV does not accept your resolution setting,
abnormal picture appears on the screen. (“TV do
not support” will appears in screen). Please read
owner’s manual for TV, and then set the
resolution that your TV can accept.
•
Changing the resolution when the unit is
connected with HDMI connector may result in
malfunctions. To solve the problem, turn off the
unit and then turn it on again.
•
When you connect a HDMI or DVI compatible
device make sure of the following :
-
Try switching off the HDMI/ DVI device and this
unit. Next, switch on the HDMI/ DVI device and
leave it for around 30 seconds, then switch on this
unit.
-
The connected device’s video input is set
correctly for this unit.
The connected device is compatible with
720X480i(576i), 720X480p(576p), 1280X720p,
1920X1080i or 1920X1080p video input.
-
-
The 1080p, 720p and 480p(576p) resolutions are
the progressive scan applied resolution.
•
Not all HDCP-compatible DVI devices will work
with this unit.
- The picture will not be displayed properly
with non-HDCP device.
Enjoying audio from an external source
and selecting the function
You can enjoy audio from an external source
through your unit. And You can select the function.
Press FUNCTION repeatedly to select the desired
input source and the function (DVD/CD, USB, AUX,
AUX OPT, PORTABLE, FM, AM).
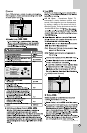
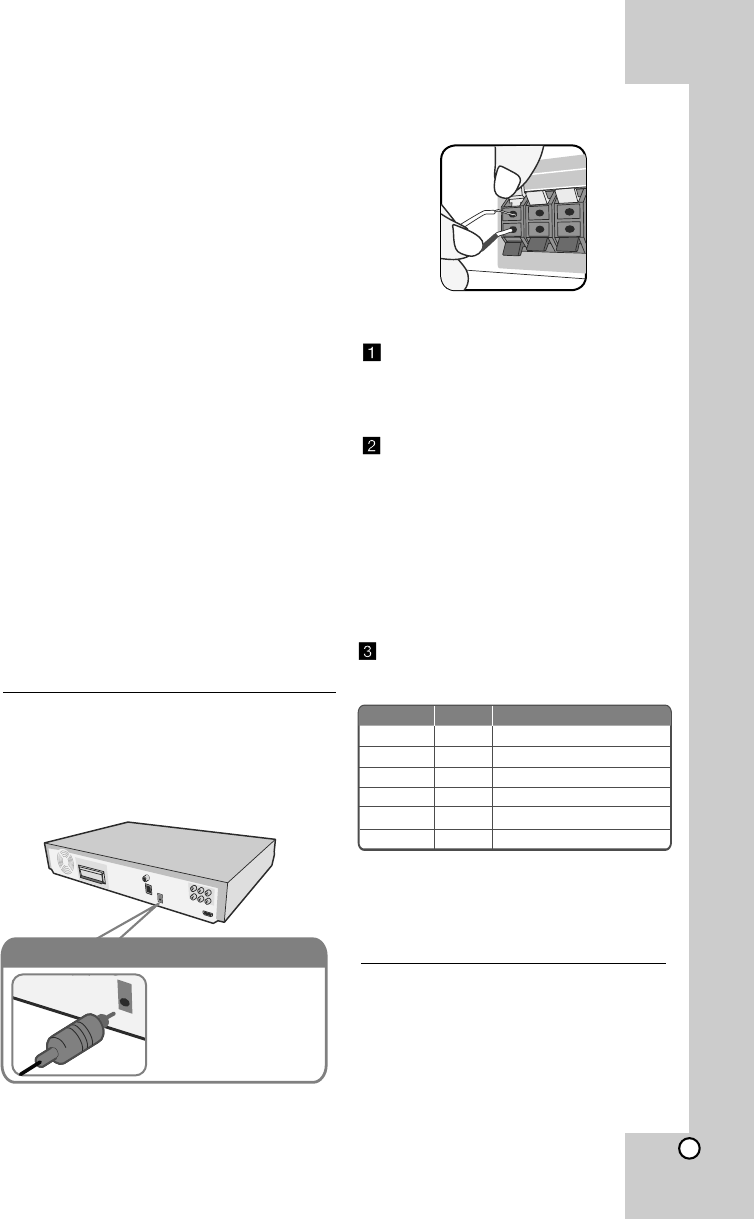
Digital Audio in connection
Connect the unit’s
OPTICAL IN jack to
the optical out to jack
on your TV (or Digital
Device etc.)
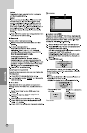
Speaker Setting up
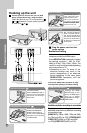
Attaching the speakers to the DVD
receiver
You will have received six speaker
cables.
Each one is colour - coded by a band near
each end and connects one of the six
speakers to the DVD receiver.
Connect the wires to the DVD
receiver.
Match each wire’s coloured band to the same
coloured connection terminal on the rear of the
DVD receiver. To connect the cable to the DVD
receiver, press each plastic finger pad to open
the connection terminal. Insert the wire and
release the finger pad.
Connect the black end of each wire to the terminals
marked -(minus) and the other end to the terminals
marked + (plus).
Connect the wires to the speakers.
Connect the other end of each wire to the correct
speaker according to the colour coding
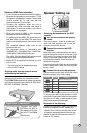
REAR RREAR R
FRONT RFRONT R
CENTERCENTER
SUB WOOFERSUB WOOFER
REAR LREAR L
FRONT LFRONT L
Grey
Red
Green
Orange
Blue
White
Behind you and to your right.
In front of you, to the right of the screen.
Above screen, directly in front of you.
This can be placed in any front position.
Behind you and to your left.
In front of you, to the left of the screen.
POSITION
SPEAKER
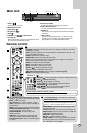
Main Unit
To connect the cable to the speakers, press
each plastic finger pad to open the connection
terminals on the base of each speaker. Insert
the wire and release the finger pad.
Be careful of the following
Be careful to make sure children do not put their
hands or any objects into the *speaker duct.
*Speaker duct: A hall for plentiful bass sound
on speaker cabinet(enclosure). Use the rear
speaker at least 30 CM away from either TV
screen or PC monitor.