


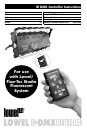

7
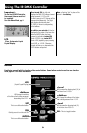
Setting & Recalling Scenes
The IR DMX Controller can store
up to 10 different scenes, with
each scene containing dimming
levels for up to 512 Lowel/Fluo-
Tec dimmable fixtures.
All scenes are saved in non-
volatile memory.
Note:
see Replacing Batteries (pg. 7)
for important information.
To set and store scenes:
■ Select any addressed channels from
1–512 and set levels for them.
■ When you have set all selected
fixtures to desired levels, hold down
the MODE button for two seconds.
The LCD display will show a Scene
number, from 1–10.
■ Use the UP/DOWN arrow buttons
to move between scenes.
■ Once the desired scene is selected,
pressing the SET button to store the
levels for that scene in the IR DMX
Controllers memory.
■ Press the MODE button again
to exit.
To recall a stored scene:
■ Press the MODE button for
2 seconds, the LCD screen will
display “Scene Mode?”.
■ Press the MODE button once
more, quickly.
■ Find the desired scene using
the UP/DOWN arrow buttons and
press the MODE button once to
transmit those dimming values and
return to normal operation.
To save a variation of a stored
scene as a different scene:
■ Hold down the MODE button
for two seconds. The LCD display
will show Scene Mode?. Press the
MODE button again to nter.
The display will show the Scene
number, from 1–10.
■ Use the UP/DOWN arrow buttons
to move between scenes.
■ Once the scene you want to create
a variation of is selected, press the
MODE button again to exit.
The display will show Sending
Values as the fixtures are set to the
values of the scene.
■ You may now adjust the dimming
levels of any fixture you want to vary
in that scene.
■ When you have set all selected
fixtures to their desired levels, hold
down the MODE button again for two
seconds and then use the UP/DOWN
arrow buttons to select the number
for the new scene to be stored in.
■ Pressing the SET button stores
the levels for that scene in the IR
DMX Controllers memory.
Note:
the SET button will “refresh”
(re-send) the values of all 512 channels
corresponding to the values stored in
the current chosen scene. The display
again will show Sending Values,
as it updates itself.
A flashing “dot” in place of
the asterisk = low battery.
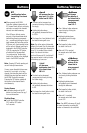
In order to replace batteries
and keep stored address dimming
level & scene information:
Note:
Be careful to properly install the
batteries. Battery reversal may cause a
permanent damage to the remote con-
trol.
1 Press the SET button for 2 seconds
to turn the unit off, or wait until the IR
DMX Controller shuts down on its
own (after 5 minutes of no activity).
2 Remove the 2 AA alkaline batteries
and quickly insert a new set within 15
seconds of the removal, making sure
to properly orient the battery contacts
as shown on the bottom of the battery
compartment.
3 Close the battery compartment.
4 After turning the IR DMX Controller
back ON, point it at the IR Sensor and
press the SET button a few times.
This will guarantee that the dimmable
fixtures are set to the same levels that
were previously saved
in the IR DMX Controller.
When powering the IR DMX Controller
up for the first time after a battery
change, the Controller’s LCD will show
its installed software version. Make
note of this number in case it is needed
for technical assistance.
Note:
Be careful to properly install
the batteries. Battery reversal may
cause a permanent damage to the
remote control.
If the IR DMX Controller is left
without batteries for a period
longer than 15 seconds,
all the previously stored dimming,
addressing & scene information
will be lost, reverting to a default
value of 0%.
Note:
Remove the batteries from the
compartment if you plan on not using
the IR DMX Controller for an extended
period of time
Read battery manufacturers warnings
for safe use.
Dispose of batteries safely per state
and federal guidelines.
Replacing Batteries