


34
MDR 24/96
MDR 24/96
OL
2
50
4
7
10
15
20
25
30
35
40
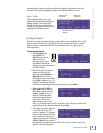
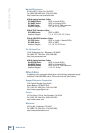
+22 dBu
dBu
equivalent
+20
–28 dBu
+18
+15
+12
+7
+2
–3
–8
–13
–18
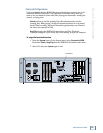
4. After adjusting the tape output levels for each console channel, follow
your console manufacturer’s instructions for setting the console tape
return levels.
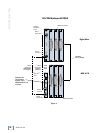
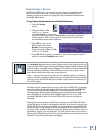
With analog I/O, a +22 dBu signal at the
MDR24/96 inputs and outputs corresponds to
0 dBFS inside the MDR24/96. So, if your
console has a nominal output level (0 VU) of
+4 dBu, there is 18 dB of headroom before
you hit the maximum record level on the
MDR24/96. It also means that your console
must be capable of putting out at least +22
dBu without distortion so the console doesn’t
clip while the recorder is still within its
working range. Most professional consoles
can output +22 dBu without breaking a sweat
(like the Mackie Analog and Digital 8•Bus consoles). But beware that
semi-pro consoles often operate at a nominal output level of –10dBV and
will run out of steam before reaching a level that can take advantage of the
recorder’s full resolution.
Recording
All recording in the MDR24/96 is non-destructive. When you record over existing
audio, the old audio is not “erased” as it with magnetic tape; rather, new audio
files are created in addition to the existing files.
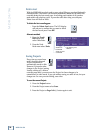
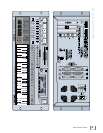
Recording can only take place on tracks that are “armed” for recording.
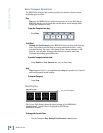
To arm tracks for recording:
1. Press a track’s Record Ready button.
2. Press it again to disarm the track.
The Record Ready LED/button blinks when a track is armed and ready to record,
and glows when the track is recording.
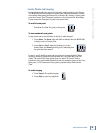
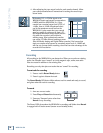
To record:
1. Arm one or more tracks.
2. Press Play and Record simultaneously.
3. Press any Transport button other than
Record to stop recording.
The Record LED glows when the MDR24/96 is recording and blinks when Record
is engaged with no tracks armed (master record standby mode).
1
REC
PLAY
RECORD