11EN 11EN
Recording Playback Editing
Introduction
Connections Basic Setup Function Setup VCR Functions
Others Español
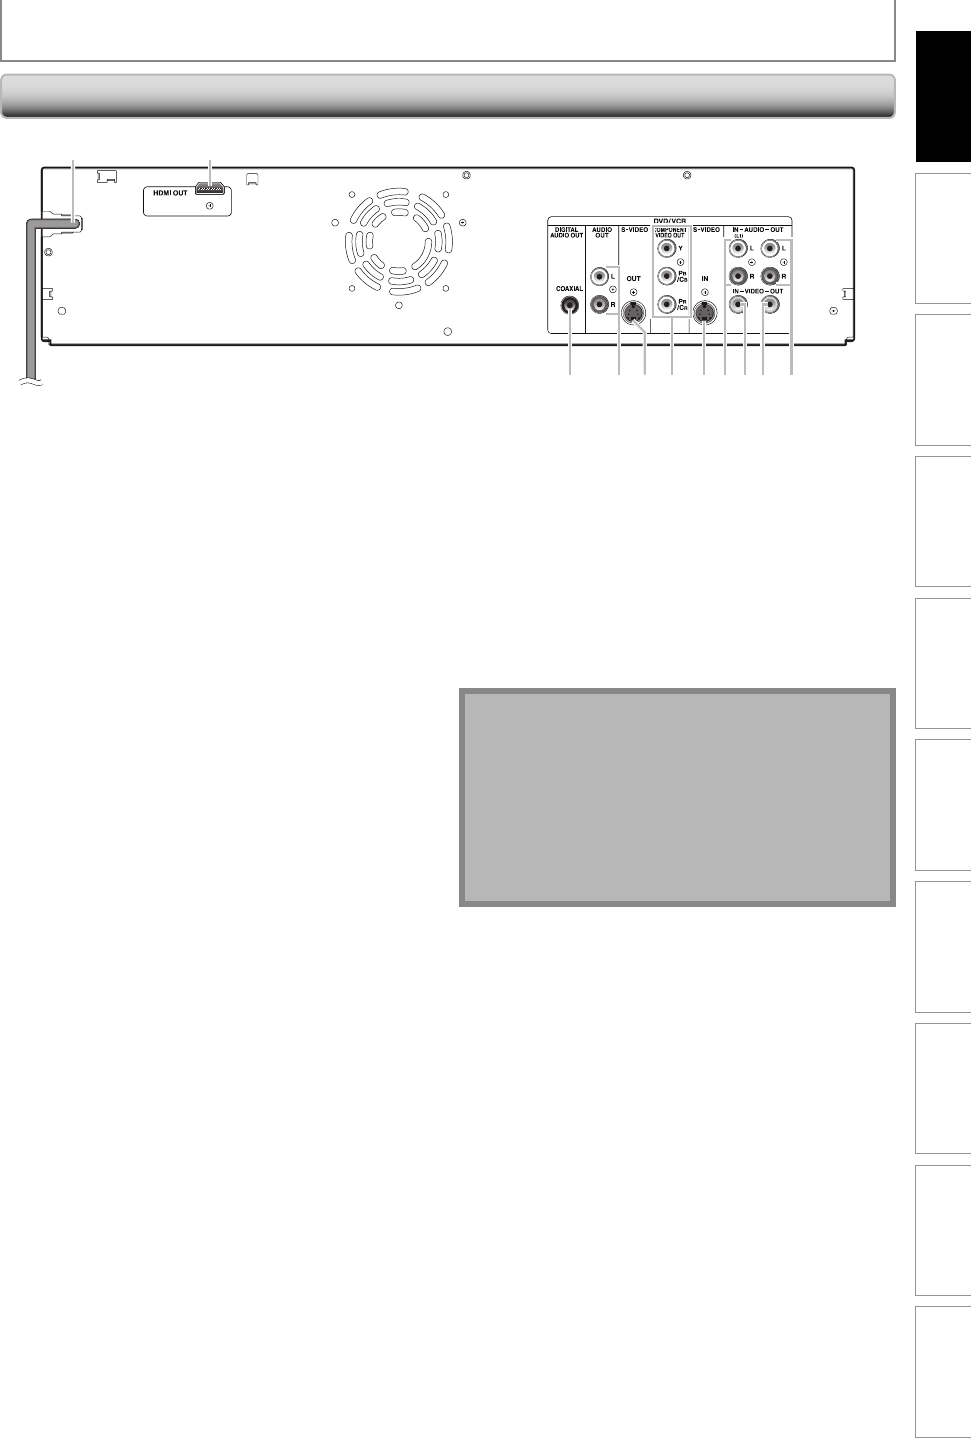
1 2
37910 8 6 453
Rear Panel
FUNCTIONAL OVERVIEW
Note
• Do not touch the inner pins of the jacks on the rear
panel. Electrostatic discharge may cause permanent
damage to the unit.
• This unit does not have the RF modulator.
Caution on using S-video, component, or HDMI
connection for VCR:
• Only the playback video/audio are available with
these connections.
1. AC Power Cord
•
Connect to a standard AC outlet to supply power to this
unit.
•
Unplug this cord from the AC outlet to completely shut
down the unit.
2. HDMI OUT jack
Use an HDMI cable to connect to a display with an
HDMI compatible port.
3. AUDIO OUT jacks
Use to connect a TV monitor, AV receiver or other
device with an RCA audio cable.
4. VIDEO OUT jack
Use to connect a TV monitor, AV receiver or other
device with an RCA video cable.
5. VIDEO IN jack (L1)
Use to connect external device with an RCA video
cable.
6. AUDIO IN jacks (L1)
Use to connect external device with an RCA audio
cable.
7. S-VIDEO IN jack (L1)
Use to connect the S-video output of external device
with an S-video cable.
8. COMPONENT VIDEO OUT jacks
Use to connect a TV monitor with component video
inputs with a component video cable.
9. S-VIDEO OUT jack
Use to connect the S-video input of a TV monitor, AV
receiver or other device with an S-video cable.
10. COAXIAL DIGITAL AUDIO OUT jack
Use to connect an AV receiver, Dolby Digital decoder
or other device with a digital audio coaxial input jack
with a digital audio coaxial cable.
E9P8BUD_ZV427MG9_v1.indd 11E9P8BUD_ZV427MG9_v1.indd 11 2009/01/27 17:06:492009/01/27 17:06:49


