30
31
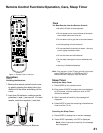
Figure 2. Operation: Installing the Batteries
Operation
Figure 2
Installing the Batteries:
1. Remove the remote control’s back cover
by gently pressing the ribbed tab in the
direction of the arrow and sliding off the
cover.
2. Load two AA batteries, making sure the
polarities (+) and (-) are correct. For best
results, insert the negative (-) side first.
AA (alkaline)
batteries
AA
AA
Remote Control Functions:Operation, Care, Sleep Timer
Figure 1. Remote Control Overview
POWER
PAUSE
REC
3
6
9
QV
DEVICE
MENU
HOME
FORMAT
PIPCH
1
7
SQV
4
SUB/CANCEL
2
5
8
0
TV MENU
PIP/POP
GUIDE
MUTE
DEVICE
CH
VOL
REW/REV
FF/FWD
PLAY
STOP
EXCH
SLEEP
INFO
V-CHIP
AUDIO
VIDEO
PIP DEVICE
CONNECT
TV
AUDIO
CABLE/DBS/DTV
DVD
VCR
11
9
10
8
7
6
5
4
1
3
2
Sleep Timer
Setting the Sleep Timer:
1. Press SLEEP on the remote control.
2. Each press of SLEEP increases the time displayed
by 30 minutes, until the maximum value of 120
minutes is reached.
3. After 5 seconds of inactivity, the message will
disappear.
4. Press SLEEP to view the remaining time before the
timer turns the TV off.
Canceling the Sleep Timer:
1. Press SLEEP to display the on-screen message.
2. Press SLEEP repeatedly until OFF is displayed.
Note: After 5 seconds of inactivity, the message
box disappears.
Care
For Best Results from the Remote Control:
• Be within 20 feet of the equipment.
• Do not press two or more buttons at the same
time unless instructed to do so.
• Do not allow unit to get wet or become heated.
• Avoid dropping on hard surfaces.
• Do not use harsh chemicals to clean. Use only
a soft, lightly moistened cloth.
• Do not mix new and old batteries.
• Do not heat, take apart or throw batteries into
fire.
• Use only AA alkaline batteries.
Hint: If the remote is in the TV layer and will not function,
press POWER and 000 (or POWER and 935 if
NetCommand® is setup) to reset the remote.
32
30
31
28
29
27
26
22
23
24
25
19
21
18
20
17
15
16
14
12
13
33
34


