17
Picture Settings Menu
Storing picture settings
This function allows you to store in memory the current
input signal and PICTURE menu settings and to recall
these settings when necessary.
There are six picture memory locations available, and notes
of up to 15 characters can be added to each.
Example: Storing picture settings at MEMORY1
Press MENU/ENTER button to access MAIN MENU. Use
the
ᮤ
ᮣ
▲ ▼ buttons to select the PICTURE menu and then
press the MENU/ENTER button.
Use the ▲ ▼ buttons to select the PICTURE MEMORY
setting.
Use the
ᮤ
ᮣ
buttons to change PICTURE MEMORY: OFF
to PICTURE MEMORY: MEMORY1 and then press the
MENU/ENTER button.
The “PICTURE MEMORY” screen appears.
PICTURE MEMORY
1/2
SEL.
ADJ.
MENU/ENTER
OK
EXIT
RETURN
MEMORY1 SET RESET
INPUT : DVD/HD1
SIGNAL : 480P
NOTE : DVD/STAR WARS
MEMORY2
INPUT : —
SIGNAL : —
NOTE : —
MEMORY3
INPUT : —
SIGNAL : —
NOTE : —
NEXT PAGE
PICTURE MEMORY
2/2
PREVIOUS PAGE
MEMORY4 SET RESET
INPUT : —
SIGNAL : —
NOTE : —
MEMORY5
INPUT : —
SIGNAL : —
NOTE : —
MEMORY6
INPUT : —
SIGNAL : —
NOTE : —
SEL.
ADJ.
MENU/ENTER
OK
EXIT
RETURN
Information
Ⅵ PICTURE MEMORY Settings
OFF: Picture memory not used.
MEMORY1 to 6: There are six available picture
memory locations.
Ⅵ Setting the memory
• Use the ▲ and ▼ button to select the desired memory
location, MEMORY1 to MEMORY6.
• Use the
ᮤ
and
ᮣ
buttons to select “SET”, then press
the MENU/ENTER button.
• If necessary, input a note.
Ⅵ Resetting the memory
Use the ▲ and ▼ button to select the desired memory
location, MEMORY1 to MEMORY6, then use the
ᮤ
and
ᮣ
buttons to select “RESET”, and finally press the
MENU/ENTER button.
The memory is cleared, and “—” is displayed in the
“INPUT”, “SIGNAL” and “NOTE” columns.
Ⅵ Inputting notes
• Use the
ᮤ
and
ᮣ
buttons to select “NOTE”, then press
the MENU/ENTER button.
• Input the note.
Use the ▲ and ▼ button to select the character.
Use the
ᮤ
and
ᮣ
buttons to move the cursor.
Use the EXIT button to delete the character at the
cursor position.
• When you have finished inputting the note, press the
MENU/ENTER button.
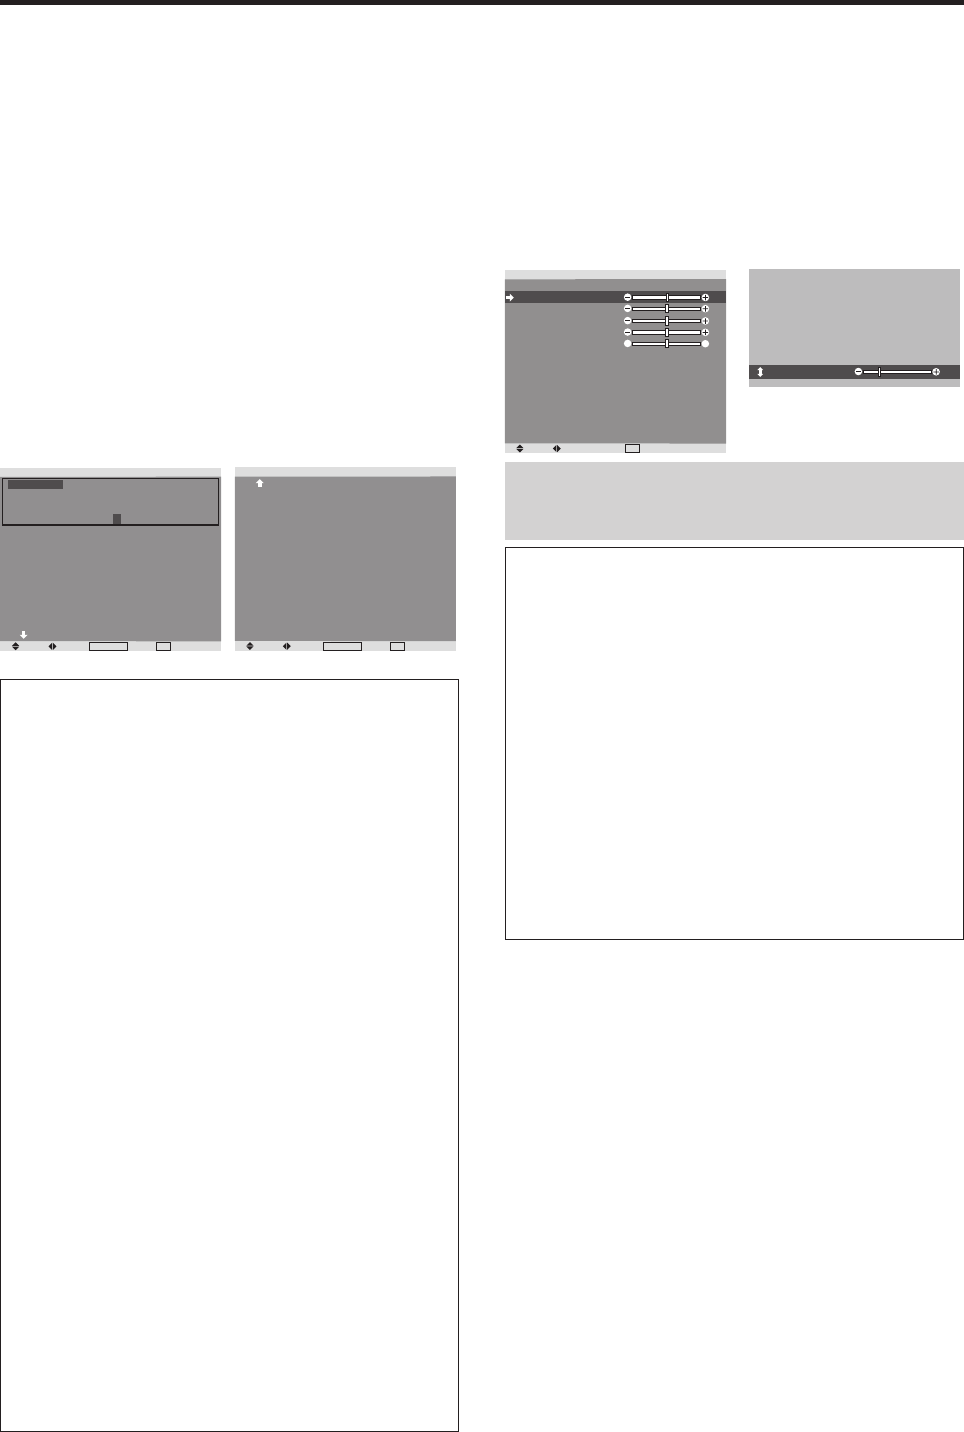
Adjusting the picture
The contrast, brightness, sharpness, color and tint can be
adjusted as desired.
Example: Adjusting the contrast
Press MENU/ENTER button to access MAIN MENU.
Use the
ᮤ
ᮣ
▲ ▼ buttons to select the PICTURE menu and
then press the MENU/ENTER button.
Use the ▲ ▼ buttons to select the CONTRAST setting.
Use the
ᮤ
ᮣ
buttons to decrease or increase CONTRAST.
SEL.
ADJ.
EXIT
RETURN
PICTURE
PICTURE MEMORY
CONTRAST
BRIGHTNESS
SHARPNESS
COLOR
TINT
NR
COLOR TEMP.
GAMMA
LOW TONE
SET UP LEVEL
COLORVIEW
FILM MODE
PICTURE MODE
: OFF
: OFF
: MEDIUM
: 2
: AUTO
: 0%
: ON
: NORMAL
G
R
CONTRAST
10
Note:
If “CAN NOT ADJUST” appears ...
When trying to enter the PICTURE submenu, make sure
PICTURE MODE is not set to DEFAULT.
Information
Ⅵ Picture adjustment screen
CONTRAST: Changes the picture’s white level.
BRIGHTNESS: Changes the picture’s black level.
SHARPNESS: Changes the picture’s sharpness.
COLOR: Changes the color intensity.
TINT: Changes the picture’s tint. Adjust for natural
colored skin, background, etc.
Ⅵ Adjusting the computer image
Only the contrast and brightness can be adjusted when
a computer signal is connected.
Ⅵ Restoring the factory default settings
Select “DEFAULT” under the “PICTURE MODE”
settings.


