


47
47
SQV (Super Quick View™)
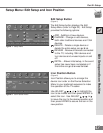
Using The Remote Control
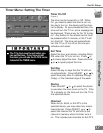
Viewing and changing SQV banks using the
remote control:
1
Press the SQV button.
2
To change memory banks, press a
number button within 5 seconds of
pressing the SQV button.
3
Press the SQV button repeatedly to
cycle through the channels available in
that bank.
Adding SQV channels using the remote con-
trol:
1
Use the CHANNEL or number buttons
to select the channel you want to add to
the current SQV memory bank.
2
Press and hold the SQV button for
about 2 seconds. When “SQV” and the
memory bank number appear under the
channel number, the channel has suc-
cessfully been added.
Removing SQV channels using the remote
control:
1
Press the SQV button repeatedly until
you see the desired channel.
2
While the channel number and SQV
indicator (with correct bank number) are
still displayed on the screen, press the
CANCEL button. If the CANCEL button
is not pressed before the SQV indicator
disappears automatically, the channel
will not be removed.
3
When the SQV indicator disappears, the
channel has successfully been removed
only for that bank. Other banks remain
unchanged.
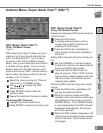
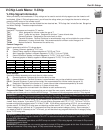
SQV (Super Quick View™)
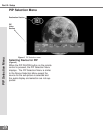
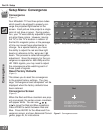
Using The Menu Screen
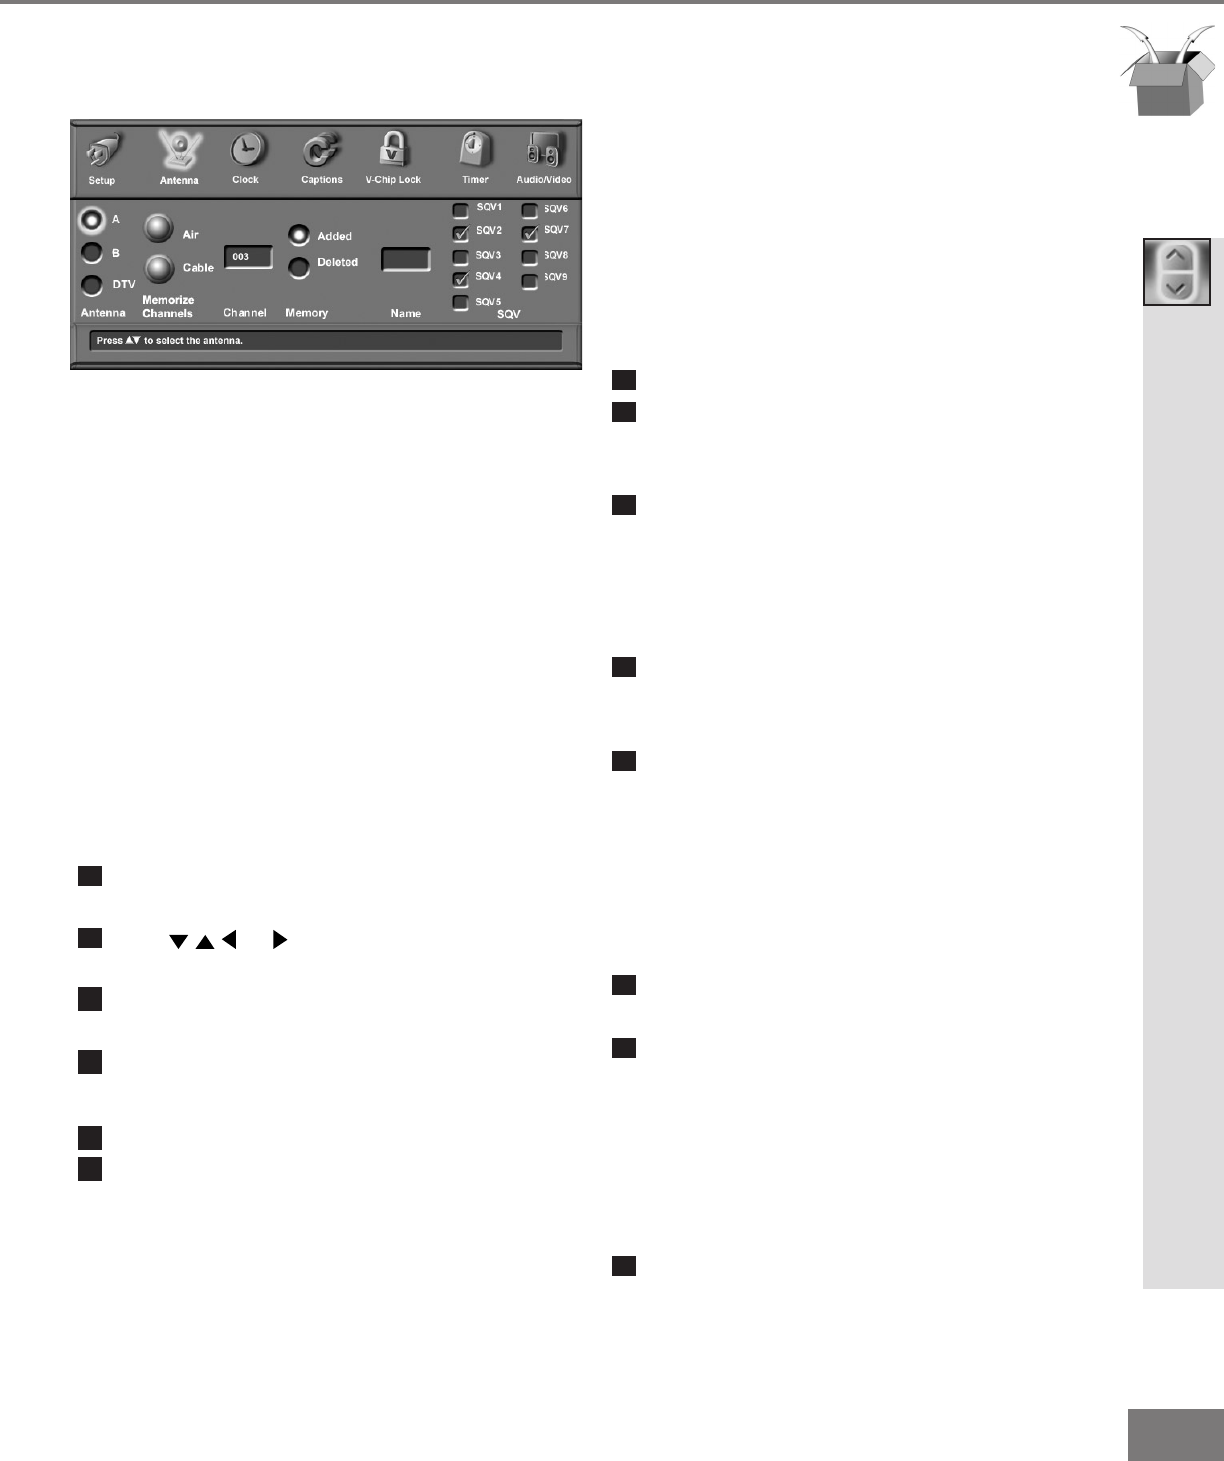
(Figure 1)
SQV (Super Quick View™) allows you to put
together a list of your favorite channels from
Ant-A, Ant-B and Ant-DTV. You can store
channels in each of the 9 different memory
banks. Also, you can store the same channel
in multiple memory banks. Once you have
added a channel to the SQV memory, when
tuned to the channel “SQV” (and the memory
bank number) will appear under the channel
number on the TV screen.
1
Select the channel using the “Channel”
option box or CHANNEL button.
2
Use or to select the SQV
Memory Bank.
3
Press ENTER to check mark the
memory bank.
4
Repeat for additional channels or banks.
Removing SQV Channels
1
Highlight the check marked box.
2
Press ENTER to remove the check mark.
Antenna Menu: Super Quick View™ (SQV™)
Part III: Setup
Super Quick View™ (SQV™)
Figure 1. Antenna Menu