


64 Chapter 5. TV Menu Settings
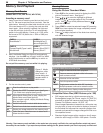
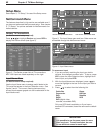
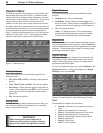
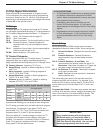
Channel Menu
Settings for the Channel
Number Shown
FAV Memory
Banks
Signal-Strength
(digital channels only)
Figure 6. Channel menu
Antenna (Channel Menu)
Select either 1 (
ANT 1 MAIN
) or 2 (
ANT 2 AUX
) as the
antenna source for the channels you wish to edit.
Channel (Channel Menu)
Select the affected channel number (shown in the
Channel box) in any of three ways:
• Press
CH
/ to select from channels already in
memory. If you also wish to tune to the channel,
press
ENTER
.
• Highlight the channel box and press to move
through all channel numbers, one at a time. If you
also wish to tune to the channel, press
ENTER
.
• Highlight the channel box, enter the number directly,
and press
ENTER
. Note that with this method, you must
press
ENTER
for the screen to display settings for the
selected channel.
Channel numbers can be one part, analog or digital (up to
five digits long), or two part for digital channels. For a two-
part digital channel, press
—
CANCEL
on the remote to enter a
separator after the first, second, or third number, depend-
ing on the broadcaster’s channel information.
For digital channels, when the broadcaster has sent a
virtual channel number, the virtual channel number is
shown in the text box and the original physical digital
channel is shown below on screen as a reference. One
original channel number can be associated with several
different virtual channels.
Memory (Channel Menu)
After the available channels have been memorized with
Memorize Channels on the Setup menu, you can add
weaker channels or delete unwanted channels using this
option. For example, if you wish to see only digital chan-
nels listed, use this menu to delete analog channels from
memory.
Press
CH
/ to review the channels in memory. Press
to select Added or Deleted for the channel shown in
the Channel box.
To Add a New Digital Channel
1. In the channel menu, enter the physical channel
number in the Channel box, including the sub-
channel number; press
—
CANCEL
(
—/CANCEL
) and then enter
the sub-channel number. If no sub-channel is speci-
fied, press
—
CANCEL
and
1
.
2. Press
ENTER
to tune to the channel.
3. Highlight the Added radio button.
Name
Analog channels from
ANT 1
and
ANT 2
can be named
with up to four characters. The name you enter here will
appear on the TV screen as part of the on-screen status
display. Digital channels may already be named if the
broadcaster sends the information.
1. Press a number key repeatedly to cycle through the
characters associated with the key. You can also use
to change a highlighted character.
2. Press
ENTER
to set the letter and move to the next letter
position. Press
CANCEL
to move back one position.
Note: When the TV Guide On Screen system is enabled,
the name displayed is the name sent by the broad-
caster instead of the name you assign.
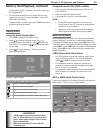
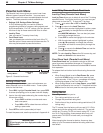
Signal Strength (Channel Menu)
Displays the approximate signal strength of the currently
tuned digital channel. Use this indicator to help you
adjust the antenna direction for best signal reception.
The taller the bar, the stronger the signal. This indicator
applies only to digital channels.
To view the effects of antenna adjustments on digital
channels, tune to the digital channel you wish to measure
while remaining in this menu. To tune to a channel, either:
• Highlight the channel box, press
CH
/ or to
display the desired channel number, and press
ENTER
.
• Enter the channel number on the remote control and
press
ENTER
.
Terminology
Virtual Channel Number
A channel number used by a local broadcaster to help
you identify their digital channel. Usually this is associ-
ated with their traditional analog channel number.
Physical Digital Channel Number
The channel number officially assigned to the actual
broadcast frequency.