30
30
POWER
INFO
PAUSE
REC
FF/FWDREW/REV PLAY
STOP
3
6
9
QV
VOLUME
GUIDE
EXCH
ENTER
CANCEL
MENU
V-CHIP
FORMAT
PIP CH
1
7
SQV
4
INPUT
SLEEP
VIDEO
AUDIO
MUTE
2
5
8
0
CHANNEL
ADJUST
PIP INPUT
PIP/POP
HOME
TV
AUDIO
CABLE/DBS/DTV DVD
VCR
HOME
THEATER
2
3
4
6
1
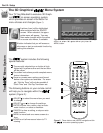
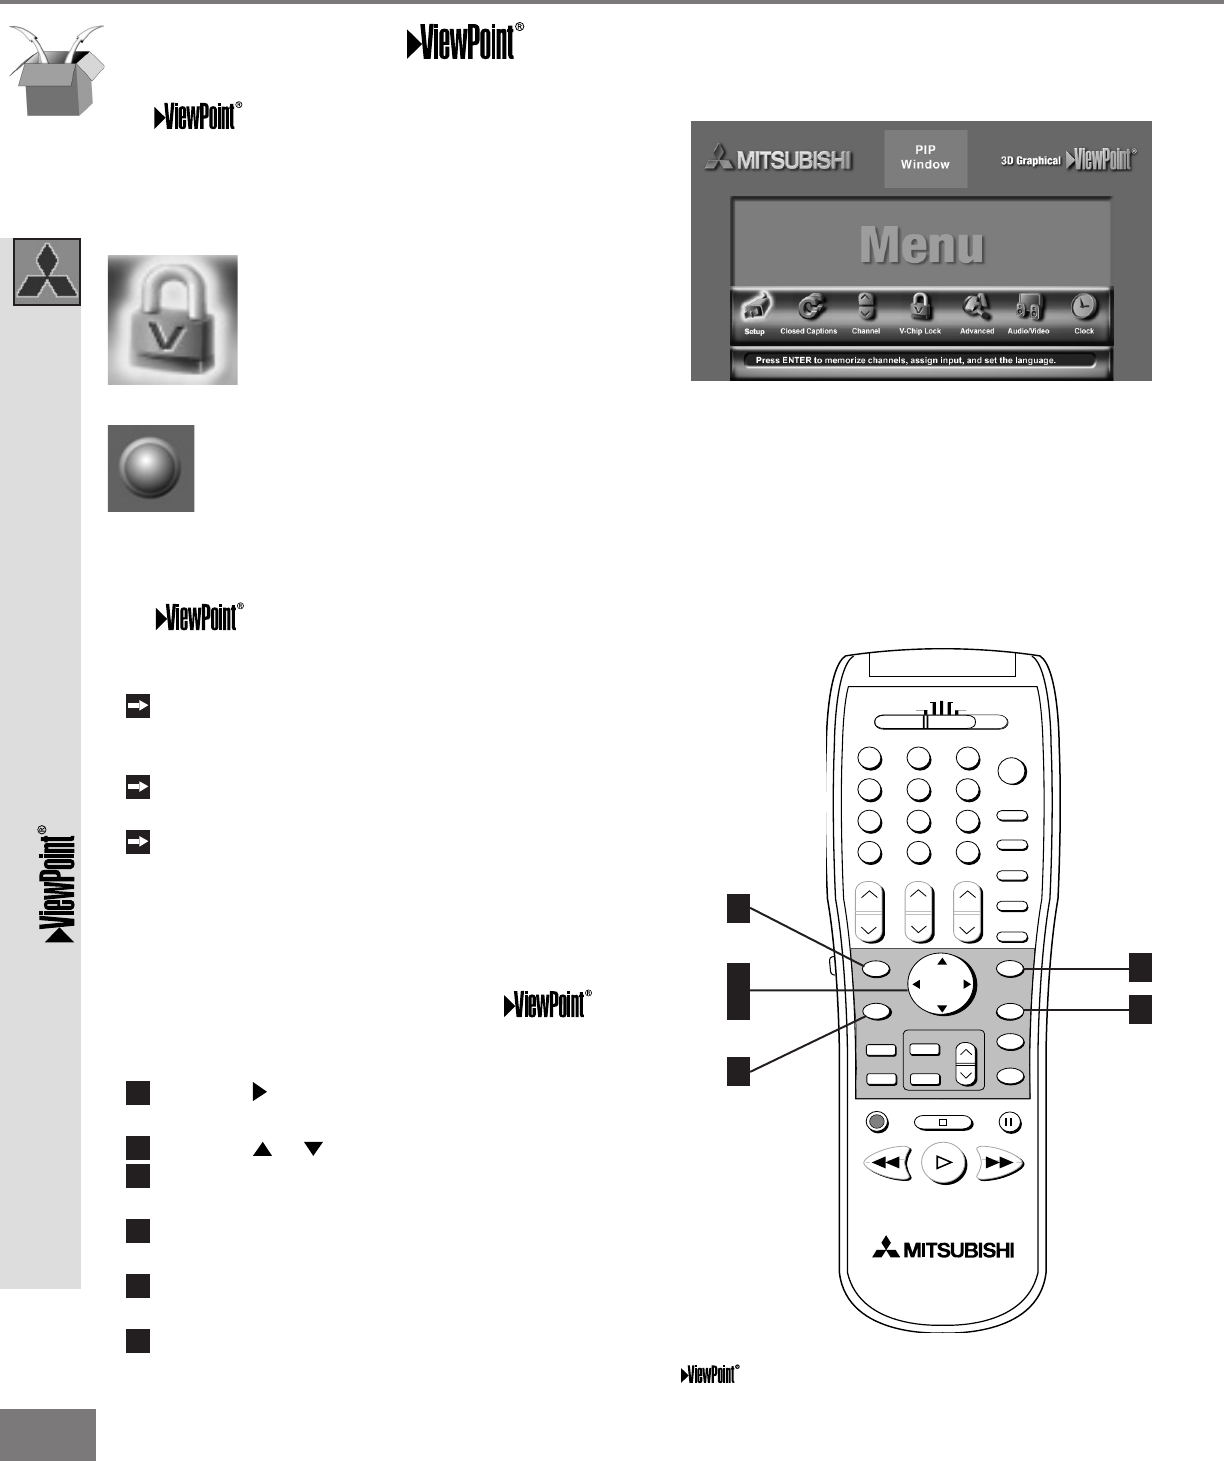
Figure 2. These buttons are used for navigation within
the on-screen operating system.
5
Part III: Setup
The 3D Graphical Menu System
Your TV has Mitsubishi’s exclusive 3D Graph-
ical on-screen operating system,
which provides on-screen information for
menu choices and changes
(Figure 1).
A picture (icon) will be highlighted
when selected with the ADJUST
arrows. When selected, the appro-
priate menu will appear. You may
then make changes within the menu
or access sub-menus, if available.
A button indicates that you will access a
sub-menu or start an automatic function by
making this selection.
The system includes the following
special features:
The currently selected icon or button is high-
lighted with a yellow outline and the text color
will be yellow.
On-screen instructions provide complete menu
choice information.
Some on-screen menu options must be set
before other options are available. For exam-
ple, “Set the Timer” will only be possible if
“Clock Time” and “Set Day” have been set.
The following buttons on your remote control
will help you to navigate within the
system (Figure 2):
1
ADJUST to select the menu item you want
to change.
2
ADJUST or to change the settings.
3
ENTER to enter into a menu, start an auto-
matic function, or select a checkbox.
4
CANCEL to clear a setting, or stop an auto-
matic function.
5
MENU to move back one menu screen at a
time.
6
HOME to exit all menus and return to TV
viewing.
The
Menu System
Figure 1. Main Menu: The Main Menu screen will always
be the rst scr een t hat appear s wh en you pr ess t he
MENU button.


