


EN – 13
ENGLISH
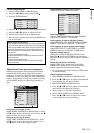
To operate projector power ON
4. Press the ZOOM/FOCUS button to FOCUS. “FO-
CUS” will appear on the display.
5. Adjust with the + or - button to get a fine picture.
6. Select the desired external input source by using
the COMPUTER 1,2 or VIDEO1,2 button on the re-
mote control or the SOURCE button on the control
panel.
• Pressing the SOURCE button on the control panel
repeatedly will select VIDEO 1, VIDEO 2, COM-
PUTER 1 and COMPUTER 2.
• The projector automatically selects the appropriate
signal format. The selected signal format is dis-
played on the screen.
• The COMPUTER, VIDEO or SOURCE buttons do
not work when MENU is displayed. At this time,
the prohibition mark ( ) appears on the screen.
• When selecting the COMPUTER input, the image
may flicker. Press the $ or % button to adjust the
image.
• The intensity of the lamp will be STANDARD for 2
minutes regardless of the setting of the LAMP
MODE when the lamp turns on.
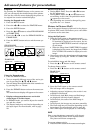
7. Press the ZOOM/FOCUS button to ZOOM. “ZOOM”
will appear on the display.
8. Adjust with the + or - button to get an approximate
size.
9. Press the LENS SHIFT button. “LENS SHIFT”
will appear on the display.
10.Adjust with the {, }, $ or % button to get an
approximate lens position.
• If necessary, adjust focus, zoom and lens shift again.
• Focus, zoom and lens shift adjustment is possible
in the normal picture mode only. In PinP or EXPAND
mode, the adjustment is prohibited.
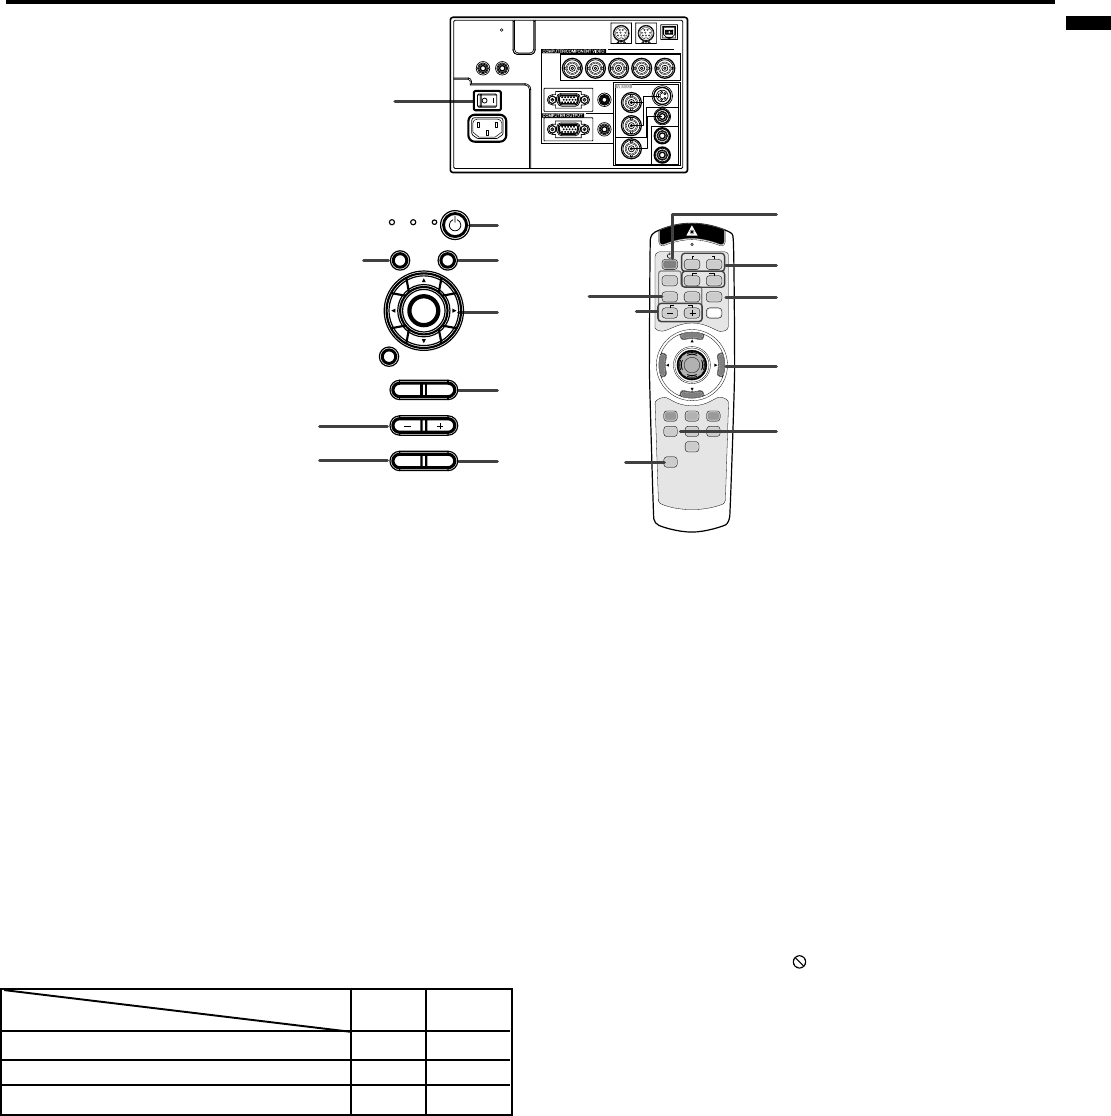
1. Turn on the equipment connected to the projector.
2. Put the projector into standby mode by pressing the
main power switch. The POWER indicator lights up
red.
3. Turn the projector on by pressing the POWER but-
ton. The light source lamp starts warming up, even-
tually turning completely on.
• The lamp may take about a minute to light up.
• The lamp occasionally fails to light up. Try to light
up the lamp again after a few minutes.
• If the projector has not cooled down completely
since the last turning-off, the fan may start
rotating when the main power switch is turned
on and the POWER button may not function.
Press the POWER button to light up the lamp
after the fan stops.
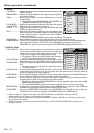
condition
indicator
LAMP
POWER
stand-by
-
red
when light source lamp is on
green
green
light source lamp held off temporarily
red
-
Important:
• A darkened image may be seen right after pressing
the POWER button due to warming up of this pro-
jector. While warming up, no other commands can
be accepted.
• After the power is turned on or the LAMP MODE is
changed, the screen may flicker before the lamp op-
eration becomes stable. This is due to the charac-
teristics of the lamp, not a failure of the lamp.
• When the lamp indicator is blinking red, the ser-
vice life of the lamp is about to end. Replace the
lamp. See pages 22 and 25.
• The picture might not be of optimum performance
in extreme hot or cold conditions. (The projector is
not malfunctioning.)
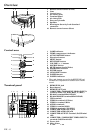
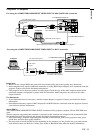
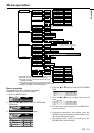
COMPUTER
VIDEO
KEYSTONE
VOLUM E
LASER
EXPAND
MENU R-CLICK ENTER
P in P
STILL
MUTE
LENS SHIFT
16 : 9
1
2
1
2
ZOOM/FOCUS AUTOPOSITION
AUTO POSITION
button
AUTO POSITION
button
MUTE button
MUTE button
2, 13
6, 8
5, 7
3, 11, 12
4
4
10
9
9
6, 8
5, 7
3, 11, 12
10
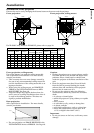
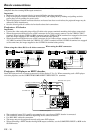
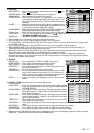
REMOTE
IN
REMOTE
OUT
INPUT 1
INPUT 2
R/P
R
B/P
B
G/Y H/H
V
V
AUDIO
IN
AUDIO
OUT
Y
C
RS-232C RS-232C/MOUSE
USB
S-VIDEO
VIDEO
2
VIDEO
1
L
AUDIO
R
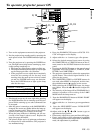
MAIN
AC IN
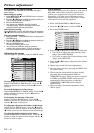
LAMP
VOLUME
ZOOM/
FOCUS
KEYSTONE
TEMP
SOURCE
MUTE
AUTO POSITION LENS SHIFT
MENU
ENTER
POWER