2.1 GETTING STARTED
2.1 GETTING STARTED
GETTING STARTED
GETTING STARTED
10
NOTE:
NOTE:
Please refer to Appendix #1 for HDD installation
instructions.
NOTE:
NOTE:
Please refer to “Section 1.5 Rear Panel”
for connection.
NOTE:
NOTE:
Please refer to Appendix#2 for pin configurations
of the external I/O port .
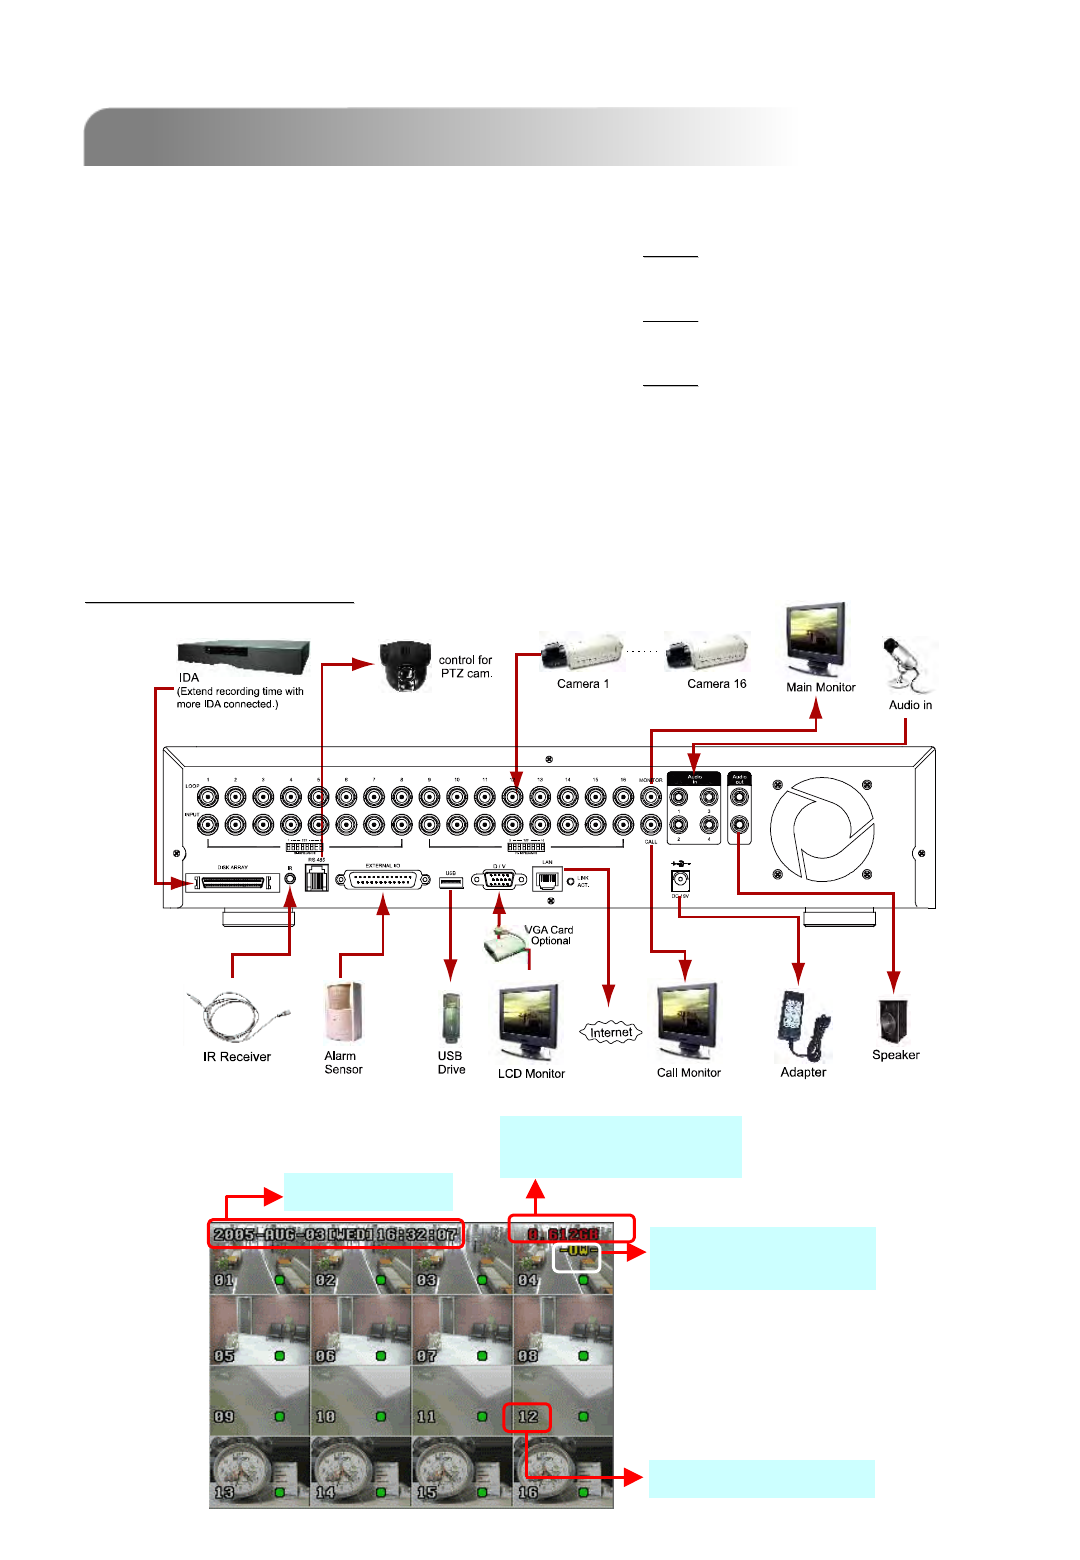
Connecting all the devices to construct a surveillance.
1) Install HDD:
The HDD must be installed
before the DVR is turned on.
2) Connect cameras.
3) Connect monitors.
4) Connect the external devices.
5) Connect the AC power cord to power adapter and plug into an electrical outlet.
The standby LED would be on as red.
Press the “POWER” button. The power LED will be on as red.
It takes approximately 10 to 15 seconds to boot the system.
Channel Title
Available Capacity of
Internal HDDs
System Time
Under HDD Overwrite
Mode
Take 16CH as an example
Take 16CH as an example


