


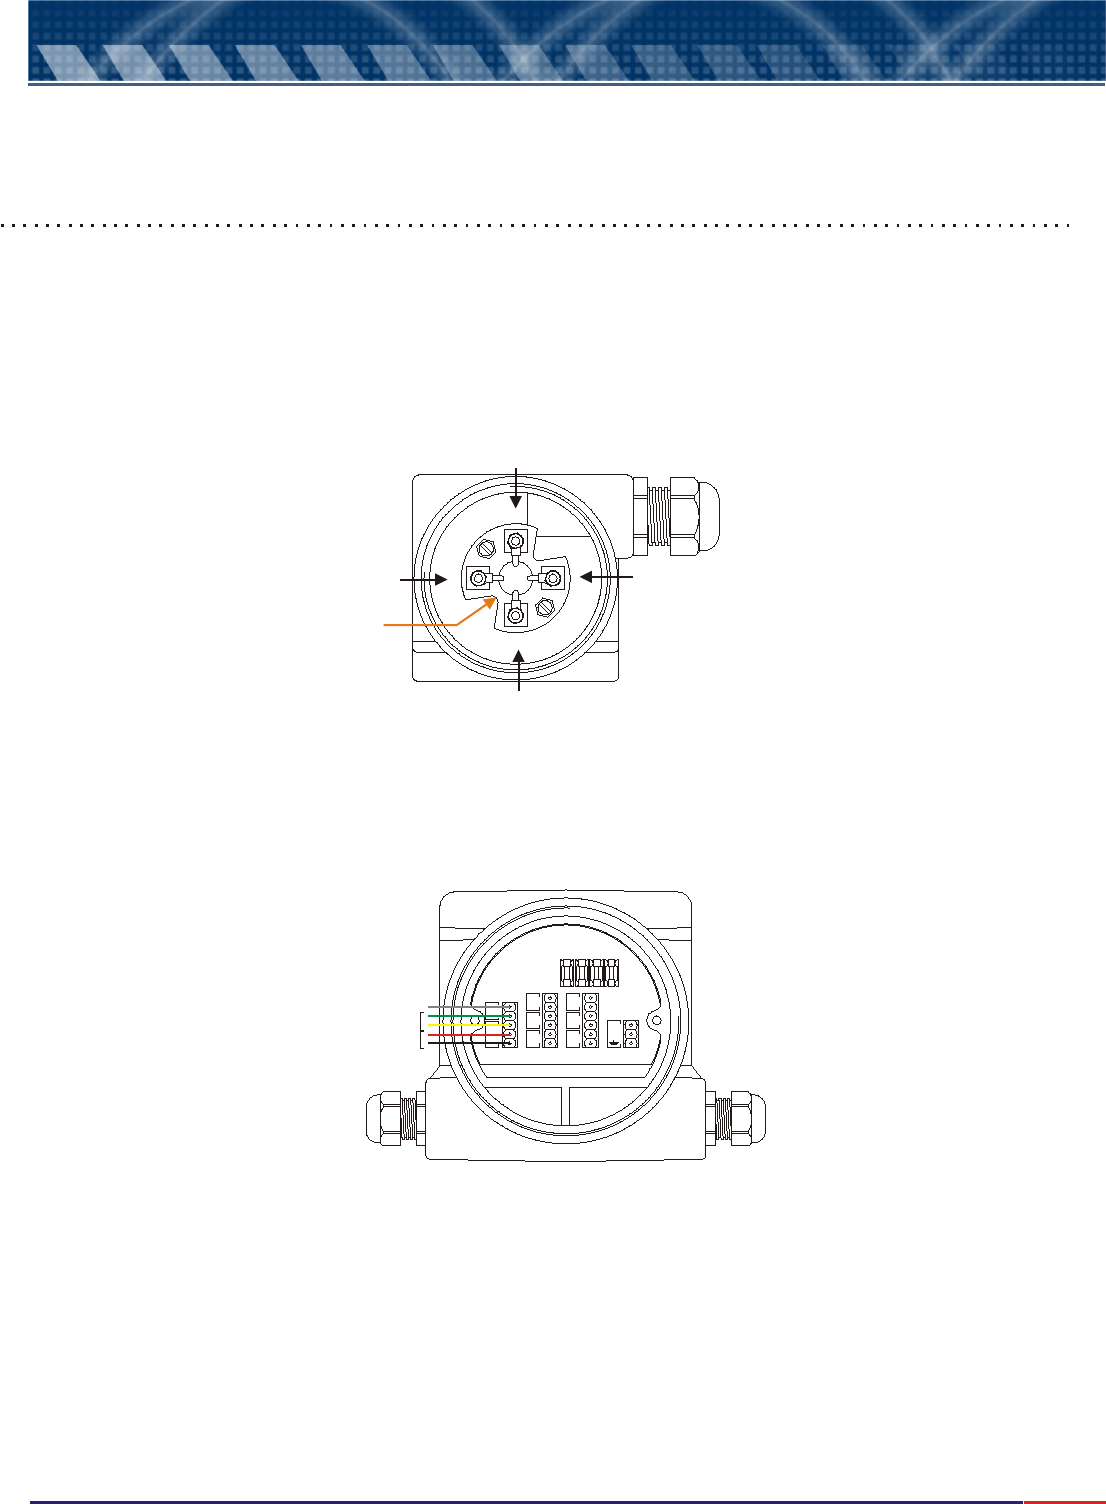
Green
Yellow
Red
Black
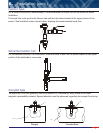
Cable Knockout
Connection
Box
Connection
Box
Interconnection
Base
Interconnection
Base
3
4
1
2
1.
Certificado de Garantia
6.
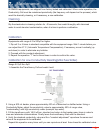
Installation
5
CN1CN1
11
CN3CN3CN2CN2 CN4CN4
++
RS485RS485
S2S2
mA-2mA-2
22
33
S3S3
-- ++ --
mA-1mA-1
ACAC
-- ++
TC-401TC-401
NaNa
S1S1
CC
Vm.Vm.
BlindBlind
..
AmAm
VdVd
TERMOTERMO
Pr.Pr.
44
55
F4F4
F3F3
F2F2 F1F1
1111
88
66
77
99
1010
1717
1414
1212
1313
1515
1616
2020
1818
1919
NaNa
CC
NaNa
CC
1
2
MEAS
THERMO
SHIELD
3
4
5
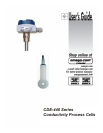
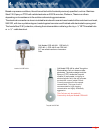
Before you install your conductivity cell, please verify for any possible bubbles and if the sample is
constantly renewed.
1. Prepare the cell installation point in area that offers good stirring, it is preferred to be close to the
equipment (maximum of 10 meters -32 feet ) and exempt of vibrations.
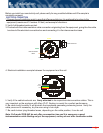
2. Verify if all threaded points are tied.
3. Proceed with the instrumentation cable connection originating from the equipment, going thru the cable
knockout of the electrical connection box and connecting it to the interconnection base.
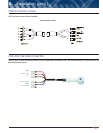
ELECTRICAL CONNECTION
4. Electrical installation example between the equipment and the cell.
5. Verify if the cable knockouts are firmly attached to its respective interconnection cables. This is
very important so the enclosure still offers IP-67. Sealing is crucial for a perfect performance
6. Be careful with humidity! It will diminish the impedance generating measuring errors. Verify the
cable press and if necessary, dry the area using a hair dryer.
7. Be careful when tying threaded areas, depending on the cable position, it can be cut!
Note: Cell model CDE-442 do not offer a connection box and it is necessary a good
instrumentation cable Sealing only at the equipment, as they do not offer connection cable.