


5
English
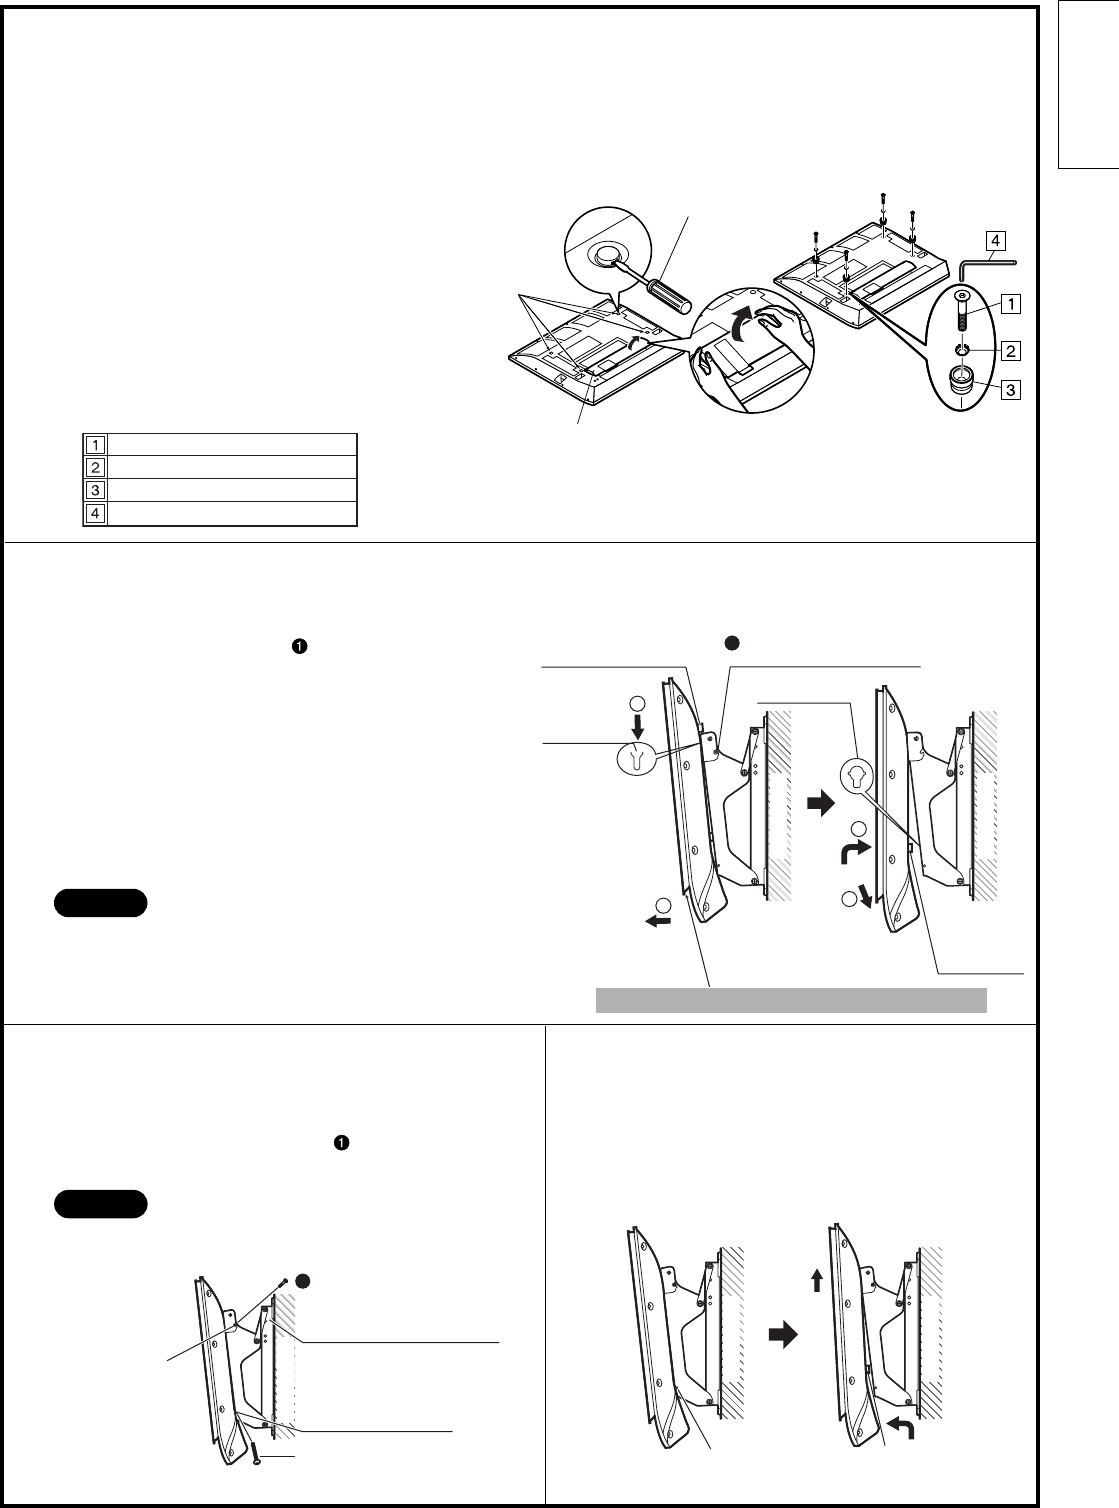
(
1
)
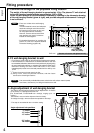
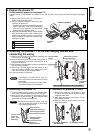
Remove the red screws for open/close fastening
(
one
each on the left and right
)
.
(
2
)
Hook the insulation spacers on the top of the plasma TV
over the notches on the bracket, and allow the TV to
hang from the bracket.
(
3
)
Pull the plasma TV body forward, as shown in the diagram at
right, and connect the wiring.
(
4
)
After wiring is finished, slightly raise the plasma TV and
insert the insulation spacers at the lower back into the
holes at the base of the wall-hanging bracket.
(
5
)
Lower the plasma TV into place.
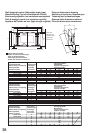
6. Fastening the plasma TV
(
1
)
Fit the included fastening screws in the indicated holes
at the sides of the wall-hanging bracket
(
left and right
)
.
(
2
)
Securely refit the red screws for open/close fastening
(
one each on the left and right
)
in the indicated holes
on the sides of the wall-hanging bracket.
(
3
)
Wall surface
Wall surface
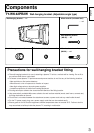
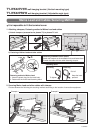
4. Prepare the plasma TV
Fit the insulation spacers to the plasma TV.
Place the plasma TV unit face down on a blanket or other soft cloth that is clean and free of debris, and follow the procedure
below.
• If the plasma TV is raised too far, there is a
risk it may become unhooked from the top of
the bracket.
• Do not hold the front panel of a PA30, PE30,
PV30 Series plasma TV at the bottom.
Notes
* Do not hold the bottom of the front panel.
7. Removal of plasma TV unit
(
1
)
Remove the screws for unit fastening
(
1 each
on the left and right
)
that are fitted to the wall-
hanging bracket sides.
(
2
)
While lifting the bottom of the plasma TV unit,
pull it towards yourself.
(
3
)
When the lower insulation spacers are freed,
keep lifting upward.
• Be sure to fit the fastening screws on the left
and right to keep the plasma TV from falling
off the wall-hanging bracket.
Note
(
1
)
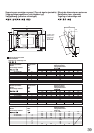
Remove the terminal cover on the plasma TV
(
PA30, PE30, PV30 series only
)
.
(
2
)
Using a flathead screwdriver, remove the four
caps from the plasma TV.
*
Carefully retain the removed terminal cover and
caps in a safe place.
(
They will be needed again
later should it be required to use the special-
purpose stand or standalone stand.
)
(
3
)
Using the included Allen wrench, fit the included
Allen head countersunk screws, dished tooth
washers and insulation spacers
(
4 sets
)
into the
holes from where the caps were removed.
(
See
the diagram at right.
)
(
1
)
Screw for plasma TV
unit fastening
(
2
)
Insulation spacer
Terminal
cover
Caps
1
Hole for red
screw for
open / close
fastening
Fastening screw
fitting position
Red screw for
open/close fastening
Wall-hanging bracket
Plasma TV
fastening screw
Wall surface
5.
Attaching the plasma TV to the wall-hanging bracket and
connecting the wiring
Flathead screwdriver
1
2
3
4
5
Top insulation
spacer
Red screw for open /
close fastening
Lower
insulation
spacer
Wall surface
Wall surface
Top notch
Lower hole
Allen head countersunk screw
Dished toothed washer
Insulation spacer
Allen wrench