Hooking Up the TV/VCR/DVD (cont’d) 9
RL
AUDIOVIDEOHEADPHONE
STANDBY-ON
SEARCH
NEXTPREV
PLAY
F.FWDREW
PLAYSTOP
OPEN/CLOSE
REC/OTR
STOP/EJECT
VOLUME
D V D
D V DTV/VCR
SELECT
V C R
CHANNEL
OUT
IN
VIDEO
IN
OUT
3CH
4CH
AUDIO
ANT.
OUT
IN
VIDEO
IN
OUT
3CH
4CH
ANT.
RL
AUDIOVIDEOHEADPHONE
AUDIO
L R
L R
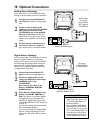
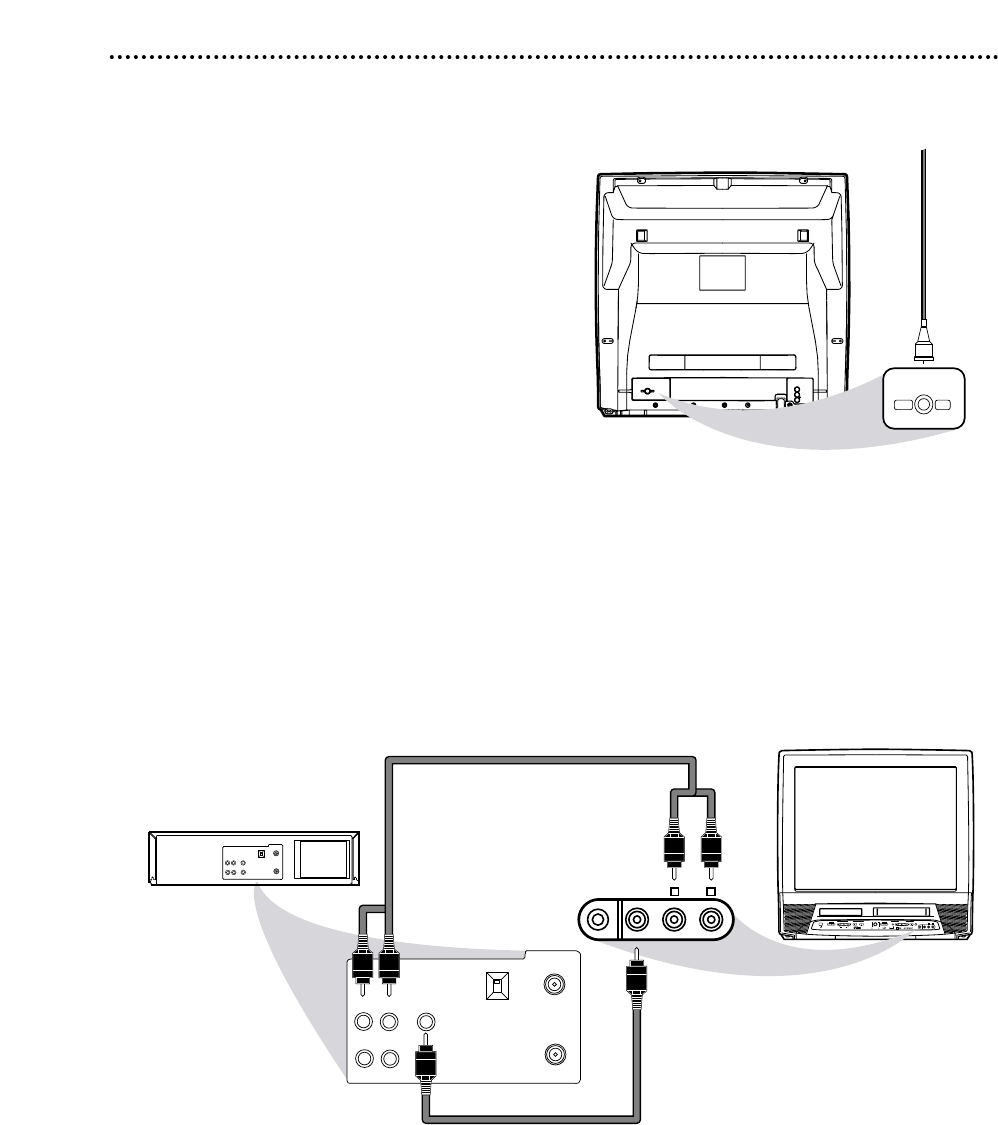
AUDIO/VIDEO In
Jacks on front of
TV/VCR/DVD
AUDIO/VIDEO OUT
Jacks on VCR
(example only)
Connect audio cables to the
AUDIO OUT Jacks on the
VCR and to the red and
white AUDIO In Jacks on the
front of the TV/VCR/DVD.
Connect a Video cable to the
VIDEO OUT Jack on the VCR
and to the yellow VIDEO In Jack
on the front of the TV/VCR/DVD.
2
When all other connections are
complete, plug in the
TV/VCR/DVD’s power cord.
3
Before you turn on the
TV/VCR/DVD, go to page 11.
ANT.
L
AUDIO OUT
R
COAXIAL
ANT.
Indoor Antenna
(not supplied,
example only)
D
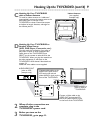
Hooking Up Your TV/VCR/DVD to
Another Video Source
(VCR, DVD Player, Camcorder, etc.)
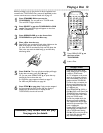
You may need this connection if you want to
play Discs or tapes on other equipment but
watch them on the TV/VCR/DVD. Press
SELECT on the remote to select AUX at the
TV/VCR/DVD. When you play the materials on
the other equipment, it will show on the
TV/VCR/DVD’s AUX channel. More details are
on page 33.
Audio and video cables are not supplied.
C
Hooking Up Your TV/VCR/DVD
with an Indoor Antenna
To install an indoor antenna or “rabbit ears”
(not supplied), connect the antenna wire to the
ANT(enna) Jack on the back of the
TV/VCR/DVD as shown. Extend the antenna
and adjust its length, direction, and angle for
the clearest picture.


