19
PHILIPS LTC3924/62 (E) QR34071
SETUP (Continued)
SETTING THE ALARM
The ALARM function allows the user to set the
recording duration, speed to be recorded and tape
recycle for alarm recordings. When a contact clos-
ure occurs at the ALARM IN input, the VCR auto-
matically enters the RECORD mode at the pre-pro-
grammed ALARM recording speed. (See Alarm In,
page 10 for a complete description of the ALARM
sequence.) The ALARM recording duration can last
according to the set value, or until the contact clos-
ure is reopened.
The ALARM recording speed can be pre-pro-
grammed to 08, 24 or 40.
The checking signal is automatically recorded on the
tape at the beginning of each ALARM recording.
Later, you can easily locate the start of each record-
ing by using these signals when watching a re-
corded content. See “ALARM INDEX SEARCH” on
page 23 for details.
See page 14 if you also want to record the date/time.
The TIME/DATE display is set as follows during
ALARM display.
— ALARM stars (✽) will replace the colons (:).
— The recording speed will be changed to 08, 24 or
40 which was selected from the “SPEED” setting
in the ALARM display.
Notes:
• When the ALARM recording ends, the VCR will
return to the status it was in before the alarm was
input.
• Select 08 at the “SPEED” setting when the alarm
input is within 30 seconds. If the 24 or 40 speed is
selected, electronic “marks” are not recorded on
the tape and alarm index search will not operate.
1. Press the START/STOP button. The duration
setting flashes on/off.
2. Press the UP or DOWN button until the desired
setting appears on the monitor. (MANUAL, 5,
15, 30 SEC, 1, 3, 5, 10, 30, 60 MIN, TAPE END)
3. Press the SET button. The record speed setting
flashes on/off.
4. Press the UP or DOWN button until the desired
setting appears on the monitor. (08, 24 or 40)
5. Press the SET button. The alarm ready setting
flashes on/off.
6. Press the UP or DOWN button to select the
alarm ready function. (YES or NO)
Select “YES” if you want to start alarm record-
ing even in the normal record or stop mode.
Select “NO” if you do not want alarm recording
in the stop mode.
7. Press the SET button. The alarm out setting
flashes on/off.
8. Press the UP or DOWN button to select the
alarm out function. See “ALARM OUT” on page
10 for details. (DURATION or PULSE)
9. Press the SET button.
The RECYCLE position flashes on/off.
10. Press the UP or DOWN button to select the
mode at the end of tape. See “TAPE RECYCLE”
on page 22 for details.
11. Press the START/STOP button.
Programming for the ALARM has been com-
pleted.
DU
L
R
AR
M
:TION U
M
AL
AN
S
SPE D:
08
A
LAR
M
A
LAR
M
A
LAR
M
A
A
RE SIND,
W
DU
FU
RTION
ION
A
E
YDR:AE
:OTU
YE
SET
❲❳
TOP
NC
IF
TCLECYRE
❲
S
❳
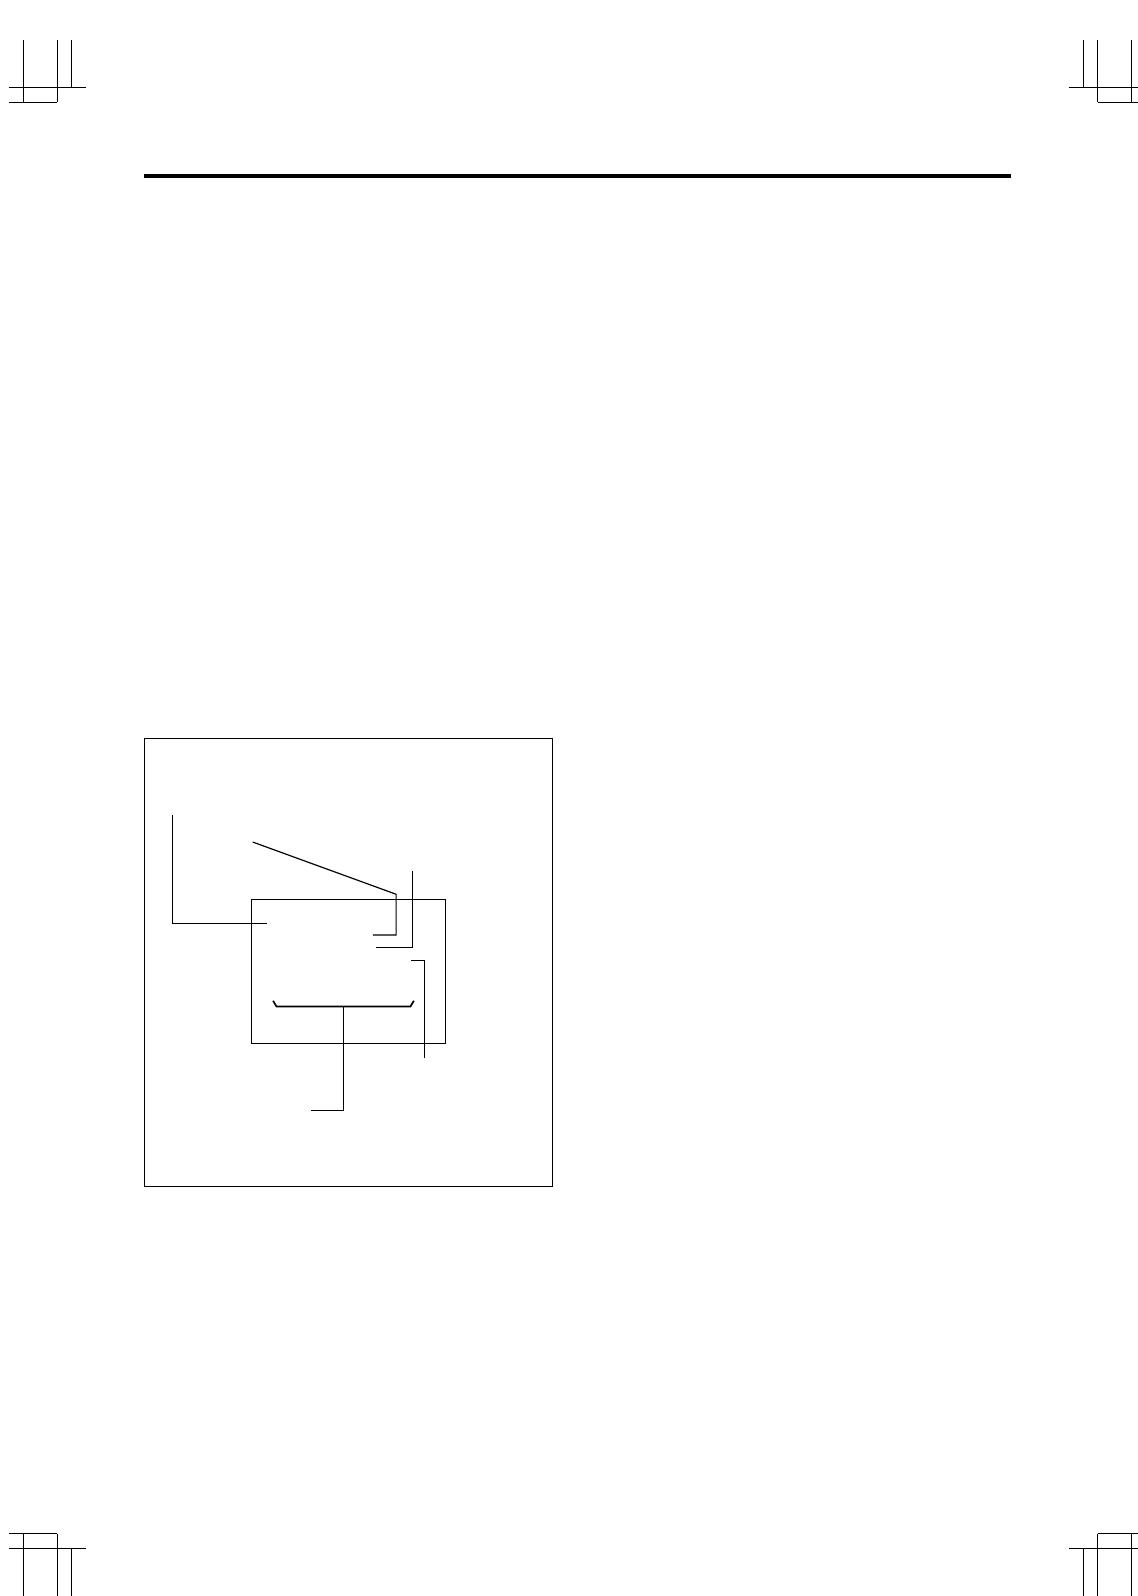
ALARM Display Format Description
DURATION: User programmable length or time the unit
stays in the alarm record mode. (MANUAL, 5 SEC, 15
SEC, 30 SEC, 1 MIN, 3 MIN, 5 MIN, 10 MIN, 30 MIN, 60
MIN or TAPE END.)
ALARM RECORDING TAPE SPEED (08, 24 or 40)
ALARM READY (YES or NO)
RECYCLE FUNCTIONS
(“REWIND, STOP IF ALARM”, “REWIND, STOP” or
“REWIND, RE-REC”)
ALARM OUT
(DURATION or PULSE)


