11
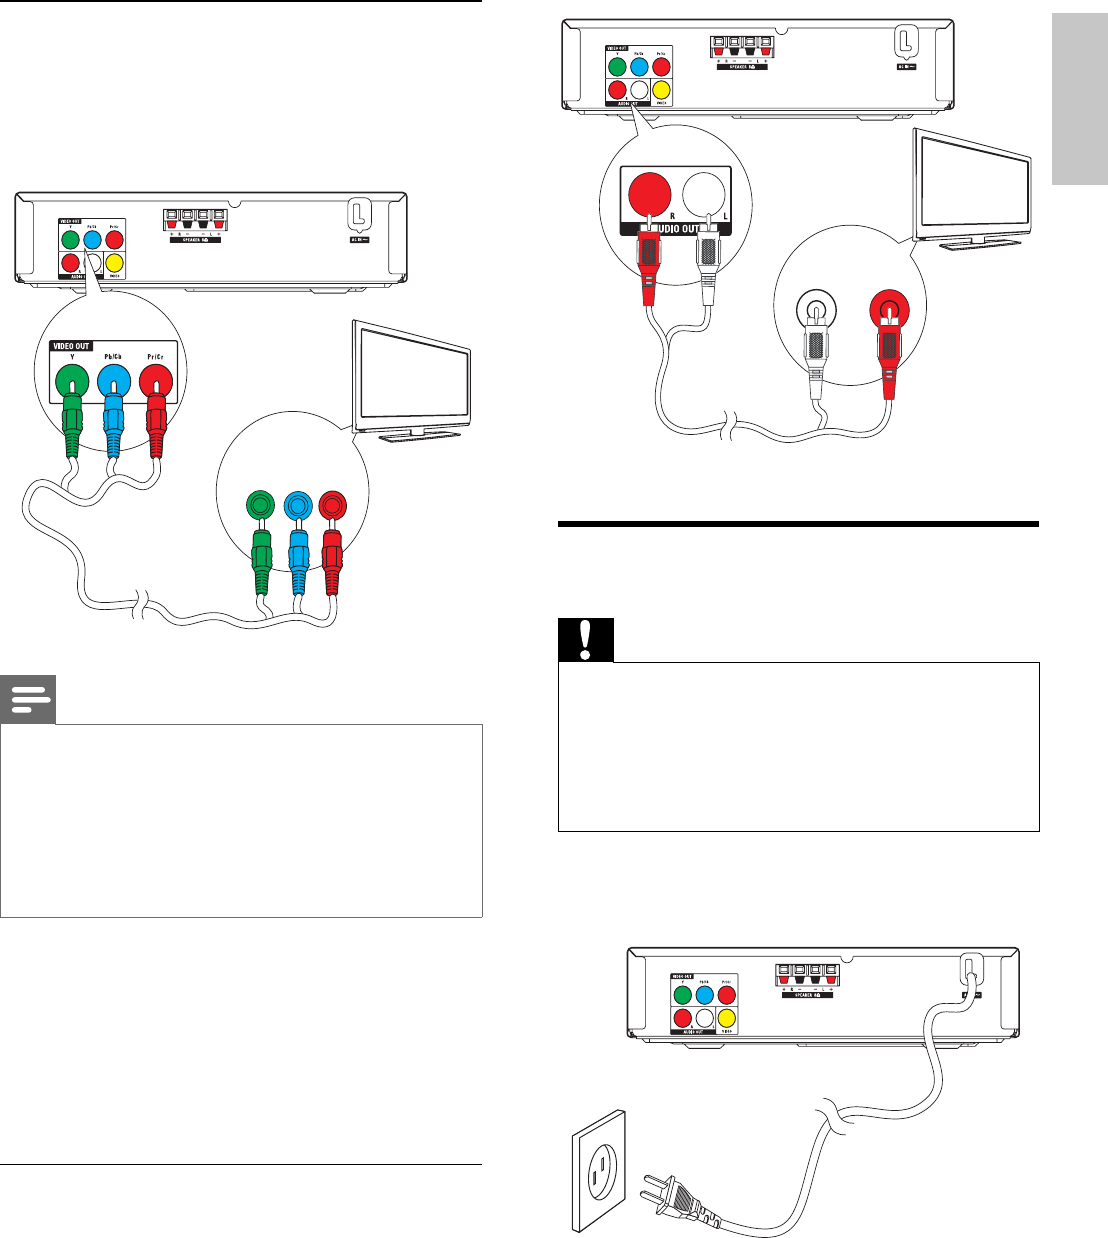
Connect power
Caution
Risk of product damage! Ensure that the •
power supply voltage corresponds to the
voltage printed on the back or the underside
of the unit.
Before connecting the AC power cord, ensure
•
you have completed all other connections.
1 Connect the AC power cord to the wall
socket.
TV
L LINE IN R
Option 2: Connect through
component video
Connect a progressive scan TV through
component video for higher quality video.
Note
The progressive scan video quality is only •
available when a progressive scan TV is
connected.
If your TV does not support progressive scan,
•
you cannot view the picture.
For how to activate progressive scan on your
•
TV, refer to the TV user manual.
1 Connect component video cables (red/
blue/green - not supplied) to:
the • VIDEO OUT ( Pr/Cr Pb/Cb Y )
sockets on this unit.
the component input sockets on the •
TV.
Connect audio cables
1 Connect audio cables (red/white - not
supplied) to:
the • AUDIO OUT L/R sockets on
this unit.
the audio input sockets on the TV.•
TV
Pr/Cr Pb/Cb Y
COMPONENT VIDEO IN PUT
English
EN


