36
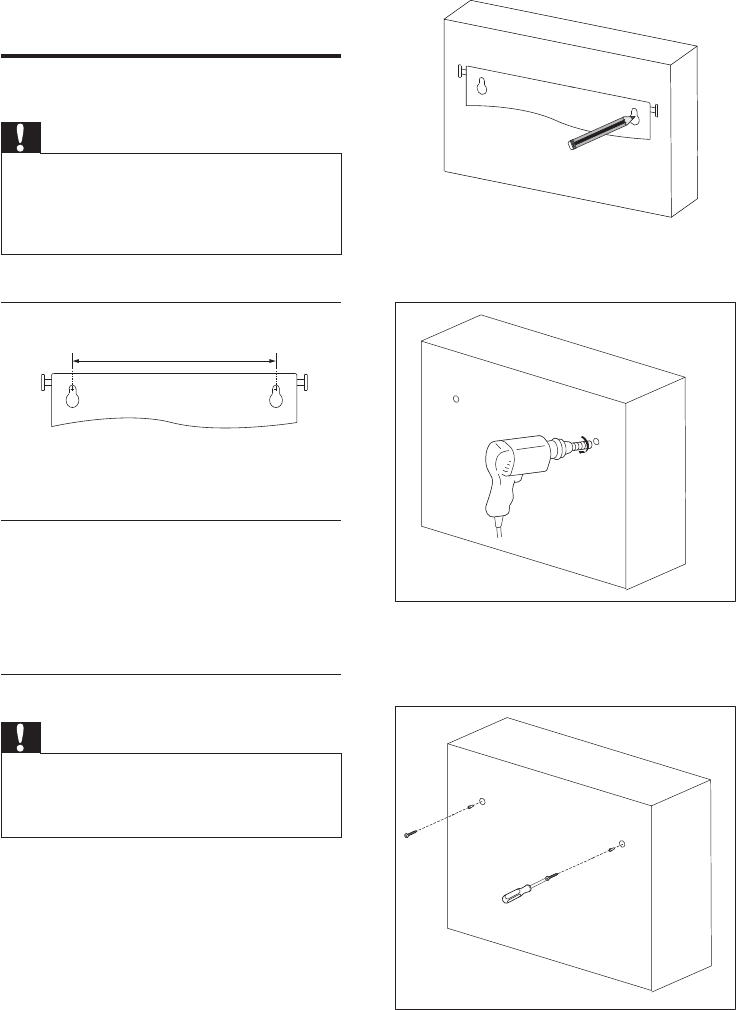
2 Drill holes as marked.
3 Secure 2 supplied screws in the holes, but
leave 5mm between the screw head and
the wall.
12 Appendix
Mount to a wall
Caution
Risk of product damage! Always consult professional •
personnel to safely mount the product to a wall.
Risk of injury! Ensure that no supply ducts such as gas,
•
water or electricity are harmed when you drill the
holes.
What’s in the supplied mounting kit
1 x wall mount template
What else you’ll need
Electric drill•
2 x screws and dowels•
Screwdriver•
Pencil•
Mount the main unit
Caution
To fi nd a suitable mounting location, make the •
necessary physical and wireless connections.
Mount the main unit and speakers to a solid concrete
•
wall or plaster board wall only!
You can use the supplied bracket to mount the
main unit and speakers to the wall.
1 Align the template in the chosen location
on a wall. Use a pencil to mark the drilling
positions.
140 mm
EN
EN.indd Sec1:36EN.indd Sec1:36 2009-3-13 14:46:482009-3-13 14:46:48


