


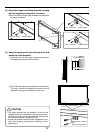

10
Installing on a Wall
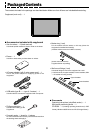
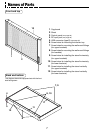
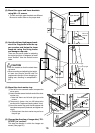
Parts included in the copyboard package:
Wall mount bar (1 pc), upper brackets (2 pcs),
Marker tray (1 pc, with 2 side covers) and M4 x 8 marker tray installation screws (3 pcs, screws removed
when unpacking), lower brackets (2 pcs), M4 x 12 bracket mounting screws (8 pcs)
Parts not included in the copyboard package:
Bolts and nuts for fastening to wall (use commercially available parts – the types differ according to wall
surface material). See page 11.
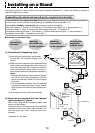
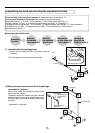
Mounting
the copyboard
onto the wall
Selecting the place
of installation
Preparing
the wall surface
Mounting the wall
mount bar
Mounting
the marker tray
on the copyboard
Mounting
the brackets
on the copyboard
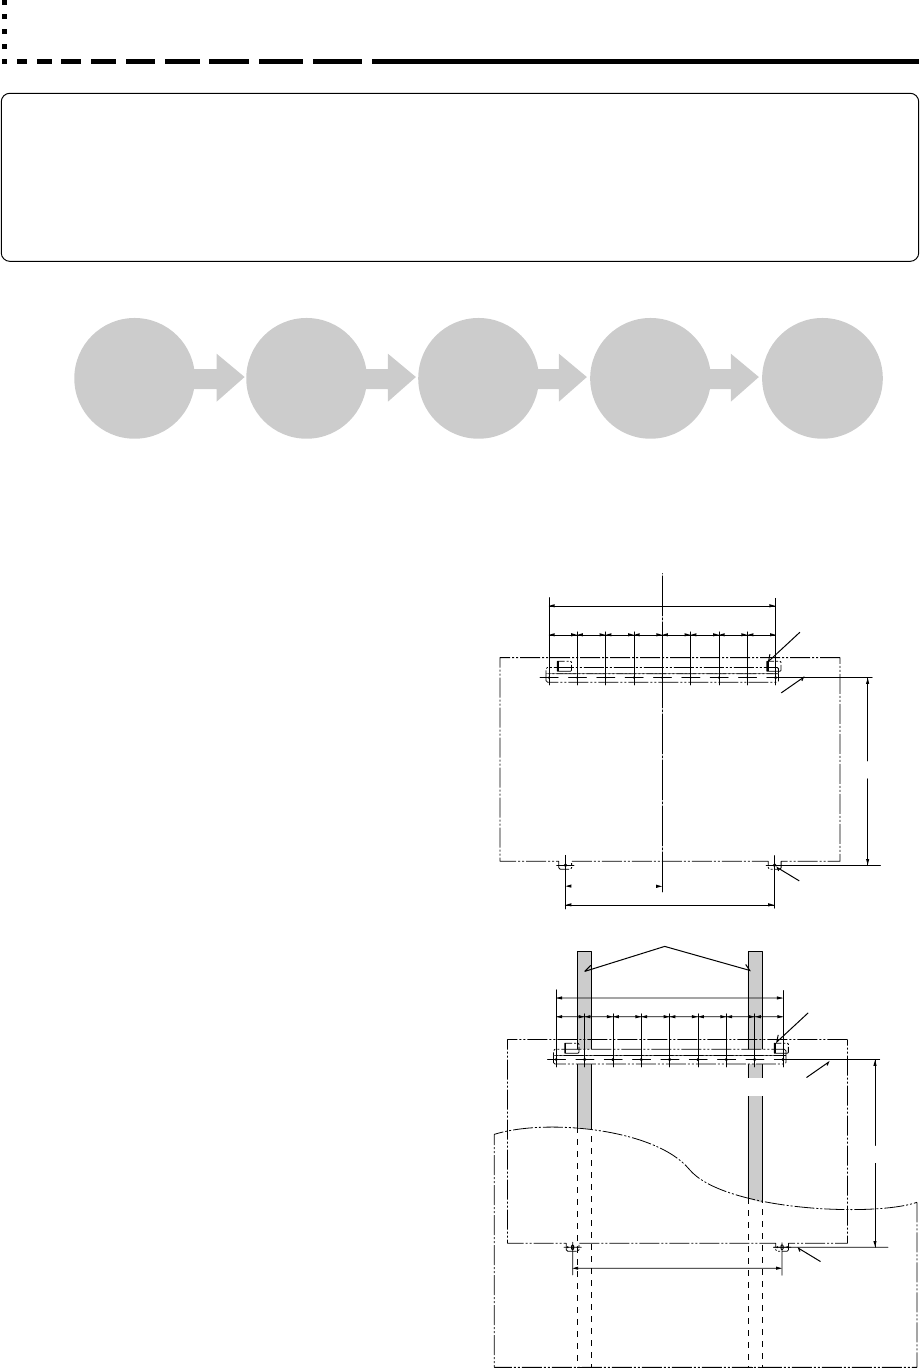
b Wall mounting procedure – flow
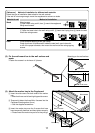
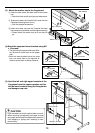
(1) Selecting the place of installation
• The wall mount bar should be mounted on columns,
posts, or wall which is strong enough to support the
weight of the copyboard.
• The diagram shows the wall mount bar’s position of
installation. The wall mount bar has 8 mm diameter
screw holes at 100 mm intervals.
• Choose holes in such a way that the center of gravity
will be at the middle. (Make sure there is no extreme
imbalance.)
• The included “wall mount positioning sheet” can be
used to easily mark the position of installation.
bFor concrete walls
Mount commercially available M6 anchor bolts and
anchor nuts to the position of installation. (See the
following page.)
655
300 (275 - 330)
800
100
100
100
100
100
100
100
100
663
Position of upper
bracket (hook)
Position of lower
bracket
Wall mount bar mounting
position
655
800
100
100
100
100
100
100
100
100
663
Wooden or thick
plywood wall
Position of lower
bracket
Position of upper
bracket (hook)
Wall mount bar mounting position
Column, stud, etc.
bFor walls with a plywood or plaster board struc-
ture
Check that there are columns or studs at the position
of installation.
Install using the wall mount bar’s M6 wood screws,
etc. (See the following page.)
Mount the lower brackets in the position on the dia-
gram shown for the wood screws for when installing
the copyboard.
Notice:
•For structures with no columns, use a separately sold
stand.
An optional partition mount kit is also available for mount-
ing the copyboard on a partition panel.