


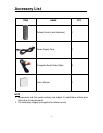

- 13 -
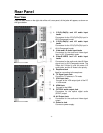
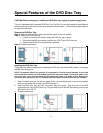
Special Features of the DVD Disc Tray
CAUTION: Before removing or installing the DVD disc tray, unplug the power supply cord.
This unit is designed with a movable DVD Disc Tray. The Disc Tray can be installed in three different
positions giving you the ability to maximize space and convenience. Follow the procedure (below)
to remove and reinstall.
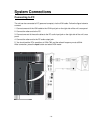
Remove the DVD Disc Tray:
Step 1: Open the back cover by sliding the left rear panel of the unit outward.
Step 2: Remove the DVD disc tray.
• Loosen and remove the screw holding the DVD disc tray in place.
• Disconnect the MGI connecting cord from the LCD TV and DVD disc tray.
• Remove the DVD disc tray by pushing it outward.
Step 3: Close the back cover.
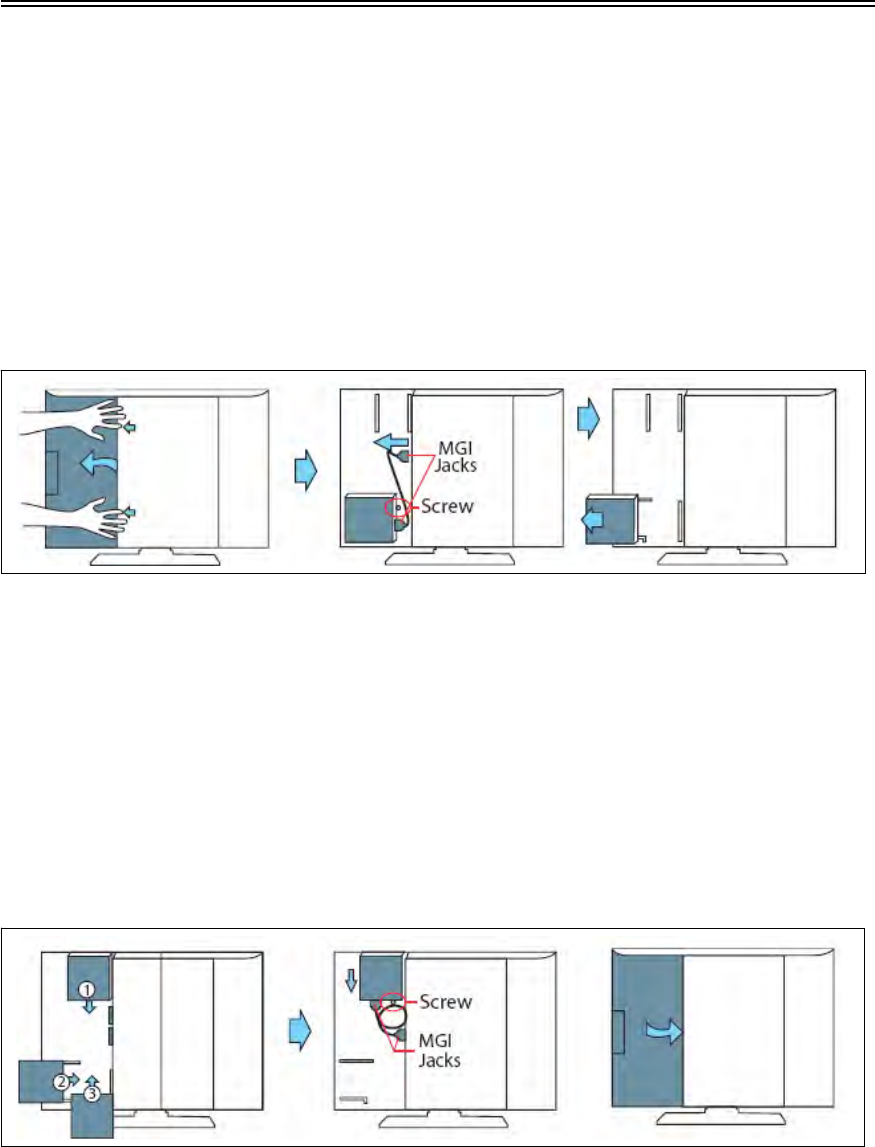
Installing the DVD Disc Tray:
There are three different positions for installing the DVD disc tray and two MGI jacks for connecting
the MGI connecting cord.
NOTE: The bottom DVD disc tray position (3) is designed for TVs that are wall-mounted. If you would
like to install the DVD disc tray in the bottom position (3), remove the stand. To remove the stand, cover
the screen with a soft cloth and place the LCD screen face down on a stable surface. Remove the
screws securing the stand to the TV. (VESA 200 wall-mounting kit and instructions are not included.)
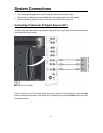
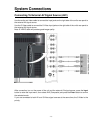
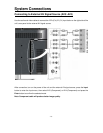
1. Open the back cover on the left rear panel of the unit and select which of the three possible
positions you would like to install your DVD disc tray in.
2. Insert the DVD disc tray and lock into place using the screw. Plug one end of the MGI
connecting cord into the DVD disc tray. Plug the other end of the MGI connecting cord into the
MGI jack on the LCD TV.
3. Close the back cover.