- 7 -
Front View
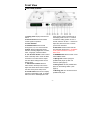
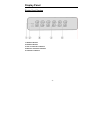
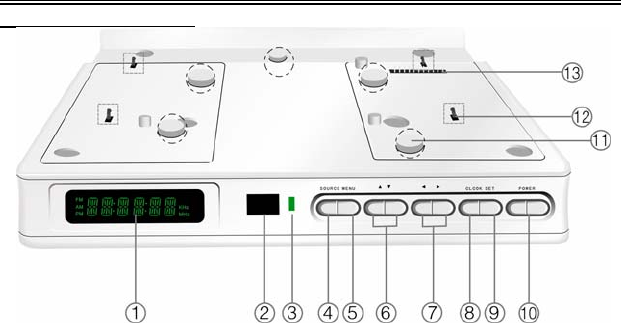
Front Panel Drawing
1. Display panel Displays the time and
status.
2. Remote Sensor Receives remote
control signal for operation.
3. Power Indicator
4. SOURCE button Press to shift
among DVD, TV, AV1 and AV2 mode.
5. Menu: Press to adjust the Picture
standard, including Brightness, Contrast,
Color, Language, or Reset all items.
6. ▲/▼ direction button Press to select
items in the setup menu. Press to select
channels in TV mode. Press to adjust
the value when setting the time on the
display panel.
7. ◄/►direction buttons Press to
select items in the setup menu and to
adjust the volume level. Press to adjust
the value in the picture setup menu.
8. CLOCK button Press once to display
the time on the display panel. In standby
status, the time is still displayed on the
panel. Press it again to set the time on
the display panel. Use the buttons
to select the editing position of hour or
minute, and then use the buttons to
adjust the value of the hour or minute
upward and downward.
9. SET button Press to enter and exit
from the timer setup menu. In STANDBY
mode, press this button to setup the
alarm clock.
10.POWER button Press to enter or exit
the STANDBY mode.
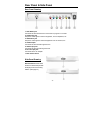
11.Spring Tab: Used to spring the
portable DVD player up when it is
removed. (See page13)
12.Fixing hooks: Fix the portable DVD
player on the Docking Station. (See
page11)
13.Docking jack: For connection with a
portable DVD player.


