9
Mounting in a Vehicle
DTS2.0+Digital Out
DTS2.0+Digital Out denotes the dual ability to pass the DTS encoded digital bitstream to an external DTS
decoder for playback as well as down-mix the digital surround soundtrack for playback in a 2-channel
environment through analog outputs.
Manufactured under license under U.S. Patent #'s: 5,451,942; 5,956,674; 5,974,380;
5,978,762; 6,487,535 & other U.S. and worldwide patents issued & pending. DTS and
the Symbol are registered trademarks, & DTS 2.0+Digital Out and the DTS logos are
trademarks of DTS, Inc. Product includes software. ©DTS, Inc. All Rights Reserved.
Dolby TrueHD
Dolby TrueHD is a very high quality audio format that reproduces the studio master audio.
This unit allow audio to be decoded to a maximum of 5.1 ch of PCM audio and output from the HDMI
terminal. Also, audio can be output with "Bitstream" to an AV amplifier that supports it.
Manufactured under license from Dolby Laboratories.
'Dolby' and the double-D symbol are trademarks of Dolby Laboratories.
Sound System
CAUTION:
1. Do not use this player case as a swing, car seat, or for any other purpose except to hold a player and
accessories.
2. The player case is intended for viewing only from the rear seats. Do not install or use this product in the
front seat of a vehicle.
3. To reduce the chance of injury in case of a collision or sudden stop:
•Alwayskeepplayerstrappedsecurelyinsidecasewhilevehicleismoving.
•Alwayskeepplayercasesecurelyattachedinsidevehiclewhilethevehicleismoving.
4. Always position the plastic hooks and strap adjustment slider so that they do not touch the back of the
head of the person in the front seat.
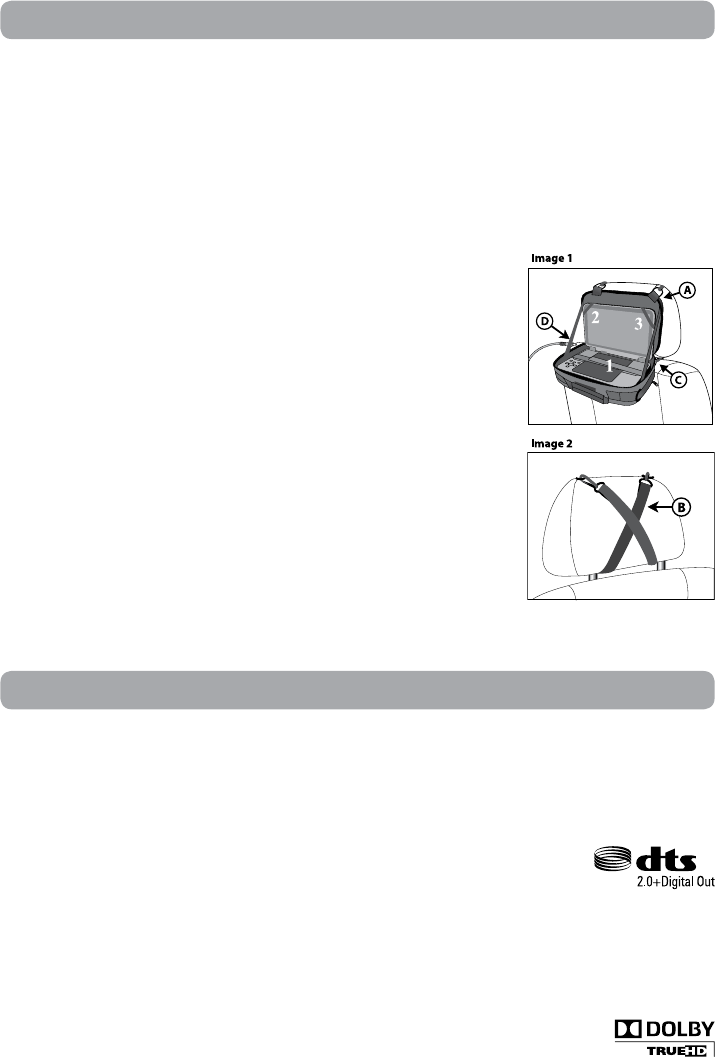
To Attach the Player Case to a Headrest (Images 1 & 2)
1. Insert the player into the case as shown right (1, 2, 3).
2. Unzip the main compartment that holds the player; locate the D rings at
the top of the case (A).
3. Locate 2 straps with hooks on each end.
4. Hook one end of the each strap to the D rings at the top of the case.
5. Criss-cross the straps around the front of the headrest (B) and hook the
straps to a second set of rings on the lower part of the case (C).
6. Tighten up the straps until the unit is secured. Connect the 12V car adapter
as shown on the right (D).
Note: Before closing the bag, release the left and right elastic bands from the
screen panel.
CAUTION
1. High temperature damages discs.
2. Do not store in closed cars.
3. Protect from direct sunlight.


