Chapter 2 13
Using the Remote Control
Graphics contained within this publication are for representation only.
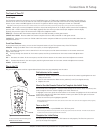
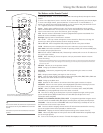
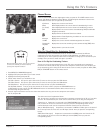
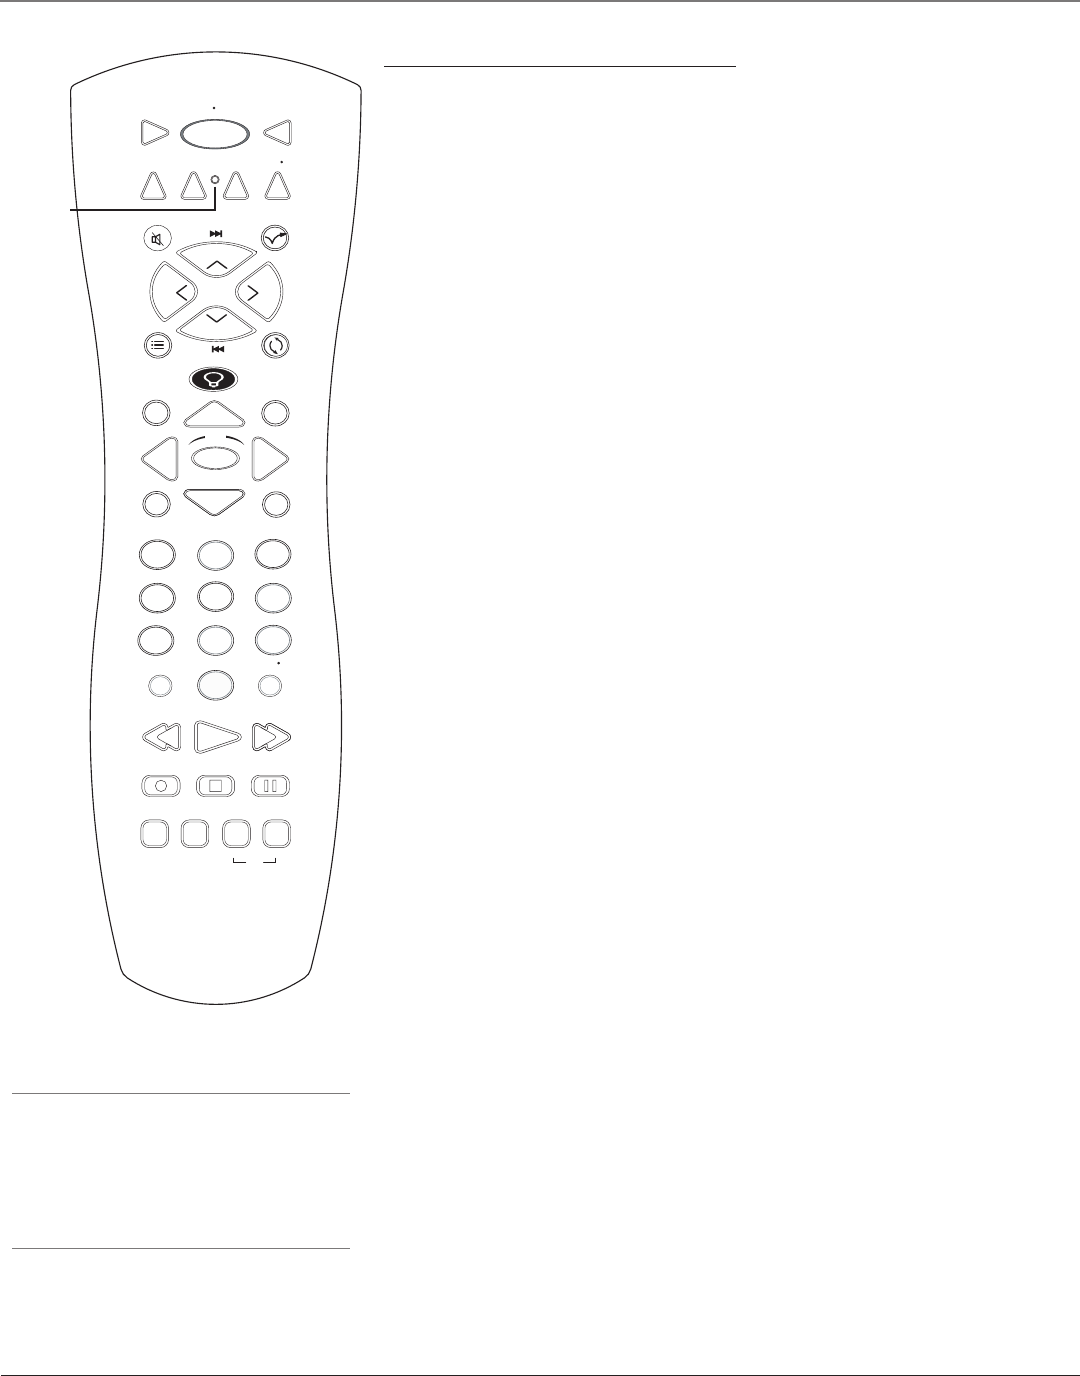
The Buttons on the Remote Control
(0-9) Number Buttons Enter channel numbers and time settings directly through the remote
control.
To enter a one-digit channel, enter a zero first. To enter a two-digit channel, press the two digits.
To enter a three-digit channel, press and hold the “1” button until “1” and two dashes (– –)
appear, then add the second two digits. Example: to tune to channel 123, press and hold 1 until
“1– –” appears, release the 1 button and then press 2 and 3.
Arrows Used to point to different items in the TV menu and to adjust the menu controls.
Moves the PIP window when no menus are on the screen. Also switches the two POP windows
when no menus are on the screen. For Zoom use, go to next page.
AUX Puts the remote in AUX mode. Can also be programmed to operate most brands of an
additional remote-controllable component.
Backlight Lights up some of the buttons in the dark.
CH + or CH - Scans up or down through the current channel list. Press once to change the
channel up or down; press and hold to continue changing channels.
CH+ or CH- PIP When using PIP or POP, changes the channel in the picture window.
CLEAR Removes any menu or display from the screen and returns you to normal viewing.
DISC MENU No function available in TV mode. If operating an RCA, a GE or Proscan DVD player,
for example, brings up the Disc menu.
DVD Puts the remote in DVD mode and, if Autotuning is enabled, will turn on the TV and tune to
the correct input channel.
FREEZE When watching TV, freezes the picture until you press another button to resume
normal TV viewing.
Note: Do not use the Freeze feature for an extended period of time. This can cause the image to be permanently
imprinted on the picture tube. Such damage is not covered by your warranty. Press any button to unfreeze the
picture at any time.
GO BACK Returns you to the previous channel.
GUIDE Brings up the Channel Guide menu.
INDICATOR Indicates the programming mode when programming the remote to control
components.
INFO Brings up status display; press again to clear the screen.
INPUT Press to toggle through the available input sources (VID1, VID2, FRNT, CMP1, CMP2 and
DVI. Press the CH+ or CH- button to resume TV viewing).
MENU Brings up the Main menu.
MUTE Reduces the TV’s volume to its minimum level. Press again to restore the volume.
OK/FREEZE When in the menu system, selects highlighted items. When watching TV, freezes
the picture until you press another button to resume normal TV viewing.
ON•OFF When in TV mode, turns the TV on and off. If in another device mode (VCR, DVD,
SAT•CABLE, etc.) and programmed, will turn the device on and off.
PIP Press once to bring up the small picture-in-picture window. Press again to bring up the
picture-outside-picture (POP) windows. Press to remove POP. (See Chapter 3 for more
information about using PIP.)
REVERSE, PLAY, FORWARD, RECORD, STOP, PAUSE If programmed, provides transport control
for some remote-controllable VCRs, DVD players, laserdisc players, tape decks, and CD players.
SAT•CABLE Puts the remote in SAT•CABLE mode and, if Autotuning is enabled, will turn on
the TV and tune to the correct input channel.
SKIP Press once before changing channels and the TV will wait 30 seconds before returning
you to the original channel. Press repeatedly to add more time.
SOUND•ANT Displays the Picture and Sound preset settings at the bottom of the TV.
SWAP When using PIP, swaps the main picture with the PIP window. When using POP, swaps
the left and right pictures.
TV Turns on the TV and puts the remote in TV mode. Also displays current status.
STOP PAUSE
TV
ON OFF
AUX
DVD
SAT
CABLE
PIP
SWAP
CH +CH -
PLAY FORWARDREVERSE
GUIDE
GO BACK
C
H
+
C
H
-
V
O
L
V
O
L
SKIPMUTE
INFO
MENU
CLEAR
DISC MENU
SOUND ANT
1
2
3
4
5
6
7
8
9
0
INPUT
VCR1
VCR2
OK
RECORD
PIP
ZO
O
M-
ZO
O
M+
F
R
E
E
Z
E
Indicator
Note: The VCR1, DVD, VCR2, and SAT•CABLE buttons
also turn on most RCA, GE, and Proscan products.
Tip
To turn off all the RCA, GE, and Proscan components that
are connected to the TV, press ON•OFF twice within two
seconds.
This feature only works with most RCA, GE, and Proscan
products.


