Graphics contained within this publication are for representation only.
35
Chapter 3: Recording, Playback & Features
Advanced VCR Features
The VCR portion of your DVD/VCR combo works like most VCRs, but has some additional features
for playback and copying tapes to disc. Most importantly, you need to understand the difference
between digital and analog as it applies to the VCR portion of your DVD/VCR combo.
The analog setting provides standard playback that the majority of VCRs provide—play, stop, pause,
record. In addition to standard VCR playback functions, the digital path provides you with all kinds of
neat features that mimic a DVD. You can only use one path at a time: digital or analog.
All DVD functions must use the digital path—there is only one digital path. Therefore, there are times
when the tape will play through the analog path (for example, when you record to a DVD disc and play
a VCR tape at the same time).
The easiest way to see if you are using the Digital VCR path, is to press INFO during playback. If you’re
in the digital mode, an Info Display appears.
Advanced Playback
1. Insert a tape.
2. Press PLAY.
3. Press INFO (if the Info Display doesn’t appear, press ANALOG DIGITAL on the remote control).
4. With the Info Display on the screen, use the left/right arrow buttons on the remote to highlight
different icons to access the VCR playback features.
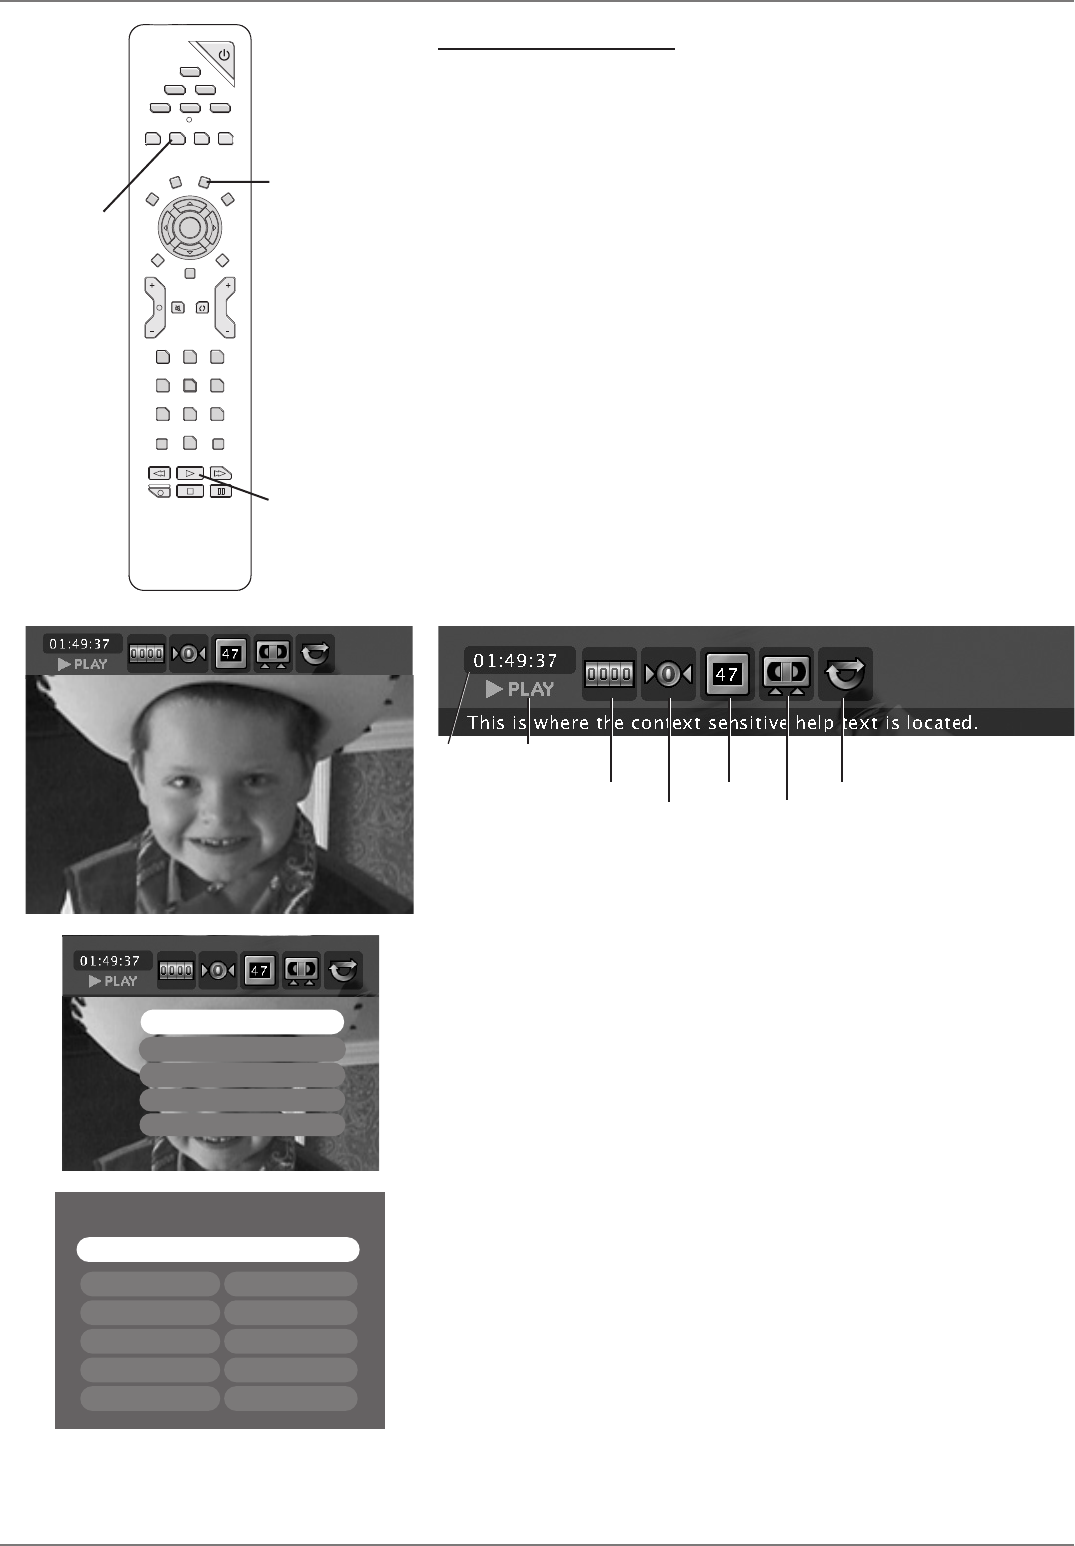
VCR Info Display
Above, the time display shows the amount of time that has elapsed on the tape. Below the time display
is the play indicator that tells you the state of playback (play, pause, stop, etc.).
Note: These items are for display only—you cannot adjust or change them.
Reset Counter: Sets the 0 point, which means the elapsed time in the Timer Display starts from the
point when you press OK with the Reset Counter icon highlighted.
Zero Search: Fast forwards or rewinds the tape to the point that you selected as the 0 point
(above).
Index Search: Each time you press RECORD on the VCR, the tape records an index mark. Use Index
Search to quickly fi nd the beginning of a program. With the Index Search icon highlighted, you can
quickly go back or go forward to the next index point. Press FORWARD to go to the next Index
Mark, press REVERSE to go to the previous Index mark. The Tape menu will be displayed while the
DVD/VCR searches for the next Index Mark.
A-B Edit: This feature was designed so that you can copy your videotape collection of home movies
to DVD discs in separate segments so the events appear as separate titles on the DVD disc. For
example, you might have your wedding; a birthday party; and your family reunion on a tape from
your camcorder recordings. If you set up A-B Edits, these events will appear as separate titles on
the DVD disc. With the AB Edit icon highlighted, press OK (the options appear on the screen).
Insert A point/Insert B point: press OK to mark the beginning or the end of an A-B segment
of the tape.
Cancel Last Edit: cancels the last action.
Delete A-B Edits: clears all A-B segments.
Review/Play A-B Edits: displays A-B edits, and allows you to start playing A-B Edits.
Save Edits & Exit: saves the A-B segments.
GO
BACK
VOL CH
MUTE
TV
ON-OFF
DVD/VCR CABLE
AUX
AUDIO
CLEAR
MENU
OK
LIVE
RECORD
STOP
PLAY
INPUT ANTENNA
PAUSE
FORWARDREVERSE
7
123
4
5
6
8
0
9
ADVANCE
AGAIN
INFOTIMER•GUIDE
SAT
ZOOM ANALOG
DIGITAL
OPEN
CLOSE
ANGLE
ANALOG button
PLAY button
INFO button
Play Mode: Standard or A-B Repeat
Time
Display
Playback
indicator
Reset Counter
Zero Search
Index Search
A-B Edit
Insert A Point
Cancel Last Edit
Delete A-B Edits
Review A-B Edits
Save Edits & Text
A and B Edit Points
Save Edits and Exit
A1: 00:01:33 B1: 00:02:00
A2: 00:01:00 B2: 00:02:35
A3: Empty B3: Empty
A4:Empty B4: Empty
A5:Empty B5: Empty


