Chapter 4 59
Using the TV’s Menu System
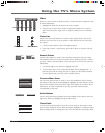
Mirror Adjustment Over time the small mirror inside the TV may shift slightly. You’ll
notice the edges of the picture aren’t symmetrical or parallel, or one of the top corners is
too far in or out. Try adjusting the edges by using Trapezoid- Left and Right. If this doesn’t
help, use the screws behind the front panel piece to adjust the corner edges while watching
the test pattern on screen. Use a 4 mm. Allen wrench or Philips screwdriver to adjust the
screws. Go to page 10 for information on removing the front panel piece and location of
the mirror adjustment screws.
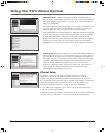
Press OK to select Mirror Adjustment and select Yes to continue. Selecting Yes resets
Trapezoid- Left and Right adjustments you’ve made.
With the test pattern on screen, look at the top corners of the test pattern. Adjust the corner
that is farthest in towards the center of the TV so the top horizontal line is parallel with the
top edge of the TV. For example, if the left corner is farthest in towards the center, turn the
left screw counterclockwise. If you feel a resistance as you turn the screw, stop turning it.
Tightening the screw more could damage it (try turning the opposite screw clockwise).
Now see if the left and right lines are parallel. If they aren’t, use the middle screw to adjust
them until they’re parallel with the edges of the TV. If necessary, use the up and down
arrow buttons on the remote to vertically center the test pattern. To exit the test pattern,
press OK, then use the Trapezoid- Left and Right option to fine tune the picture, if
necessary.
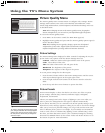
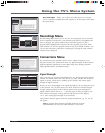
Reset Controls Menu button resets all Picture Quality controls to their original factory
settings (except Personal Picture Preset and Horizontal and Vertical Position) for the
currently tuned input (see on-screen text). To reset the settings, you must:
1. Tune to the input you would like to reset.
2. Press MENU to access the Main Menu.
3. From the Advanced Settings menu, select Reset Controls, and then select Reset to reset
the settings for the currently tuned input.
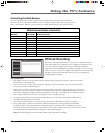
Videogame Preset Settings
Audio Connections
7
Balance
6
SAP
5
Audio Mode
4
Sound Logic
3
Audio Processor
2
Tex t hereEqualizer Presets
1
Go Back
0
Main Menu Audio
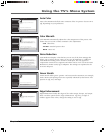
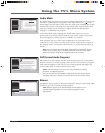
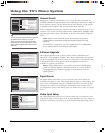
For each input select a different equalizer preset or create a
Personal preset with the equalizer. Press OK to continue.
Personal
Video Camera
Videogame
Voice
Music
Standard
Cinematic
Flat
12
kHz
3
7.5
kHz
2
3
kHz
1
1.2
kHz
0
500
Hz
3
200
Hz
5
120
Hz
7
+12
0 dB
-12
Web Browser
8
Assisted Setup
7
Preferences
6
Connections
5
Parental Controls
4
Recordings
3
AudioAudio
2
Picture Quality
1
Go Back
0
Main Menu
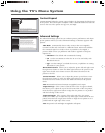
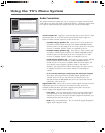
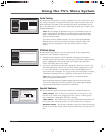
Press OK orto access the Audio menu.
•Equalizer Presets: Select a preset or adjust the equalizer.
•Audio Processor: Choose the way for programs to sound.
•Sound Logic: Turn it on to minimize variations in volume.
•Audio Mode: Select default or current audio for digital TV.
•SAP: Turn on SAP to hear different audio for NTSC sources.
•Balance: Shift the audio between the left and right speakers.
•Audio Connections: Set up to match your sound system.
The Audio menu has screens for setting the audio features
and for tweaking the sound:
Audio Menu
The Audio menu lets you adjust audio output. To access the Audio menu, press
MENU on the remote, and then select Audio from the main menu. The following
audio items can be adjusted: Equalizer Presets, Audio Processor, Sound Logic, Audio
Mode, SAP, Balance, and Audio Connections.
Equalizer Presets
You can select one of the seven-band Equalizer Presets or create your own
personal preset. The seven-band graphic equalizer lets you adjust the audio
frequency settings. The equalizer can only be changed if the Fixed/Variable
Audio Output is set to Variable Output, Speakers On. If the Fixed/Variable
Audio Output is set to Fixed Output, you cannot make changes to the equalizer
and the bands are set to 0dB. However, the graphic equalizer levels for
Variable Output, Speakers On are stored in memory in case you switch from
Fixed Output back to Variable Output, Speakers On.
Note: Equalizer Presets are stored for each input. All other audio feature
settings are stored globally across all inputs and not per input.


