


Chapter 4 57
Using the TV’s Menu System
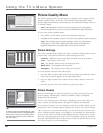
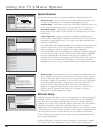
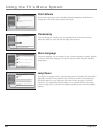
Software Upgrade
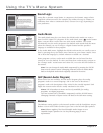
The Software Upgrade screen contains current software information and
indicates if a new upgrade is available. The software information and upgrades
can be accomplished only if you have the TV connected via the Ethernet cable
to the Internet with ISP subscription. Select the Upgrade Now button, if
available, to upgrade your software.
Note: If using a dialup service via a router connected at a dialup speed
of 56K, the Software Upgrade could take several hours or more. If the TV
is unplugged during a Software Upgrade, it could cause the TV to not
operate properly.
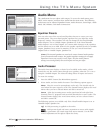
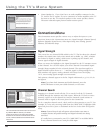
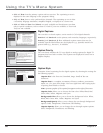
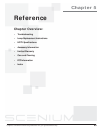
Signal Source
The Signal Source menu allows you to choose the source from which you
would like the signal to come: Cable Input, Antenna Input, or Video Inputs. The
same can be accomplished using the component buttons if you’ve set up Auto
Tuning on the remote or by pressing the INPUT button. But, if you misplace the
remote, this feature gives you another way to tune to a signal source.
Special Features
7
Ethernet Setup
8
Auto Tuning
6
Video Input Setup
5
Signal Source
4
Software UpgradeSoftware Upgrade
3
Channel Search
2
Signal Strength
1
Go Back
0
Main Menu Connections
You can view your current TV-software version and check
if a new software version is available.
If you have a connection to the TV's Ethernet jack, your TV
may periodically alert you to the availability of a TV
software upgrade which can be downloaded through the
Ethernet jack.
From time to time, your cable company may use the Cable
Input to automatically upgrade the digital-cable software
in the TV. If the TV is on, you'll be notified when it occurs.
Status: TV-software upgrade XXXXX is available by
selecting the "Upgrade Now" button below.
Current TV Software Version and Date: A2.0B/B2.0A
Upgrade Now
Special Features
7
Ethernet Setup
8
Auto Tuning
6
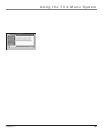
Signal TypeVideo Input Setup
5
Signal Source
4
Software Upgrade
3
Channel Search
2
Signal Strength
1
Go Back
0
Main Menu Connections
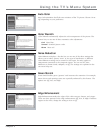
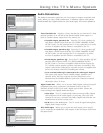
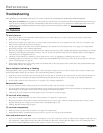
You can select the Air/Cable setting for Antenna A and
Antenna B. Press OK to continue.
Select the Input 4 video source:
The component video (Y PB PR) connectors on the TV can
be changed to accept composite video instead. When using
composite video, connect the yellow RCA cable to the
Y/VIDEO connector on the TV.
Select the Input 2 video source:
Composite Video
Component Video (Y PB PR)
Composite Video
Component Video (Y PB PR)
Special Features
7
Ethernet Setup
8
Auto Tuning
6
Video Input Source
5
Signal SourceSignal Source
4
Software Upgrade
3
Channel Search
2
Signal Strength
1
Go Back
0
Main Menu Connections
You can select a source from the available signal sources.
Press OK to continue.
Use this screen if you have misplaced your remote control
and need a way to tune to a different antenna or to go to
the video inputs. Use the arrows to highlight the rectangle
then press OK or MENU-OK to scroll to the input you want.
Front Input
Video Input Setup
The Video Input Setup screen lets you choose which type of connection you’re
using for the Input 2 and/or Input 4 jack on the back of the TV. If you decide to
change the connection, you need to go back into the Video Input Setup screen.
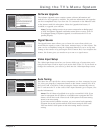
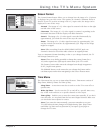
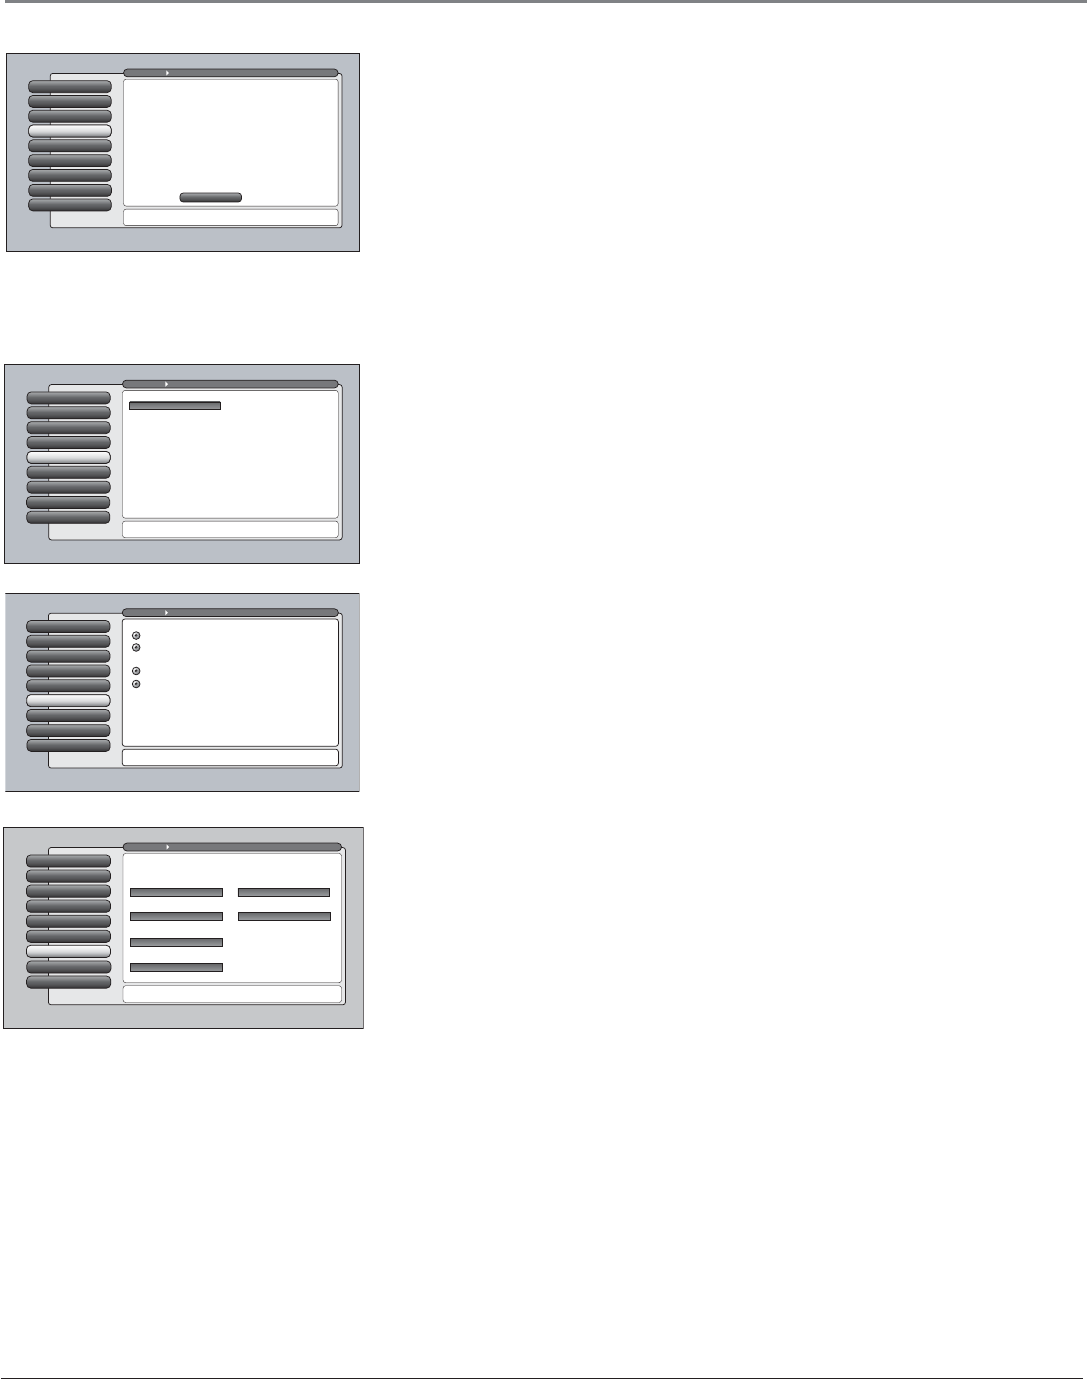
Auto Tuning
This menu lets you specify the various components you have connected to your
TV. It lets you program a component button on the remote control (VCR, AUX,
DVD, SAT/CAB, or AUDIO) so that pressing the button automatically turns on
the TV and turns the TV to the correct Video Input Channel (go to Chapter 3 for
detailed information).
Notes: The AUX button by default is set up for a second RCA VCR. If you
need to reprogram the AUX button, or instead want to program the VCR
button, use the 2001 code. Then use the VCR2 option in the auto tuning
menu to set auto tuning.
If you have two RCA satellite receivers, you can control each separately.
Program the second receiver with the AUX button using the 5001 code.
Then use the RCA SAT2 option in the auto tuning menu to set auto
tuning.
Special Features
7
Ethernet Setup
8
Auto Tuning
6
Video Input Setup
5
Signal Source
4
Software Upgrade
3
Channel Search
2
Signal Strength
1
Go Back
0
Main Menu Connections
Press OK to select the channel or input that is tuned when
the VCR key is pressed on the remote.
Select which input or channel should be automatically tuned
when a button listed below is pressed on the remote control.
RCA SAT2
Front Input
SAT-CABLE (Satellite or Cable Box)
Front Input
DVD
Front Input
VCR2 (AUX default)
Front Input
VCR
Front Input
AUDIO (Audio Receiver/Amp)
Front Input