


VCR Features
Chapter 4 35
Tracking
Your VCR has automatic tracking which removes streaks and noise from the picture. Automatic
tracking is activated when you insert a tape or turn on the VCR. Occasionally you may need to
manually adjust tracking, especially if the tape was recorded on a different VCR. Use the
TRACKING
–
/+ buttons on the VCR front panel or remote control to remove streaks and noise.
You can also use tracking when pausing a tape to reduce the noise of the stilled picture.
When manually adjusting the picture, automatic tracking is turned off. To turn automatic tracking
back on, eject the tape and reinsert it.
Note: Tracking has no effect when recording– only during playback.
Some lines cannot be avoided with the VR355 model VCR due to the fact it is a 2-head VCR.
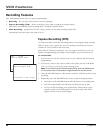
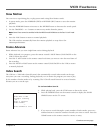
0:30:00
Hours
Minutes
Seconds
Time Counter
The time counter shows the actual time used when recording or playing back a
tape. The time counter helps locate the beginning or end of recorded events. It
resets to 0:00:00 whenever a tape is ejected from the VCR.
For example, if you record a 30–minute program at the beginning of a tape,
rewind it, and then want to go to the end of the first program to start another
recording:
1. Press the INFO button twice to display only the time counter.
2. Press the CLEAR button to reset the time counter to 0:00:00.
3. Press the remote control’s FORWARD button (FWD on the VCR) to advance
a tape until the time counter reads 0:30:00.
4. Press the STOP button. This is the approximate end of a 30-minute program
(you may want to press the PLAY button to verify). When the tape is cued
correctly, you can begin recording.
5. Press the INFO button to remove the time counter from the screen and
return to the normal display mode.