13
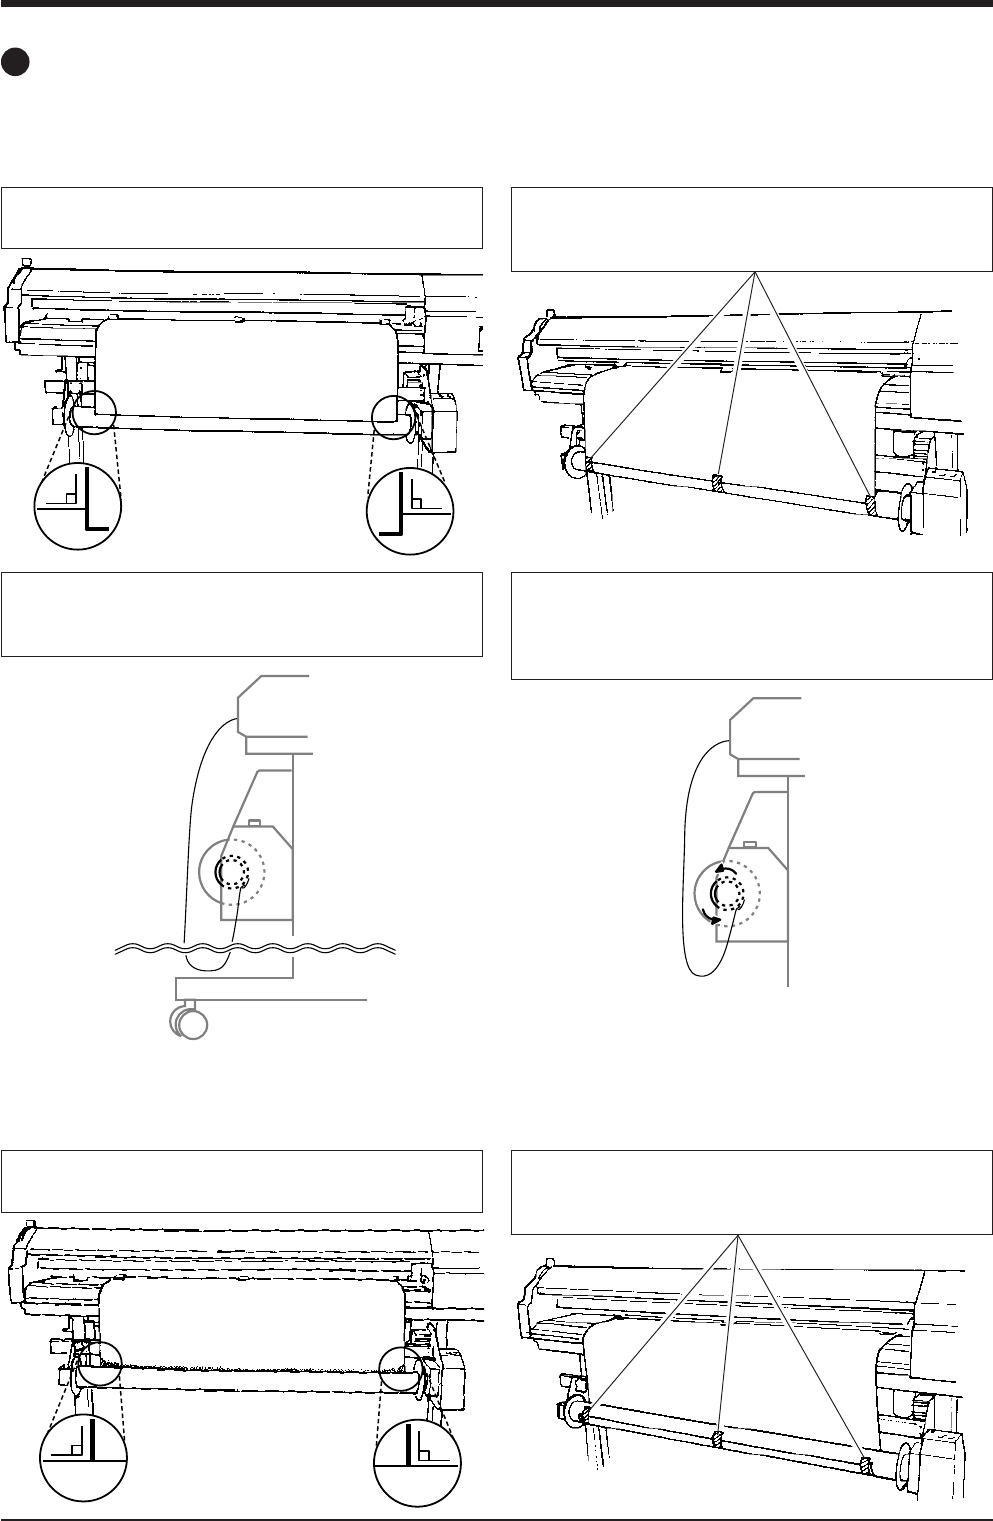
Pull out material so that it is perpendicular to the paper
tube.
1
To prevent the pulled-out material from becoming
crooked, secure with tape at the two edges and center, as
shown in the figure.
2
Backward Take-up (BACKWARD)
The printed surface is moved to the inner side and taken up
Securing the Material in Place
Forward Take-up (FORWARD)
The printed surface is moved to the outer side and taken up
Front
Pull out the material and ensure a certain amount of slack,
as shown in the figure. Move the sheet loading lever to
secure the material in place.
3
Move the [MANUAL] switch to the [FORWARD]
setting and take up one turn's worth of material.
After take-up, maintain slack as shown in the figure to keep
the material from being drawn taut by take-up.
4
Front
Pull out material so that it is perpendicular to the paper
tube.
1
To prevent the pulled-out material from becoming
crooked, secure with tape at the two edges and center, as
shown in the figure.
2
Front <---


