


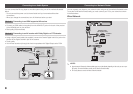
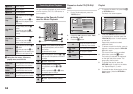


3. Press the ▲▼ buttons to select Wired
Network Settings, and then press the
v
button. The Wired Network Settings
screen appears.
4. Select the Internet Protocol Setup field,
and then press the
v
button.
5. Press the ▲▼ buttons to select Manual,
and then press the
v
button.
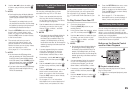
6. Press the ▼ button to go to the first
entry field (IP Address).
7. Use the number buttons on your remote
to enter numbers.
8. When done with each field, use the ►
button to move to the next field. You
can also use the other arrow buttons to
move up, down, and back.
9. Enter the IP Address, Subnet Mask,
and Gateway values in the same way.
10. Press the ▼ button to go to DNS.
11. Press the ▼ button to go to the first
DNS entry field.
12. Enter the numbers as above.
13. Press the RETURN button on your
remote control.
14. Run a Network Test to ensure the player
has connected to your network.
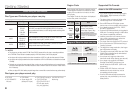
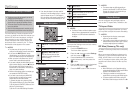
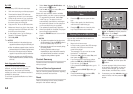
Network Test
Use this menu item to check whether your
network connection is working or not.
Network Status
Use to check whether a connection to a
network and the Internet has been established.
BD-Live Internet Connection
Set to allow or prohibit an Internet connection
when you use the BD-LIVE service.
• Allow (All) : The Internet connection is
allowed for all BD-LIVE contents.
• Allow (Valid Only) : The Internet
connection is allowed only for BD-LIVE
contents containing a valid certificate.
• Prohibit : No Internet connection is allowed
for any BD-LIVE content.
✎
NOTES
`
What is a valid certificate?
When the player uses BD-LIVE to send the
disc data and a request to the server to certify
the disc, the server uses the transmitted data
to check if the disc is valid and sends the
certificate back to the player.
`
The Internet connection may be restricted
while you are using BD-LIVE contents.
Using BD-LIVE™
Once the player is connected to the network,
you can enjoy various movie-related service
contents using a BD-LIVE compliant disc.
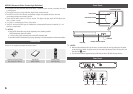
1. Attach a USB memory stick to the
USB jack on the front of the player, and
then check its remaining memory. The
memory device must have at least 1GB
of free space to accommodate the BD-
LIVE services.
2. Insert a Blu-ray Disc that supports BD-
LIVE.
3. Select an item from various BD-LIVE
service contents provided by the disc
manufacturer.
✎
NOTES
`
The way you use BD-LIVE and the provided
contents may differ, depending on the disc
manufacturer.
The DLNA Function
DLNA lets you play music, video, and photo
files located in your PC or NAS on the player.
To use DLNA with your player, you must
connect the player to your network.
(See pages 11~12).
To use DLNA with your PC, you must install
DLNA software on your PC.
If you have NAS, you can use DLNA without
any additional software.
To download DLNA software
1. Go to Samsung.com
2. Click Support, enter your player’s
product number in the field that
appears, and then click Product.
3. On the next screen, click Get downloads
under Downloads.
4. Click Software on the next page.
5. Click the icon in the DLNA line under File
to start the download.
For instructions explaining how to play content
located on your PC, see page 15.
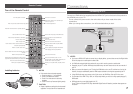
System Settings
Initial Settings
By using the Initial Settings function, you can
set the language, Network Settings, etc.
For more information about the Initial Settings
function, refer to the Initial Settings section of
this user manual (page 9).
Quick Start
You can turn on the power quickly by
decreasing the boot time.
✎
NOTES
`
If this function is set to On, Standby power
consumption will be increased.
Anynet+ (HDMI-CEC)
Anynet+ is a convenient function that offers
linked operations with other Samsung players
that have the Anynet+ feature.
To operate this function, connect this player to
an Anynet+ Samsung TV with an HDMI cable.
With Anynet+ on, you can operate this player
using a Samsung TV remote control and start
disc playback simply by pressing the PLAY
( ) button on the TV’s remote control.
For more information, please see the TV user
manual.
✎
NOTES
`
This function is not available if the HDMI cable
does not support CEC.
`
If your Samsung TV has an Anynet+ logo, then
it supports the Anynet+ function.
`
Depending on your TV, certain HDMI output
resolutions may not work.
Please refer to the user manual of your TV.
`
If you have Anynet+ turned on, when you
turn off the product, disconnect, and then
reconnect the power cable, the product turns
on automatically to re-establish the Anynet+
connection. After about 15 seconds, it turns off
again automatically.
`
Some Samsung TVs, when connected to this
product using the Anynet+ function will, when
you turn them on, display a warning popup
message saying no connection has been
found. Never-the-less, the Anynet+ connection
is properly established and available to use.
12