11
ENG
Installing the Display on the Wall Attachment Panel (continued)
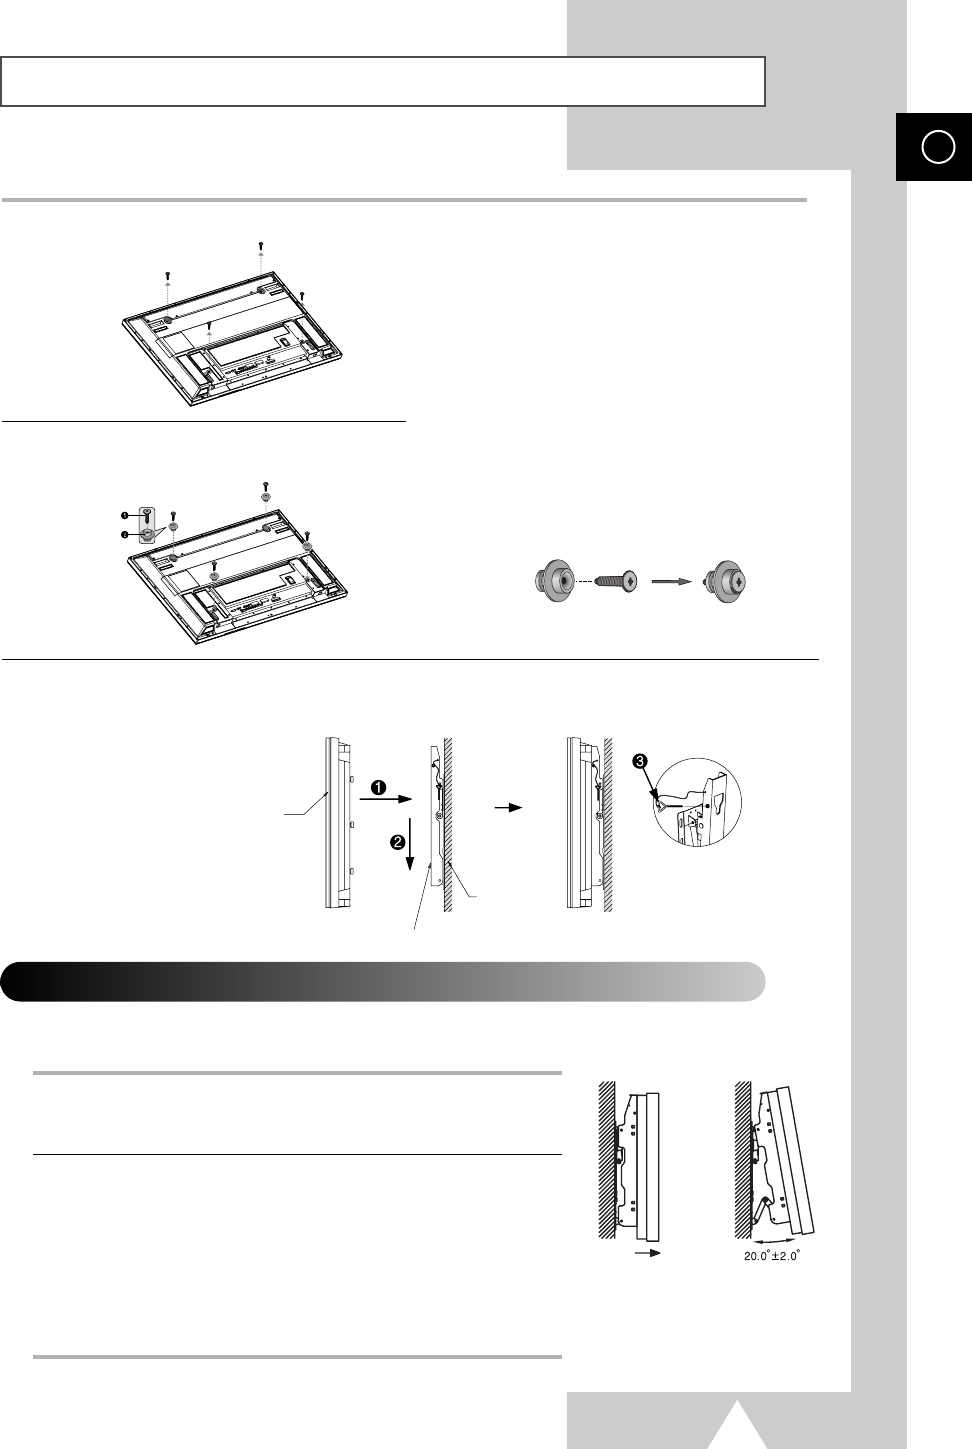
1 Remove the screws from the back of the PDP.
3 Tighten the screws of the plastic hanger to the
back side of the PDP.
4 Put the 4 pegs on the PDP in the grooves of the wall mount bracket and pull down on the PDP (!) to
secure it to the wall mount bracket (@). Tighten the screws as shown (#) so that the PDP cannot be
separated from wall mount bracket.
2 Use the screws and assemble the plastic
hanger.
☛
◆ Please ask the installers to install the
wall mount bracket.
◆ Please be sure to check if the plastic
hanger is completely secured on both
the left and right side after hanging
the PDP on the wall mount bracket.
◆ Please avoid catching your fingers
while installing and adjusting the
angle.
◆ Please tightly secure the wall mount
bracket to the wall to avoid injury
from a falling PDP.
Connecting External Devices to the PDP
1 Be sure to remove the safety pins underneath the PDP.
◆ If the safety pins are not removed, the angle cannot be adjusted.
Any attempt to do so may cause damage to the PDP.
2 Pull out the bottom of the PDP (which has been attached to the Wall
Mount Bracket) in the direction indicated by the arrows (refer to
the illustration) until it clicks.
◆ Using the PDP After Connecting External Devices.
Be sure to secure the PDP by inserting the 2 safety pins after
readjusting the angle of the PDP to 0
o
.
◆ For safety, be sure to secure the PDP using the safety pins.
If the safety pins are not used, the PDP may fall, causing serious
injury.
➢
The exterior of the PDP may be different than the picture.
(Assembly and installation of the plastic hanger is the same.)
◆
To connect external devices such as a DVD or a Home Theater System to the PDP, please refer
to following instructions:
PDP panel
Wall attachment panel bracket
Wall
1_BN68-00630T-00_Eng 6/9/04 9:15 AM Page 11


