


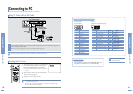


Connecting to PC
Setting up the PC Environment
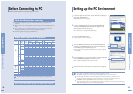
Before Connecting to PC
Check the following before connecting the projector to a PC.
Connecting to PC Before Connecting to PC
58 59
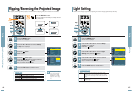
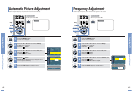
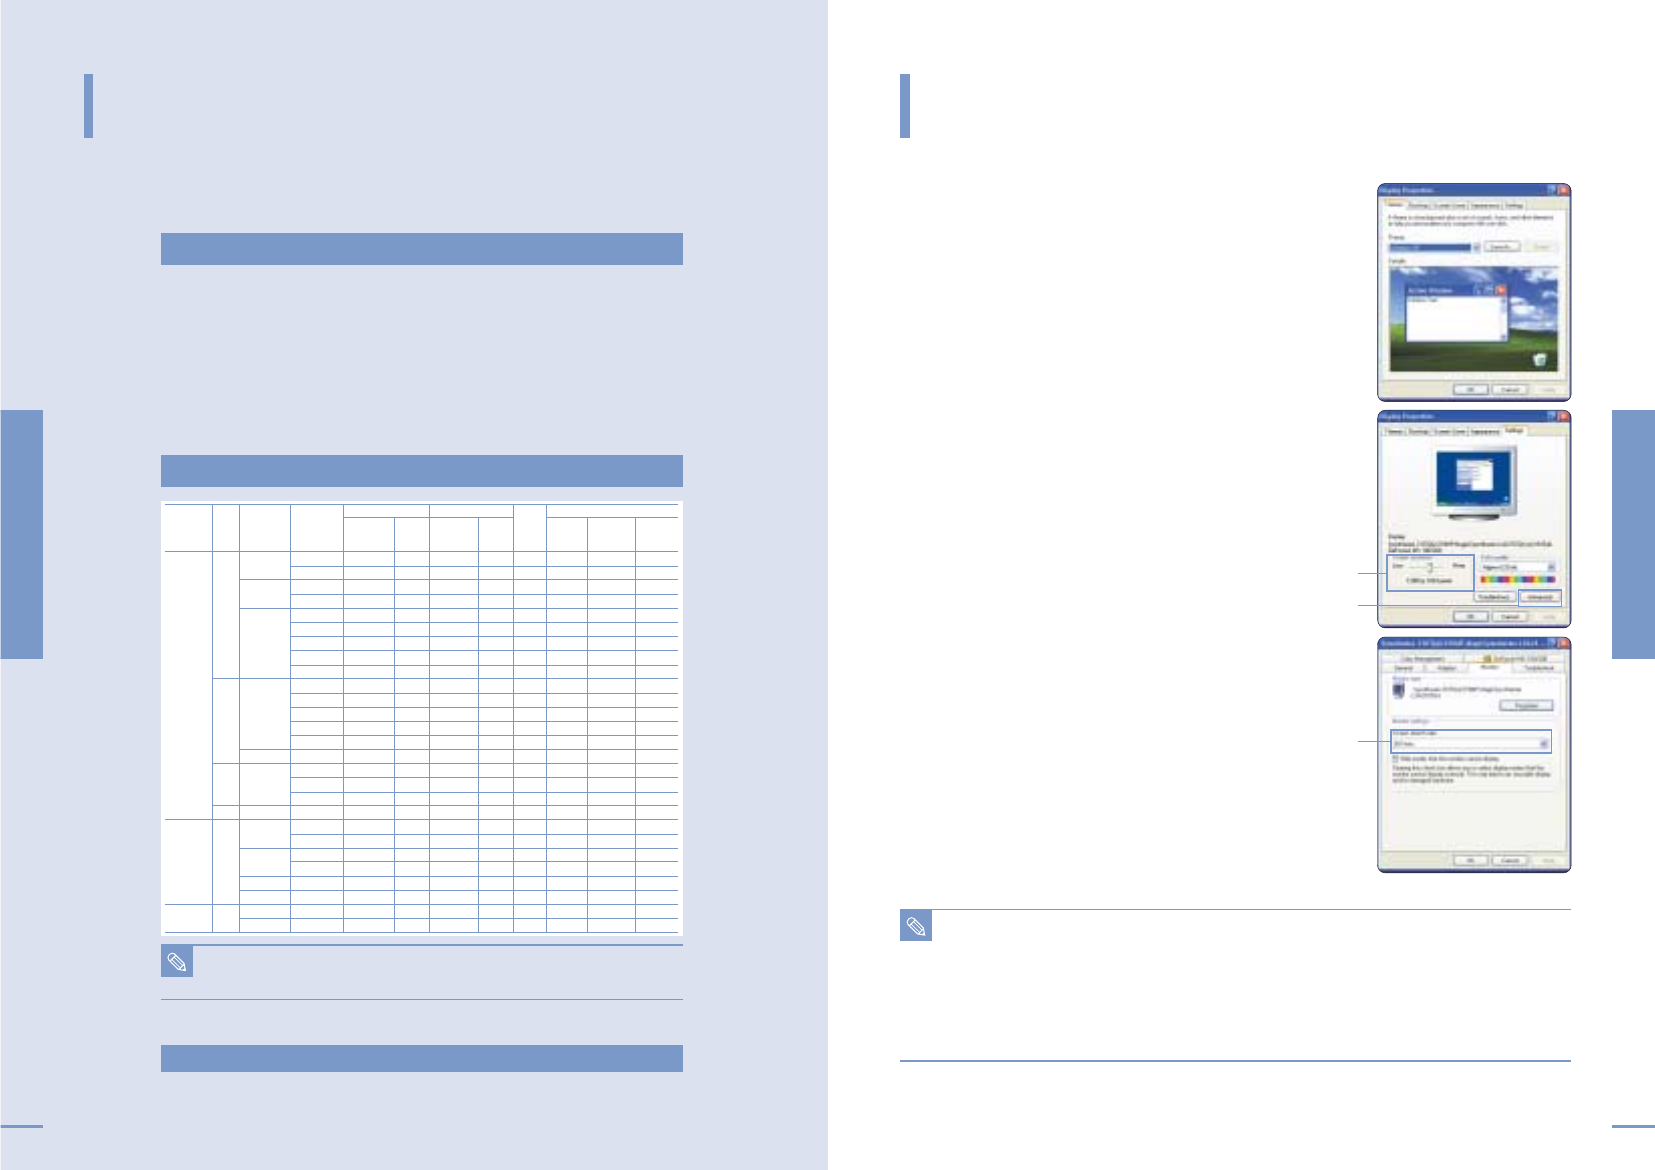
1
Click the right mouse button on the Windows wallpaper
and click on Properties.
Display Properties tab will appear.
2
Click on Settings tab and set the Screen resolution by
referring to Resolution described in the display mode
table supported by this projector.
■
You do not have to change Color quality setup.
3
Press the Advanced button.
Another property window will appear.
4
Click on Monitor tab and set the Screen refresh rate by
referring to Vertical Frequency described in the display
mode table supported by this projector.
■
Set up both the vertical and horizontal frequency instead of Screen
refresh rate.
5
Press the OK button to close the window and press the OK
button in Display Properties window to close.
■
The computer might begin restart automatically.
6
Shut down the PC and connect to the projector. (Page 60)
1
2
3
4
640 x 350
720 x 400
640 x 480
800 x 600
832 x 864
1024 x 768
1280 x 1024
1920 x 1080i
1280 x 720p
720 x 480p
720 x 576p
720 x 480i
720 x 576i
800 x 449
832 x 445
900 x 449
936 x 446
800 x 525
864 x 525
832 x 520
840 x 500
832 x 509
1024 x 625
1056 x 628
1040 x 666
1056 x 625
1048 x 631
1152 x 667
1344 x 806
1328 x 806
1312 x 800
1688 x 1066
2200 x 1125
2640 x 1125
1650 x 750
1980 x 750
858 x 525
720 x 576
858 x 525
864 x 625
31.47
37.86
31.47
37.93
31.47
35.00
37.86
37.5
43.27
35.16
37.88
48.08
46.87
53.67
49.73
48.36
56.4
60.02
63.981
33.75
28.125
45
37.5
31.5
31.25
15.73
15.625
P
P
N
N
N
N
N
N
N
N/P
P
P
P
P
N
N
N
P
P
X
X
X
X
X
X
X
X
70
85.1
70
85
60
66.7
72.8
75
85
56.3
60.3
72.2
75
85.1
74.6
60
70.1
75
60.02
60
50
60
50
60
50
60
50
N
N
P
P
N
N
N
N
N
N/P
P
P
P
P
N
N
N
P
P
X
X
X
X
X
X
X
X
25.175
31.5
28.322
35.5
25.175
30.24
31.5
31.5
36
36
40
50
49.5
56.25
57.284
65
75
78.75
108
74.25
74.25
74.25
74.25
27
27
13.5
13.5
O
O
O
O
O
O
O
O
O
O
O
O
O
O
O
O
O
O
O
O
O
O
O
O
O
O
O
O
O
O
O
O
O
O
O
O
O
O
O
O
O
O
O
O
O
X
X
X
X
X
X
X
X
X
X
X
X
X
X
X
X
X
X
X
X
X
X
X
X
X
X
X
X
SOY
SOY
SOY
SOY
SOY
SOY
SOY
SOY
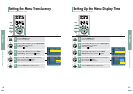
Mode
Resolution
(H x V)
Total
Resolution
Frequency
[KHz]
Polarity
Horizontal Sync
Frequency
[Hz]
Polarity
Vertical Sync
Pixel
Clock
[MHz]
Separate Composite
SOG
(Sync-On
-Green)
Sync Type
VGA
SVGA
XGA
SXGA
HD
SD
Source
PC
&
DVI
PC
&
DVI
&
Component
Component
■
Adjust the PC display setting to the resolution and frequency supported by the
projector.
■
Refer to the PC user manual (graphic and sound card) when connecting the projector
to PC.
■
Do not connect power cord until all connections are completed. It may result in
damage to the product if you connect power during connection.
■
Check the graphic card port type installed in PC.
Check the following before connecting:
Refer to "Rear Side and Cables" on page 10 for cables used for connection.
NOTE
The table complies to IBM/VESA requirements and is based on analog signal input.
Display modes supported by this projector
Setting up the PC Environment
NOTE
■
Process might vary depending on the type of computers or Windows versions.
■
This appliance supports up to 32 bits per pixel in Color quality when it is used as a PC monitor.
■
Projected images may differ from the monitor depending on monitor manufacture or Windows versions.
■
If a band or an unusual signal appears on the projector when PC is turned off or disconnected, switch to
COMPOSITE mode using the SOURCE button or check that PC is properly connected.
■
When connecting the projector to PC (including DVI connection), check that PC setup complies to display settings
supported by this projector. If not, there may be signal problems.