OPERATING GUIDE
CONNECTING TO YOUR COMPUTER
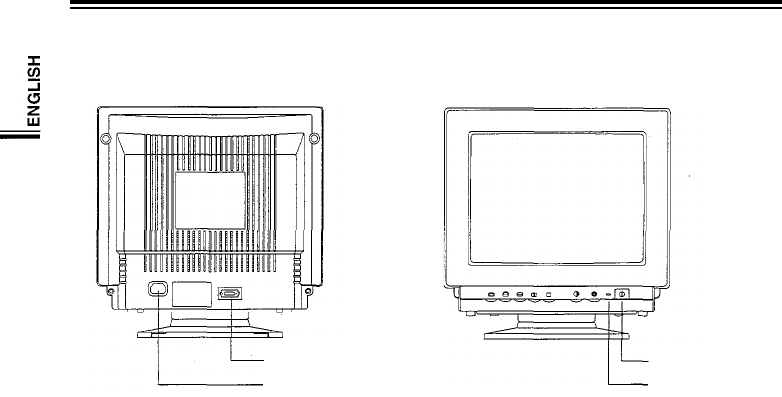
Signal Input
AC Cord Inlet
Power (On/Off)
Power Indicator
This monitor can be connected to any IBM compatible analog display adapter.
Such adapters include VGA, 8514/A, XGA, and the built-in video system of IBM PS/2 computers
and compatibles.
To attach the monitor to your system, use the following instructions:
1.
Turn off the power to the computer.
2.
Insert the AC power cord into monitor
and then into an AC power outlet.
3.
Connect the 9-pin side of the signal
cable to the 9-pin D-SUB connector on
the rear side of the monitor.
4.
Connect the 15-pin side of the signal
cable to the video output port of your
video controller.
Note: Please see the connector pin
assignment chart for the video controller
(video controller manual) and the connector
pin assignment chart for the monitor (Page
10 this manual) if the video controller does
not have a standard 15 pin D-SUB connector.
5.
Before turning on the power to the
monitor and computer, check your
computer’s owner’s manual for
instructions about turning on equipment
connected to the computer. Also, check
for any instructions for your video system
when using a multi-sync monitor. In
some cases, jumper or switch settings
may be required for the video board to
output extended resolution modes.
6.
To turn on the monitor, push the power
switch. The power indicator LED will
light. To turn the monitor off, push the
power switch once again. The power
indicator LED will also turn off.
6


