48_ web viewer
web viewer
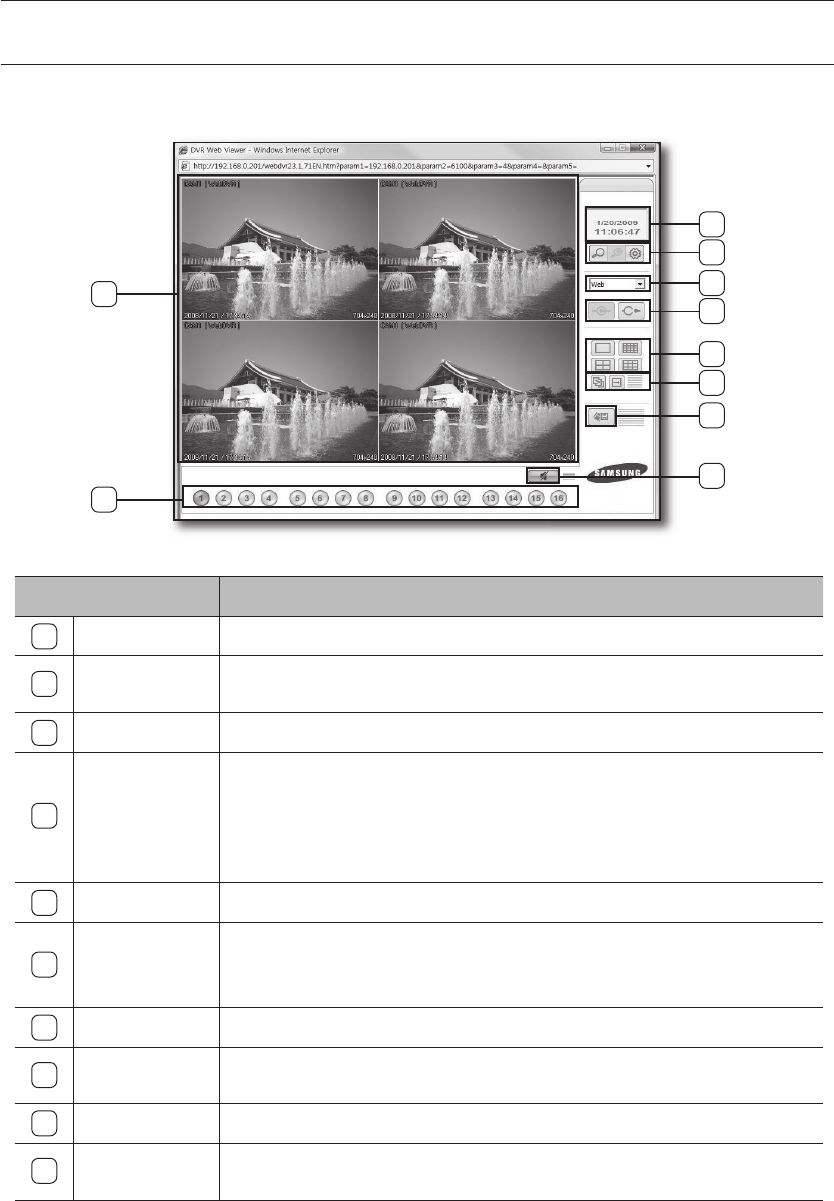
USING LIVE VIEWER
Enter the IP address of the DVR in the web browser's address bar to display the web viewer when the DVR is
connected in the "Local Connection" window.
Name Description
1
Main Screen Displays the Live image of the DVR that is currently connected.
2
Camera Selection
Displays the channel number of the camera that is connected to the DVR. If you click this in
Single mode, the video image of the connected camera will be displayed.
3
PC Time Displays the PC use time of the current user.
4
Search/Local Setup/
Remote Setup
- Search: Use this if you want to switch to search mode.
- Local Setup: The Local Setup button is enabled only if a DVR isn't connected.
- Remote Setup: Use this if you want to confi gure the DVR settings.
The Search and Remote Setup buttons are enabled only if a DVR is connected.
5
DVR Selection Box Select a DVR group to connect to.
6
Connect/Disconnect
- Connect: Use this to connect to a DVR.
Connection is made by the DVR group.
- Disconnect: Use this to disconnect from the current DVR.
7
Split Screen Switch the split mode. (1/4/9/16-split)
8
Auto Sequence,
Manual Sequence
- Auto Sequence : Automatically sequences the camera video images.
- Manual Sequence : Manually sequences the camera video images.
9
Save AVI Saves the current Live video in the format of AVI.
10
Mute
If you click this, you can hear the voice sound alone from the speaker in the web viewer and,
click it again to disable the speaker.
1
2
3
4
5
6
7
8
9
10
02235A_SHR-1041K_ENG.indb 48 2009-02-17 오전 10:51:19


