


21
English
signals usually will not need noise reduction.
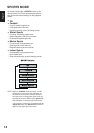
MPEG NR OPERATION
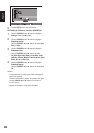
1
Press the MENU button on the remote control to
display the Main menu.
2
Use
the
CURSOR ◄and►buttonstohighlight
ADVANCED. Press the OK button.
3
Use
the
CURSOR ▲and▼buttonstoselect
MPEG NR. Press the OK button.
4
Use
the
CURSOR ▲and▼buttonstoselectOff,
Weak, Medium or Strong. Press the OK button.
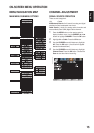
DYNAMIC AI OPERATION
1
Press the MENU button on the remote control to
display the Main menu.
2
Use
the
CURSOR ◄and►buttonstohighlight
ADVANCED. Press the OK button.
3
Use
the
CURSOR ▲and▼buttonstoselectthe
Dynamic AI. Press the OK button.
4
Use
the
CURSOR ▲and▼buttonstoselectOff,
Weak, Medium or Strong. Press the OK button.
NOTE : Please set PICTURE MODE to User then can turn
on this function PAGE 19.
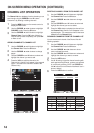
PICTURE (PIX) SHAPE OPERATION
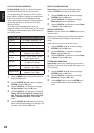
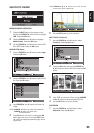
Pix Shape- Divided into three categories. The options
during the Pix Shape mode change by the detection of
HD, SD or PC inputs.
HD: Full / WaterGlass / Zoom1 / Zoom2
SD: Standard / WaterGlass / Zoom1 / Full / Zoom2
PC: Normal / Full / Dot by Dot
1
Press the MENU button on the remote control to
display the Main menu.
2
Use
the
CURSOR ◄and►buttonstohighlight
ADVANCED. Press the OK button.
3
Use
the
CURSOR ▲and▼buttonstoselectPix
Shape.
Press the OK button.
4
Use
the
CURSOR ▲and▼buttonstoselect
Standard, WaterGlass, Zoom1, Full or Zoom2.
Press the OK button.
NOTE : The remote controls of HD cable and satellite
boxes also have similar zoom choices. Try having
the TV setting on FULL first, and adjust via the
cable/satellite box's remote control.
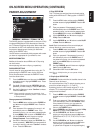
BACKLIGHT OPERATION
1
Press the MENU button on the remote control to
display the Main menu.
2
Use
the
CURSOR ◄and►buttonstohighlight
ADVANCED.
Press the OK button.
3
Use
the
CURSOR ▲and▼buttonstoselect
Backlight.
Press the OK button.
4
Use the CURSOR ◄and►buttonstoselectthe
desired value between 0 to 50.
NOTE:
•
This item will be grayed out if you turn on the Light
sensor function.
•
Please set Light sensor operation to off then can turn on
this function.
LIGHT SENSOR OPERATION
Picture brightness will automatically be boosted or reduced
depending on the room brightness.
1
Press the MENU button on the remote control to
display the Main menu.
2
Use the CURSOR ◄and►buttonstohighlight
ADVANCED. Press the OK button.
3
Use the CURSOR▲and▼buttonstoselectLight
Sensor. Press the OK button.
4
Use the CURSOR▲and▼buttonstoselectOff
,Low ,Middle or High. Press the OK button.
NOTE:
•
The initial setting of Light sensor in the Home mode is
High.
•
Change this setting to Middle, Low or Off if a picture is
too dark in your home.
OSD DISPLAY TIME OPERATION
OSD Display Time
1
Press the MENU button on the remote control to
display the Main menu.
2
Use
the
CURSOR ◄and►buttonstohighlight
ADVANCED.
Press the OK button.
3
Use
the
CURSOR ▲and▼buttonstoselectthe
OSD Display Time option.
Press the OK button.
4
Use
the
CURSOR ◄and►buttonstochoose
from 20 Seconds, 30 Seconds, 40 Seconds, 50
Seconds or 60 Seconds.
Press the OK button.
NEXT PAGE OPERATION
NEXT PAGE - Jump to next page menu.
1
Press the MENU button on the remote control to
display the Main menu.
2
Use the CURSOR◄and►buttonstohighlight
ADVANCED. Press the OK button.
3
Use the CURSOR▲and▼buttonstoselectthe
Next Page.
4
Press the OK button to jump to the next page.
120Hz CONDITION OPERATION
1
Press the MENU button on the remote control to
display the Main menu.
2
Use the CURSOR◄and►buttonstohighlight
ADVANCED. Press the OK button.
3
Use the CURSOR▲and▼buttonstoselectthe
Next Page. Press the OK button.
4
Use the CURSOR▲and▼buttonstoselectthe
120Hz Condition option.
5
Use the CURSOR◄and►buttonstoadjustthe
120Hz Condition setting to On or Off.