


47
Settings
SETTINGS
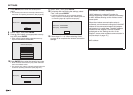
6 Select “Next”, then press ENTER.
• If selecting “Yes” in the step 5, go to the step 8.
7 Enter your DNS address.
Enter your DNS address.
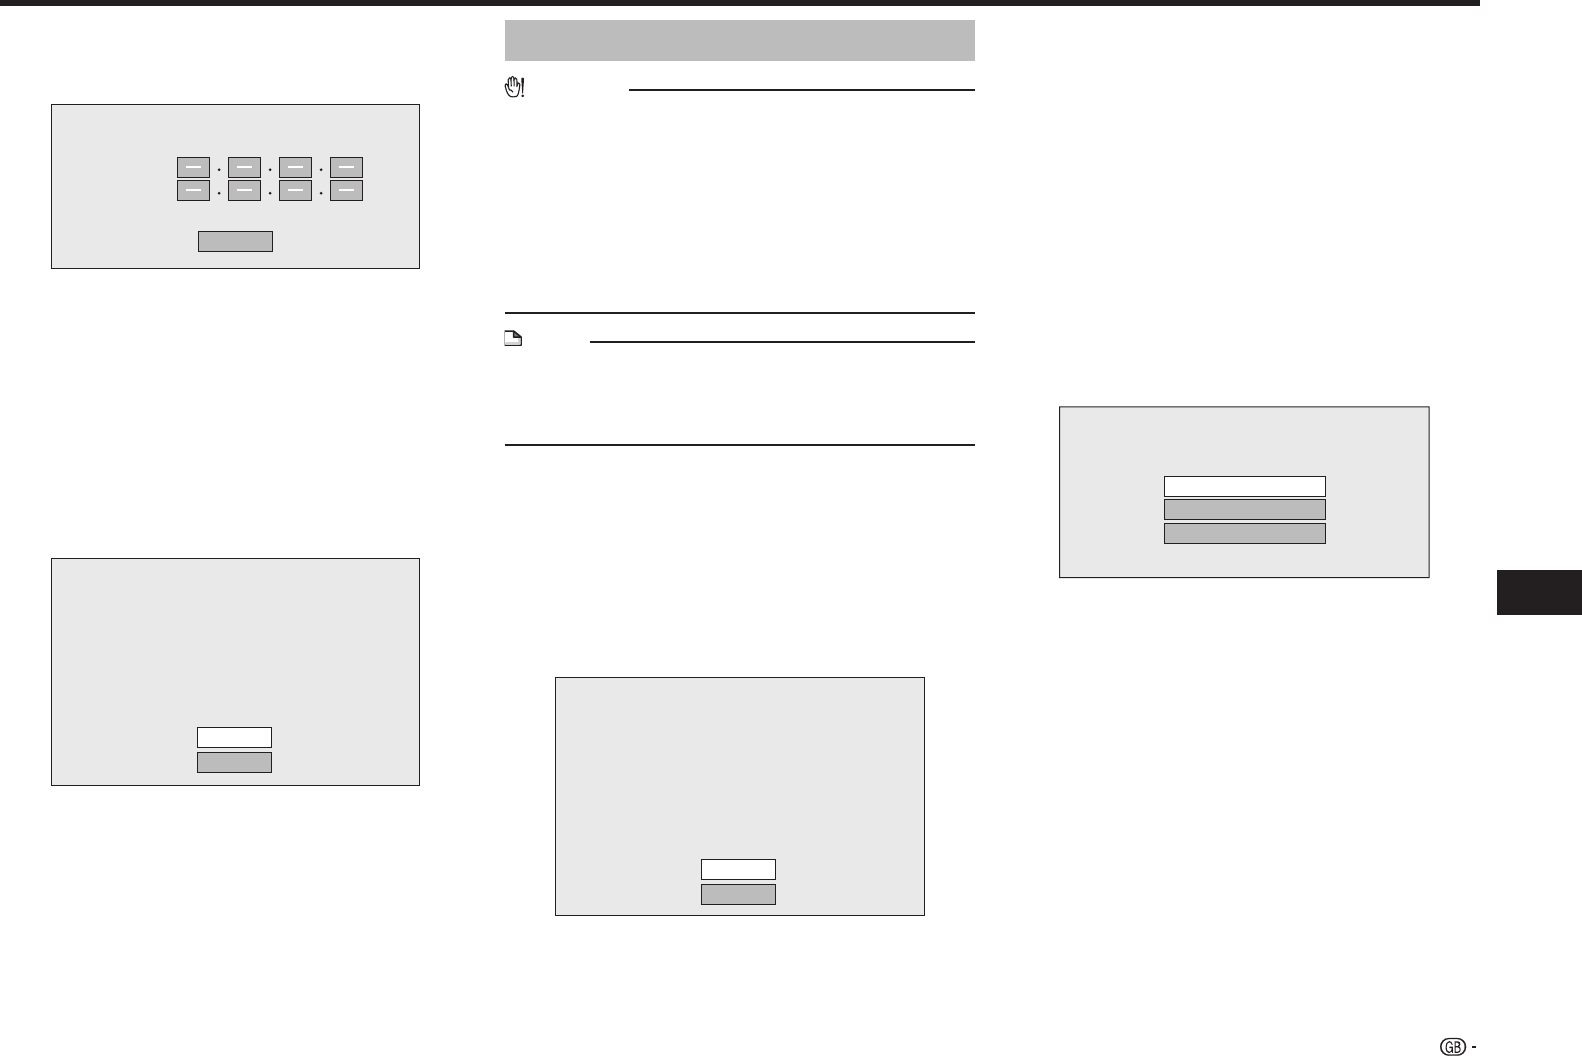
Primary
Secondary
Next
• The primary and secondary DNS addresses are
entered using the screen for inputting characters.
(See page 49.)
Regarding each of the setup values, confirm the
specifications of your broadband router.
8 Select “Next”, then press ENTER.
9 For testing the connection to the Internet, after
confirming the settings, press a/b to select
“Test”, then press ENTER.
• “Test” is available only when setting to obtain the IP
address automatically. “Test” cannot be selected if
the IP address has not been obtained automatically.
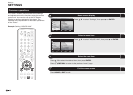
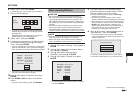
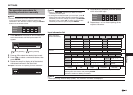
Confirm the current setting.
: xxx xxx xxx xxx
: xxx xxx xxx xxx
: xxx xxx xxx xxx
: xxx xxx xxx xxx
xxx xxx xxx xxx
: xx xx xx xx xx xx
IP Address
Netmask
Gateway
DNS Address
MAC Address
Test
Complete
• As a result of the test, if the Internet connection
fails, enter the setup values manually.
10 Press a/b to select “Complete”, then press
ENTER.
11 Press HOME or EXIT to return to the HOME
screen.
• To perform other settings, press j.
When selecting Wireless
CAUTION
• We recommend writing down the MAC address of
the connected wireless LAN adapter in this operation
manual (page 48) and keeping it in a safe place. The
MAC address is labeled on the adapter or displayed on
the “Setting the info. of the Ethernet” screen (See step
4 below).
• When performing the wireless communication setup,
security information for the wireless router/access
point (WEP, WPA or WPA2 key) is required. Check your
wireless router/access point’s information prior to setup.
NOTE
• Wireless communication setup cannot be performed
when the wireless LAN adapter is not inserted.
• Before this player can access the Internet wirelessly,
setup of a wireless router/access point is required.
1 Press a/b to select “Settings”, then press d or
ENTER.
2 Press a/b to select “Communication Setup”,
then press d or ENTER.
3 Press a/b to select “Ethernet Setup
(Wireless)”, then press d or ENTER.
4 Press a/b to select “Change”, then press
ENTER.
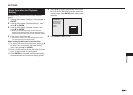
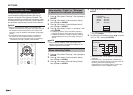
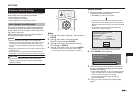
Setting the info. of the Ethernet
: xx xx xx xx xx xx
: Not Selected
: Auto Setup
: Auto Setup
: Auto Setup
: Auto Setup
MAC Address
Access Point
IP Address
Netmask
Gateway
DNS
Change
Initialize
• For initializing the current setting, select “Initialize”,
then press ENTER.
5 The player scans all of the available access
points and displays the points with the “Other
Network” selection bar on the screen.
• During searching access point(s), “Accessing...”
appears on the screen.
• Up to 6 items (5 access points and the “Other
Network” selection bar) are displayed on the screen.
• When there are six or more items retrieved, display
the next screen by selecting “Next”, then pressing
ENTER. (The “Other Network” selection bar is
always displayed last.) When no available access
points are retrieved, only the “Other Network”
selection bar is displayed on the screen.
6 Press a/b to select “desired access point” or
“Other Network”, then press ENTER.
• For access points which are set to hide the SSID
using the wireless router, select “Other Network” to
set the access point.
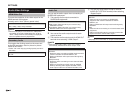
Select the access point.
XXXXXXXXXXXX
YYYYYYYYYYYY
Other Network
• If selecting “desired access point”, go to step 9.
• If selecting “Other Network”, go to the next step.
(Continued on the next page)