


57
GB
/
PLAY
STOP
OPEN/
CLOSE
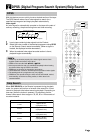
OPERATE
VCR/DVD
SELECTOR
VCR MENU
DVD SETUP
TAPE
SPEED
ON
SCREEN
TIMER
ON/OFF
TITLE
DVD MENU
DISPLAY
EJECT
FUNCTION
CONTROL
PROG/
REPEAT
CLEAR
RETURN
REV FWD
SET
ENTER
ZERO BACK
SKIP SEARCH
VCR DVDAM/PM
INPUT SELECT
PAUSE/STILL
REC
VCR/DVD COMBINATION
SLOW
CH
VCR DVD
SKIP
DPSS
AUDIO
OUTPUT
ANGLE
PROG
DV- NC70
DV- NC70X
G-CODE
DV- NC70W
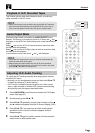
Playback of Hi-Fi Recorded Tapes
This Product will play back both video and audio, or audio-only
tapes recorded in the Hi-Fi mode.
• Stereo sound output is only possible using the AUDIO OUT terminals.
Sound from the radio frequency converter (RF OUT) is mono only. A
blue screen will appear if audio-only Hi-Fi tapes are played back.
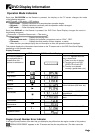
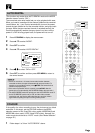
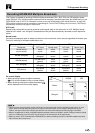
Audio Output Mode
The audio output mode is controlled by AUDIO OUTPUT on the
Remote. The Product is normally set to the Hi-Fi mode, with
and
displayed on the VCR Front Panel display, and normal stereo sound
output.
Select , and only the Hi-Fi Left channel audio is heard from both
the Right and Left speakers.
Select , and only the Hi-Fi Right channel audio is heard from both
the Right and Left speakers.
If you select the mono linear track,
and will disappear.
• Should the Hi-Fi output level be poor, the Product will automatically
select the mono linear track output.
• When playing back tapes which have only Hi-Fi sound recorded:
If Hi-Fi sound is not reproduced, or if there is some noise in the audio,
press CH ' / " until the sound improves.
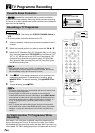
Adjusting Hi-Fi Audio Tracking
(To adjust the Hi-Fi tracking manually when playing back a poorly
recorded Hi-Fi tape.)
• Normally you can simultaneously press and hold both CH ' / "
to obtain the optimal Hi-Fi audio tracking.
• If Hi-Fi audio is unstable (frequent dropouts, etc.) with a rental
video, a tape recorded on another VCR, restore normal tracking
while playing back the tape as described below:
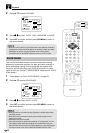
1 Press ON SCREEN on the Remote and select the Full Display
mode. (See page 36.)
2 Simultaneously press CH ' / ".
3 Press CH ' / " repeatedly at equal, short intervals until the
and indicators disappear from the On Screen Display (OSD).
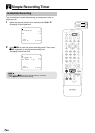
4 Press CH ' / " in the same manner while counting button
operations until the L and R indicators reappear and then
disappear again.
5 Press CH ' / " again for half the number of times counted in
step 4 above to obtain optimal track.
Playback