39
Enjoying Photo/Music/Video Playback
USB Operation Panel/Home Network
(DLNA) Operation Panel
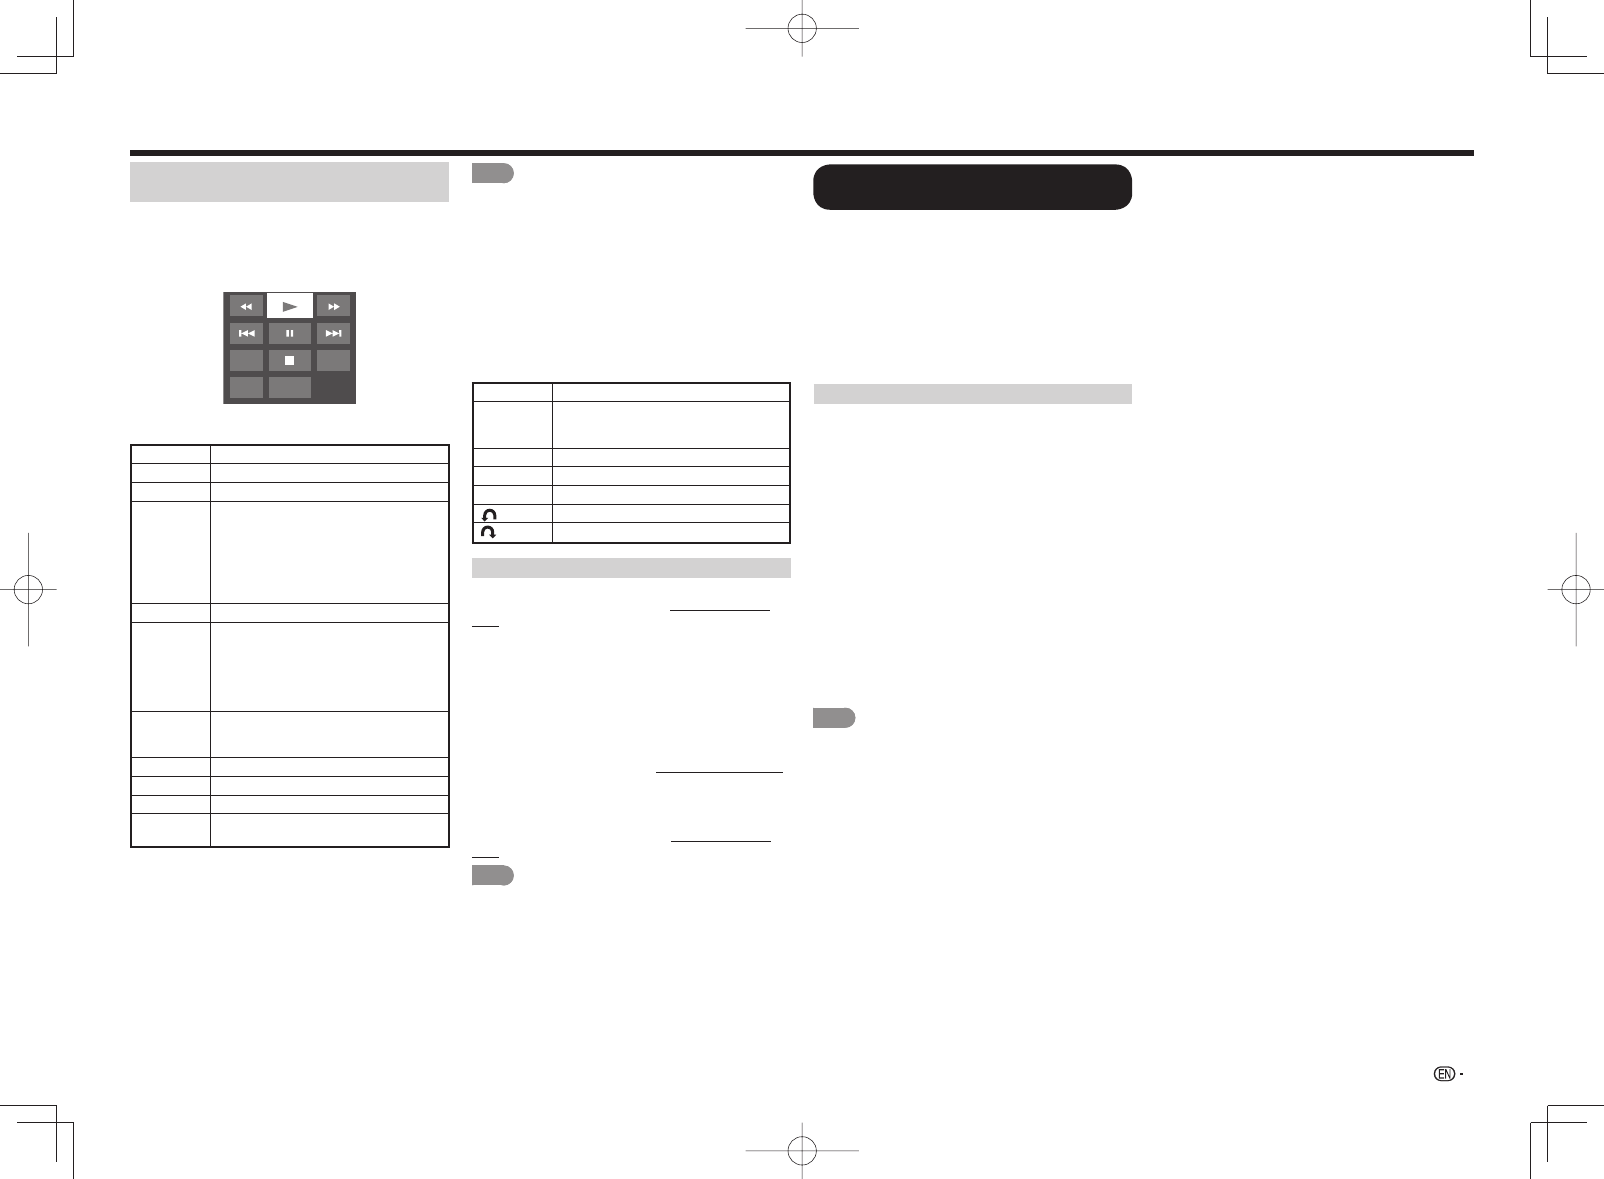
You can use the operation panel for video playback
operations.
You can call up this operation panel from "System
Options" > "View Option".
Example
Resume
Audio CC
Title
jump
Buttons for using the USB operation panel
Hold down to go in reverse.
d
Starts playback.
Hold down to fast forward.
Video without chapters: Press once to
return to the previous playback point.*
Press twice to return to the previous
fi le.
Video with chapters: Press once to
return to the previous chapter. Press
twice to return to the previous fi le.
)
Sets pauses and still pictures.
/
Video without chapters: Press once to
advance to the next playback point.*
Press twice to display the next fi le.
Video with chapters: Press once to
advance to the next chapter. Press
twice to display the next fi le.
Audio Change the audio when multiple
audio is available for the video you are
watching.
+
Playback stops.
CC Change the Closed Caption display.
Title Displays the title (edition).
Resume
jump
Jump to the scene where playback
was last stopped.
* During playback of a fi le without chapters, playback
points are set automatically. Playback points are set at
intervals of a one-tenth of playback time.
Example for a fi le with a playback time of 100 minutes:
Playback points are set every 10 minutes. Pressing
/
one time after viewing the fi le for 15 minutes
jumps to the 20-minute playback point.
NOTE
• Reverse/fast forward continues from one fi le to another
during continuous playback.
• Use "CC" on the operation panel to change the Closed
Caption display. You can also switch the Closed
Caption display by using "System Options" > "View
Option" > "Change CC" or by pressing CC on the
remote control unit.
• Use "Audio" on the operation panel to change the
audio. You can also switch the audio by using "System
Options" > "View Option" > "Change Audio".
Buttons for using the Home Network (DLNA)
operation panel
d
Starts playback.
Go to the beginning of a fi le by pressing
once or to the previous fi le by pressing
twice.
)
Sets pauses and still pictures.
/
Go to the next fi le.
+
Playback stops.
Jump back in a video.
Jump forward in a video.
DivX
®
Setup
This is the function to confi rm your registration code.
You need to register the code at http://www.divx.
com.
1
Press MENU to display the MENU screen.
2
Press
c
/
d
to select "Initial Setup", and then
press ENTER.
3
Press
a
/
b
to select "DivX
®
Setup", and then
press ENTER.
■
DivX
®
VOD Registration
You can fi nd your registration code on this menu.
You need to register the TV at http://www.divx.com
before playing the DivX content.
■
DivX
®
VOD Deregistration
You can fi nd your deregistration code on this menu.
You need to deregister the TV at http://www.divx.
com to release the registration.
NOTE
• This function is available only for the USB mode.
• This function may not work while an Internet
application is being used.
Playing Back Files from a Portable
Device or PC
With the remote playback function, you can use your
portable device to play back pictures, video, and
music on the home network server.
• This TV is a DLNA certifi ed Digital Media Renderer.
(DMR)
• To use the remote playback function, your portable
device must be a DLNA Certifi ed Digital Media
Controller.
• A wireless access point is required to use a
portable device.
Set Up Home Network
Make the settings for remote playback.
1
Press
c
/
d
to select "Initial Setup", and then
press ENTER.
2
Press
a
/
b
to select "Internet Setup", and then
press ENTER.
3
Press
a
/
b
to select "Set Up Home Network",
and then press ENTER.
4
Press
a
/
b
to select the specifi c adjustment
item, and then press ENTER to set each item.
■
Remote Control Play Settings
This setting allows the TV to perform remote
playback.
Permitted/Not allowed
■
Timeout Setup
This sets the time until the TV returns automatically
to TV mode after remote playback ends.
10 sec./60 sec./No
NOTE
• This function may not work while an Internet
application is being used.
• For information on the compatible formats, see
"Home Network (DLNA) Server Compatibility" on
page 36.


