


Note: RS-232 communications are limited to 15 m (50 ft.), whereas USB are limited to
5 m (16 ft.).
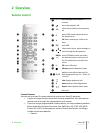
Triggers
Some Home Theater devices can be controlled through a 12 V signal. The projector
can output three 12 V (100 mA max) signals:
• TRIG1 for motorized screens control
• TRIG2 and TRIG3 are for motorized screen masks and anamorphic lens motors
control. See “Screen” and “Anamorphic Lens” on page 27 for instructions on
how to do configure them from OSD
Note: Three jack adapters are shipped with the projector.
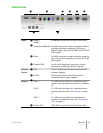
IR Emitter
The IR emitter sends the infrared pulses that sync the 3D glasses. Proceed as follows
to install the emitter:
1. place the emitter near the projector on a secure surface or use an appropriate
mount kit
2. connect the supplied 3D IR emitter to the projector 3D Sync Out output
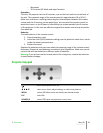
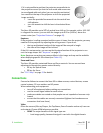
3D Glasses
The glasses are shipped with the battery already inserted in its compartment:
1. Remove the battery insulating sheet by pulling it. As a result of this, the
glasses turn on.
2. Press the button once (for less than 1 second) to turn them off. You will see
the indicator light ramp from bright to off.
For more information on glasses status and transitions, refer to “3D Glasses” on page
20.
To install the battery:
1. Open the battery cover.
2. Insert one CR2032 battery making sure the polarity match the mark inside the
battery cover.
3. Replace the cover.
Replace the battery with a new one when the glasses fail to work prop-
erly. Dispose of used battery according to local regulations. Keep away
from children.
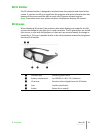
AC Power
Choose the AC power cord that is appropriate in your area among those shipped with
the product. Plug the female end of the power cord to the AC receptacle located on
the right hand side of the projector (100-240 V AC, 50-60 Hz) and the other end into a
grounded AC outlet. An high-quality surge protector is recommended while a UPS is
optional.
3 Installation Nero 3D
User Guide
17