10
GB
Using optional equipment
For details, refer to the operating instructions
supplied with the connected equipment. Some
buttons may not work depending on the
connected equipment.
1 Press HDMI 1, HDMI 2, HDMI 3, AV1,
AV2 or COMPONENT.
2 Press EXT.
3 While the EXT button lights up, press \/1
to turn the equipment on, then operate the
equipment using the following buttons.
z
•The N button has a tactile dot. Use the tactile dot
as a reference when operating other equipment.
REC
WIRELESS MENU
TOP MENU
MENU
F1 F2
BD/DVD
REC PAUSE REC STOP
TV
COMPO-
NENTMONITOR
AV1 AV2
HDMI 2HDMI 1
HDMI
HDMI 3
EXT
DIGITAL/
ANALOG
THEATRE
SYNC MENU
AUDIO
1
4
7
2
5
8
0
3
6
9
PROG
TV
1
2
3
4
5
7
6
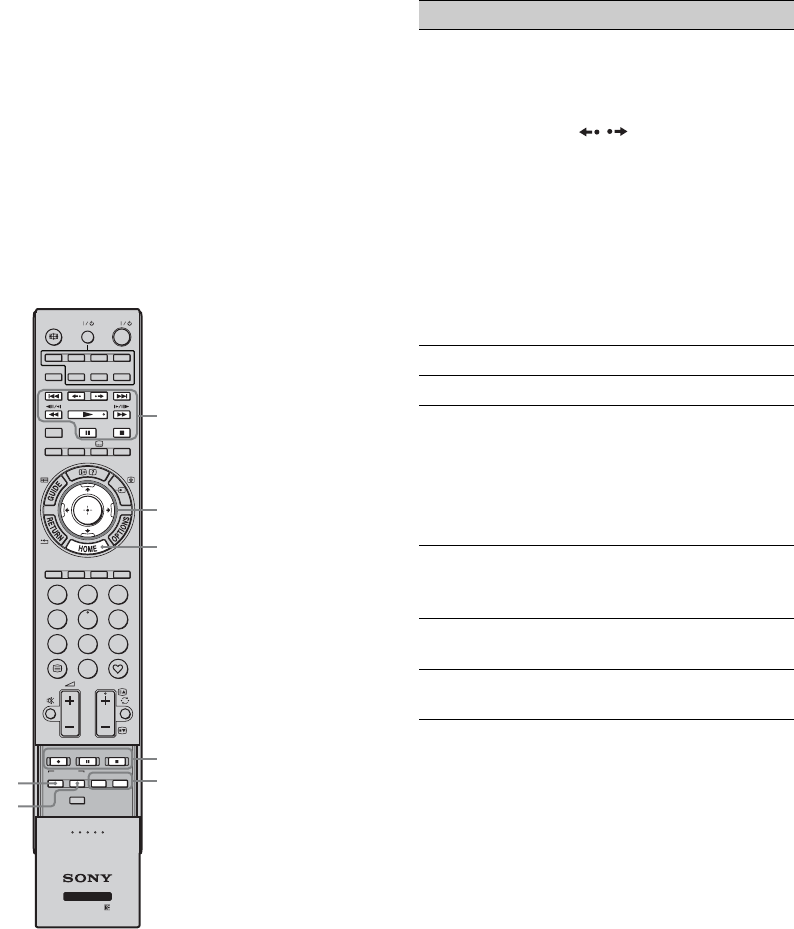
Item Description
1 BD/DVD
operating
buttons
• ./>: Goes to the
beginning of the previous/
next title/chapter/scene/
track.
• / : Replays the scene/
briefly fast forwards the
scene.
• m/M: Fast reverses/fast
forwards the disc when
pressed during playback.
• N: Plays a disc at normal
speed.
• X: Pauses the playback.
• x: Stops the playback.
2 F/f/G/g/3 Selects / confirms an item.
3 HOME Opens the menu.
4 DVD record
buttons
• z REC: Starts the
recording.
• X REC PAUSE: Pauses the
recording.
• x REC STOP: Stops the
recording.
5 F1/F2 Selects a function when using
a combination unit (e.g. a
DVD/HDD).
6 BD/DVD
MENU
Displays the BD/DVD disc
menu.
7 BD/DVD
TOP MENU
Displays the top menu of the
BD/DVD disc.
