


6
8
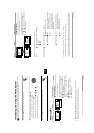
First Time Operation
Your TV is now ready for use
5
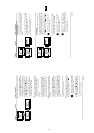
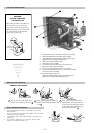
The Auto Tuning menu appears on the screen. Press the
OK button to select Yes.
6
The TV starts to automatically search and store all
available broadcast channels for you.
This procedure could take some minutes. Please be
patient and do not press any button. Otherwise the
automatic tuning will not be completed.
If no channels were found during the auto tuning
process then a new menu appears automatically on
the screen asking you to connect the aerial. Please
connect the aerial (see page 6) and press OK. The
auto tuning process will start again.
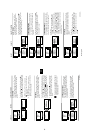
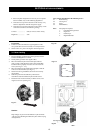
7
After all available channels are captioned and stored,
the Programme Sorting menu appears automatically
on the screen enabling you to change the order in
which the channels appear on the screen.
a)
If you wish to keep the broadcast channels in the
tunned order, go to step 8.
b)
If you wish to store the channels in a different order:
1 Press the or button to select the programme
number with the channel (TV Broadcast) you wish
to rearrange, then press the button.
2 Press the or button to select the new
programme number position for your selected
channel (TV Broadcast), then press .
3 Repeat steps b)1 and b)2 if you wish to change
the order of the other channels.
8
Press the MENU button to remove the menu from the
screen.
No channel found
Please connect aerial
Confirm
OK
Programme: 01
System: B/G
Channel: C21
Auto Tuning
Searching...
Programme Sorting
Select channel:
Exit:
MENU
Programme:
01 TVE
02 TVE2
03 TV3
04 C33
05 C27
06 C58
OK
Programme Sorting
Select new position:
Exit: MENU
Programme:
01 TVE
02 TVE2
03 TV3
04 C33
05 C27
06 C58 05 C27
OK
K
K
K
Do you want to start
automatic tuning?
Yes
No
OK
K
MENU
7
GB
Language
Select Language:
i
4
Svenska
Norsk
English
Nederlands
Français
Italiano
i
$
OK
Country
Select country:
i
4
Sverige
Norge
-
Italia
Deutschland
Österreich
i
$
OK
K
K
K
If picture slants, please
adjust picture rotation
Not necessary
Adjust now
OK
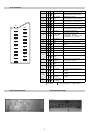
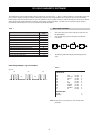
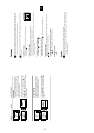
Switching On the TV and Automatically Tuning
The first time you switch on your TV, a sequence of menu screen appear on the TV enabling
you to: 1) choose the language of the menu screen, 2) choose the country in which you wish
to operate the TV, 3) adjust the picture slant 4) search and store all available channels (TV
Broadcast) and 5) change the order in which the channels (TV Broadcast) appear on the
screen.
However, if you need to change any of these settings, you can do that by selecting the
appropriate option in the (Set Up menu) or by pressing the Auto Start Up Button
on the TV set.
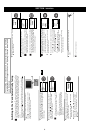
First Time Operation
continued...
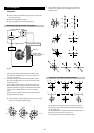
1
Connect the TV plug to the mains socket (220-240V AC,
50Hz)
Press the on/off button on the TV set to turn on the TV.
The first time you press this button, a Language menu
displays automatically on the TV screen.
2
Press the or button on the remote control to select
the language, then press the OK button to confirm your
selection. From now on all the menus will appear in the
selected language.
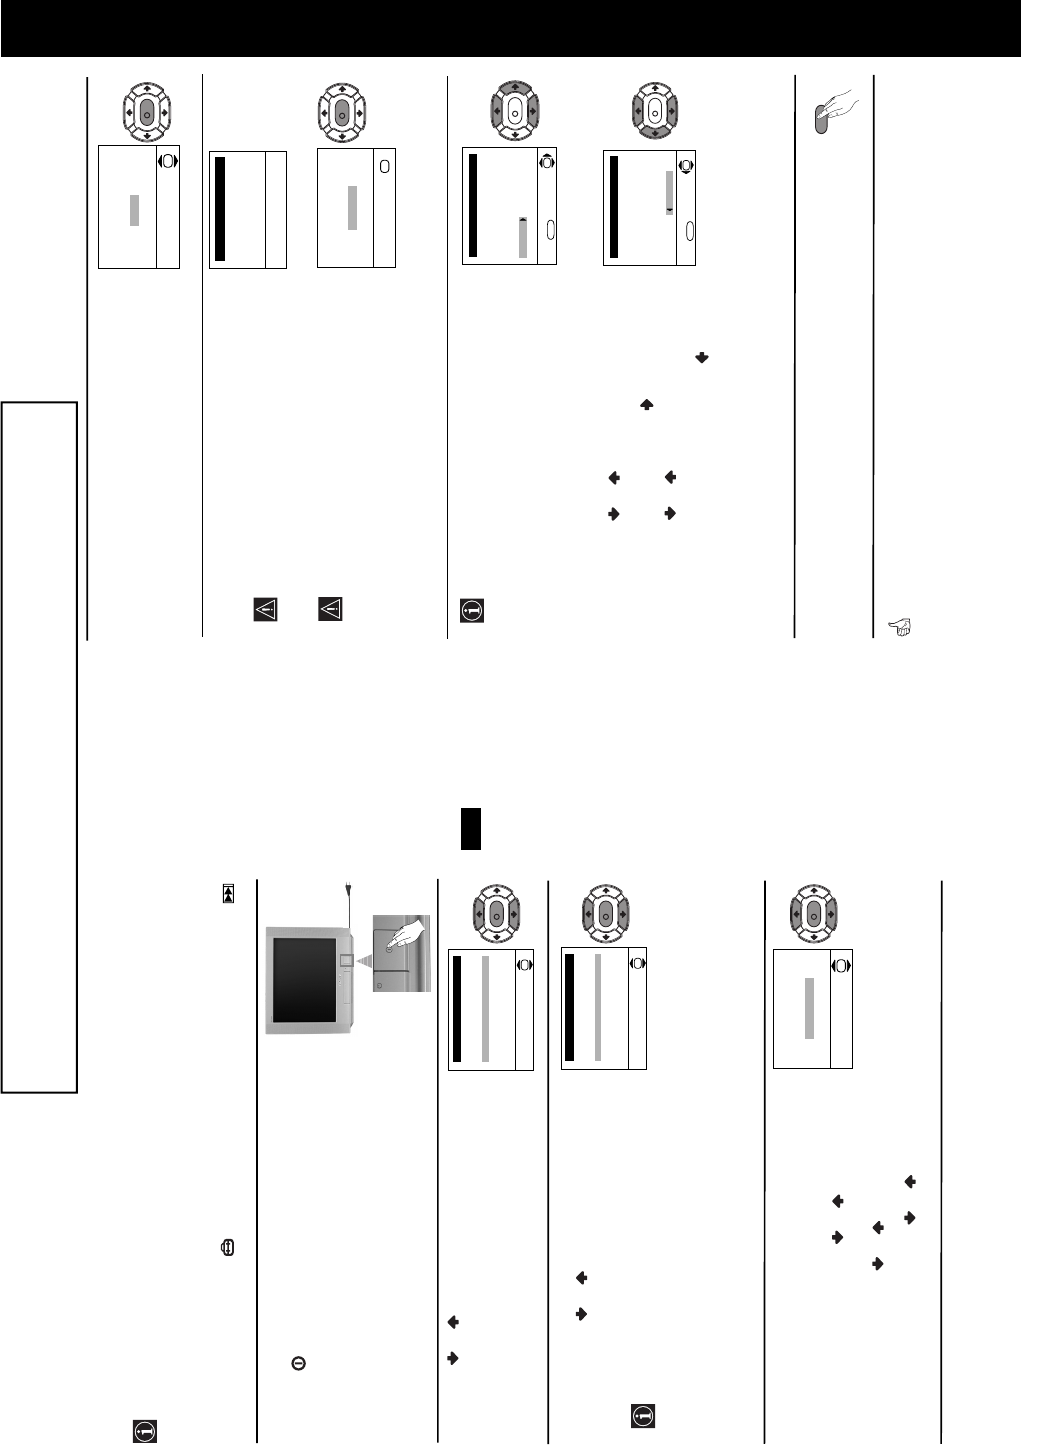
3The Country menu appears automatically on the TV
screen. Press the or button to select the country in
which you will operate the TV set, then press the OK
button to confirm your selection.
• If the country in which you want to use the TV set
does not appear in the list, select “-” instead of a
country.
• In order to avoid wrong teletext characters for
Cyrillic languages we recommend to select Russia
country in the case that your own country does not
appear in the list.
4
Because of the earth’s magnetism, the picture might slant.
The
Picture Rotation
menu allows you to correct the
picture slants if it is necessary.
a)
If it is not necessary, press or to select Not
necessary and press OK.
b)
If it is necessary, press or to select Adjust now,
then press
OK
and correct any slant of the picture
between –5 and +5 by pressing or . Finally press
OK
to store.
The operating instructions mentioned here are partial abstracts from the ‘Operating
Instruction Manual’. The page numbers of the ‘Operating Instruction Manual’ remain
as in the manual.
SECTION 1 GENERAL