


1-9
37
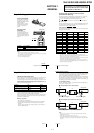
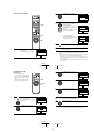
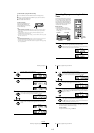
Recording TV programs
To watch another TV program while recording
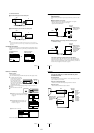
To save a recording
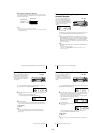
To prevent accidental erasure, break
off the safety tab as illustrated. To
record on the tape again, cover the tab
hole with adhesive tape.
Tips
• To select a channel, you can use the number buttons on the remote commander. Enter the
channel number, then press ENTER.
• You can select a video source from the LINE-1 IN or LINE-2 IN jacks using the INPUT
SELECT button.
• The display appears on the TV screen indicating information about the tape, but the
information won’t be recorded on the tape.
• If you don’t want to watch TV while recording, you can turn off the TV. When using a cable
box, make sure to leave it on.
Notes
• The remaining tape length may not be indicated accurately for short tapes such as T-20 or T-
30, or tapes recorded in the LP mode.
• The display does not appear during still (pause) mode or slow-motion playback.
• It may take up to one minute for the VCR to calculate and display the remaining tape length
after you press DISPLAY.
1
Press TV/VIDEO to turn off the VIDEO indicator in the display window.
2
If the TV is connected to the VCR’s LINE OUT jacks, set the TV to the TV’s
antenna input; if not, skip this step.
3
Select another channel on the TV.
Safety tab
38
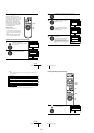
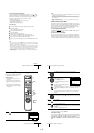
Recording TV programs using the Dial Timer
Recording TV programs using the Dial
Timer
The Dial Timer function allows you to make
timer recordings of programs without turning
on your TV. Set the recording timer to record
up to eight programs that will be broadcast
within a month using the DIAL TIMER. The
recording start time and recording stop time
can be set at one minute intervals.
Before you start...
• When using a cable box, turn it on.
• Insert a tape with its safety tab in place.
Make sure the tape is longer than the total
recording time.
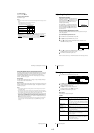
1
Press DIAL TIMER.
“DIA” and “HOY” appear alternately in the display window.
If the date and time are not set, “DIA” flashes. See step 2 in the following
section “To set the clock” to set the date and time.
xSTOP
DIAL TIMER
?/1 POWER
CHANNEL +/–
123
456
789
0
INPUT
SELECT
DIAL TIMER
EP
VIDEO
APC
EP
VIDEO
APC
39
Recording TV programs using the Dial Timer
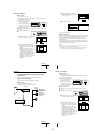
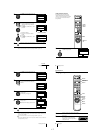
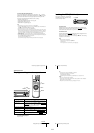
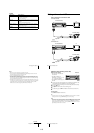
2
Turn DIAL TIMER to set the recording date.
3
Press DIAL TIMER.
“DESDE” and the current time appear alternately in the display window.
4
Turn DIAL TIMER to set the recording start time.
You can set the recording start time in 15 minute intervals or adjust the time
in one minute intervals by pressing the CHANNEL +/– buttons.
5
Press DIAL TIMER.
“HASTA” and the recording stop time appear alternately in the display
window.
DIAL TIMER
EP
VIDEO
APC
DIAL TIMER
EP
VIDEO
APC
EP
VIDEO
APC
DIAL TIMER
CHANNEL
EP
VIDEO
APC
DIAL TIMER
EP
VIDEO
APC
EP
VIDEO
APC
continued
40
Recording TV programs using the Dial Timer
To return to the previous step
To return to the previous step, press the CHANNEL + and – buttons on the VCR at
the same time during any of the Dial Timer settings.
To stop recording
To stop the VCR while recording, press xSTOP.
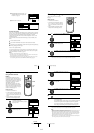
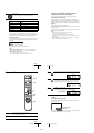
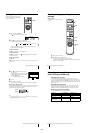
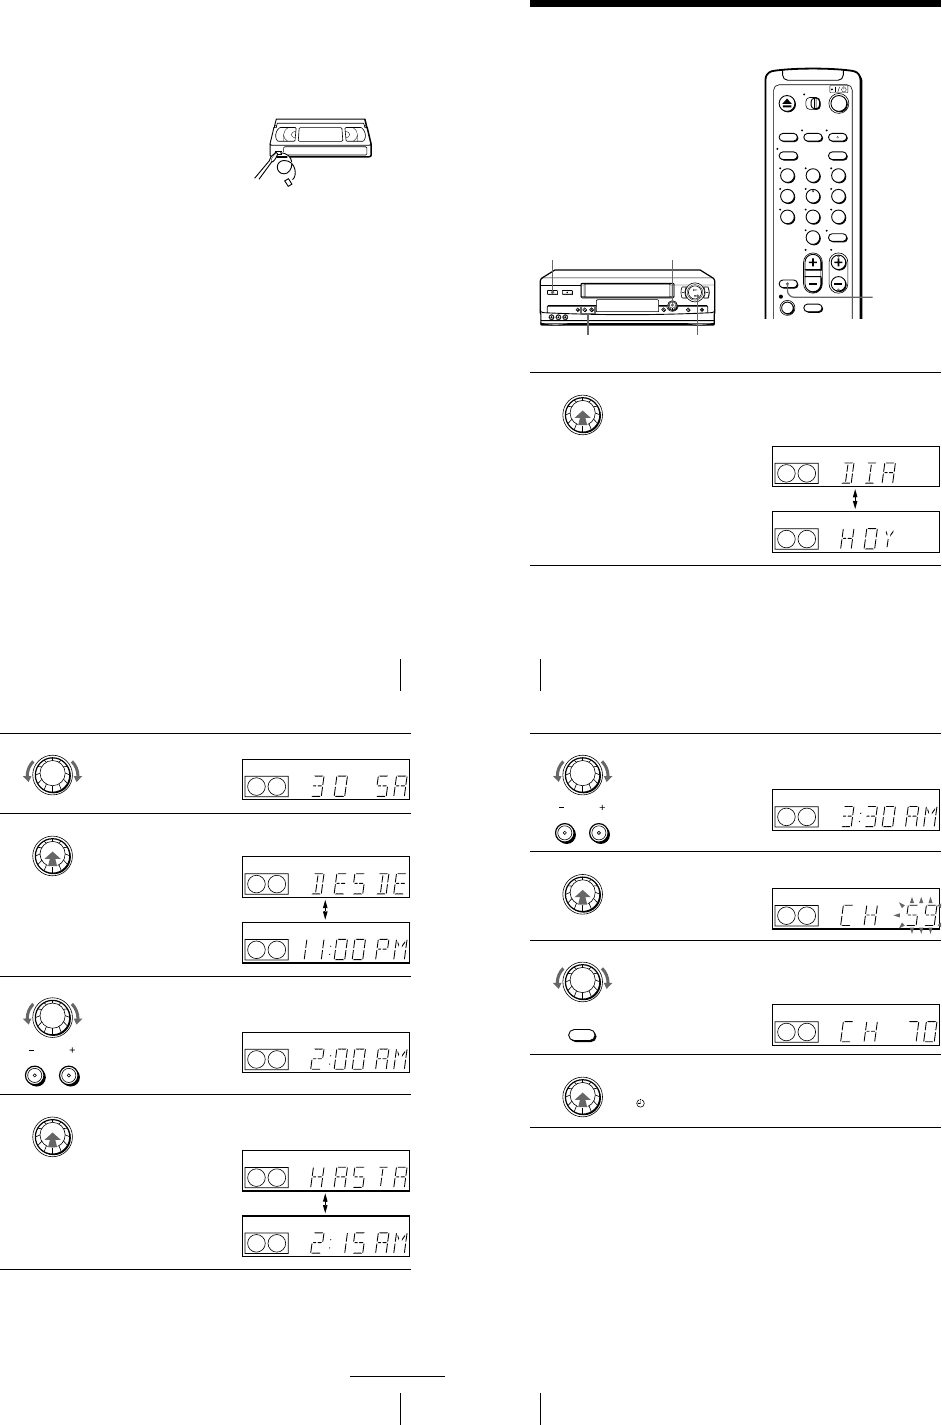
6
Turn DIAL TIMER to set the recording stop time.
You can set the recording stop time in 15 minute intervals or adjust the time
in one minute intervals by pressing the CHANNEL +/– buttons.
7
Press DIAL TIMER.
The channel number appears in the display window.
8
Turn DIAL TIMER to set the channel number.
To record from a source connected to the LINE-1 IN or LINE-2 IN jacks,
turn DIAL TIMER or press INPUT SELECT on the remote commander to
display “L1” or “L2”.
9
Press DIAL TIMER to complete the setting.
“OK” appears in the display window for about five seconds.
The indicator appears in the display window and the VCR stands by for
recording. When using a cable box, leave it on.
DIAL TIMER
CHANNEL
EP
VIDEO
APC
DIAL TIMER
EP
VIDEO
APC
DIAL TIMER
INPUT
SELECT
EP
VIDEO
APC
DIAL TIMER