


53
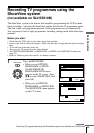
Recording TV programmes using the Dial Timer (SLV-SE810B only)
Basic Operations
To set the clock
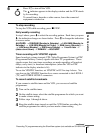
Tips
• To cancel a Dial Timer setting, press x (stop) on the VCR
while you are making
the setting.
• The programme is recorded in the current tape speed mode. To change the tape
speed, press SP/LP before you complete the setting in step 9.
• When you are recording a programme in the SP mode and the remaining tape
becomes shorter than the recording time, the tape speed is automatically changed
to the LP mode. Note that some interference will appear on the picture at the point
the tape speed is changed. If you want to keep the same tape speed, set VITESSE
AUTO. to NON in the OPTIONS-1 menu (page 84).
• To check, change, or cancel the programme setting, see “Checking/changing/
cancelling timer settings” (page 68).
Notes
• If eight programmes have already been set using the ShowView system or the
MINUTERIE menu, “FULL” appears in the display window for about five
seconds.
• The indicator flashes in the display window when you complete the setting in
step 9 with no tape inserted.
• If you set the clock using the Auto Clock Set function and REGLAGE AUTO is set
to OUI, the clock will adjust itself to the incoming time signal regardless of
adjustments made with the Dial Timer. Be sure you have set the Auto Clock Set
correctly.
• The station name may not appear if the VCR does not receive station name
information signals.
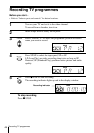
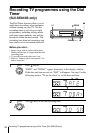
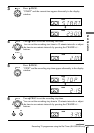
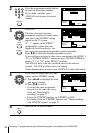
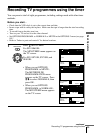
1
Turn PROG so that “CLOCK” appears in the display window.
2
Press PROG.
“DAY” appears in the display window.
3
Turn PROG to set the day.
4
Press PROG.
“MONTH” appears in the display window.
5
Turn and press PROG to set the month, and then the year.
After you set the year, “CLOCK” appears in the display window again.
6
Turn and press PROG to set the hour and minute.
7
When you have finished setting the time, press PROG to start the
clock.
continued