Chapter 6: Advanced Chassis Setup
6-3
System Fan Failure
If a fan fails, the remaining fan will ramp up to full speed and the overheat/fan fail
LED on the control panel will blink on and off. Replace any failed fan at your earli-
est convenience with the same type and model (the system can continue to run
with a failed fan). Remove the top chassis cover while the system is still running
to determine which of the two fans have failed. Then power down the system be-
fore replacing a fan. Removing the power cord is also recommended as a safety
precaution.
Replacing System Cooling Fans
1. Removing a fan
With the system powered down, fi rst remove the chassis cover (refer to page 6-7).
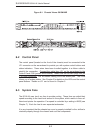
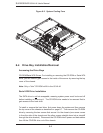
Grasp the failed fan unit and lift it out of the chassis. See Figure 6-2.
2. Installing a new fan
Replace the failed fan with an identical 4-cm, 12 volt fan (available from Supermicro:
p/n FAN-0061). Push the new fan into the vacant space in the housing while mak-
ing sure the arrows on the top of the fan (indicating air direction) point in the same
direction as the arrows on the other fans. Reposition the fan housing back over
the two mounting posts in the chassis, then reconnect the fan wires to the same
chassis fan headers you removed them from. Power up the system and check that
the fan is working properly and that the LED on the control panel has turned off.
Finish by replacing the chassis cover.


