


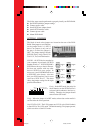


Test - This setting is for manufacturer use only. Do not jumper.
Terminator ON/OFF - This jumper turns termination power ON or OFF. If
you are connecting more than one SCSI device to your system, and the
DVD-RAM is not at the end of the chain, then terminator jumper is not
required.
PLACING DVD-RAM INSIDE YOUR COMPUTER
Now that you have set the jumpers, you are ready to install your DVD-
RAM inside your computer.
IMPORTANT: Disconnect power from your computer system before
beginning installation.
Remove computer cover and faceplate if required. Refer to your com-
puter system’s manual for removal information. If DVD-RAM is replac-
ing another drive (i.e., CD-ROM or DVD-ROM), remove the drive pres-
ently installed in your system.
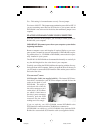
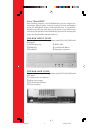
The SD-W1101 DVD-RAM can be mounted horizontally or vertically in
any free half-height drive slot at the front of your computer.
Carefully start sliding the DVD-RAM into the opening with the disc tray
facing the front of the computer. Before you push the drive all the way in
you will need to connect the SCSI interface cable and the power cable to
the back of the drive.
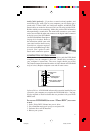
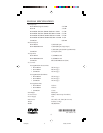
CONNECTING CABLES
SCSI Interface Cable (not supplied with kit) - The internal SCSI inter-
face cable is connected to your SCSI host adapter card and fits into the
socket on the back of your
DVD-RAM. The stripe or
red-colored side of the rib-
bon cable connects to pin 1
on the drive’s SCSI connec-
tor which is found next to
the drive’s power connector.
Carefully push the SCSI
connector into the socket,
making sure it fits snugly.
If you are replacing your SCSI CD-ROM: connect DVD-RAM to the
SCSI interface connector that the CD-ROM was connected to.
If DVD-RAM is an addition to a SCSI CD-ROM: daisy-chain the DVD-
RAM with a custom built SCSI interface cable (not supplied with kit).
3
1101kit.p65 2/10/99, 3:47 PM3