


7
HLC56 (E/F) Web 213:276
Chapter 1: Introduction
Features of your new monitor
The following are just a few of the many exciting features of
your new Toshiba widescreen LCD monitor:
• Two sets of ColorStream
®
HD high-resolution component
video inputs (- pages 9 and 12).
• HDMI
™
digital, high-definition multimedia interface
(- pages 9 and 14).
• SRS WOW
™
audio technologies (- page 33).
• CableClear
®
DNR digital picture noise reduction
(- page 31).
• PC IN (Analog RGB) computer input (- pages 9 and 15).
Overview of steps for installing,
setting up, and using your new
monitor
Follow these steps to set up your monitor and begin using its
many exciting features.
1 Carefully read the important safety, installation, care, and
service information (- pages 2–4). Keep this manual for
future reference.
2 Observe the following when choosing a location for
the monitor:
• Place the monitor on the floor or a sturdy, level, stable
surface that can support the weight of the unit. Secure
the monitor to a wall, pillar, or other immovable
structure (- page 3).
• Place the monitor in a location where light does not
reflect on the screen.
• Place the monitor far enough from walls and other
objects to allow proper ventilation. Inadequate
ventilation may cause overheating, which will damage
the monitor. THIS TYPE OF DAMAGE IS NOT
COVERED UNDER THE TOSHIBA WARRANTY.
3 Do not plug in any power cords until AFTER you have
connected all cables and devices to your monitor.
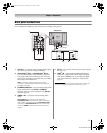
4 BEFORE connecting cables or devices to the monitor,
learn the functions of the monitor’s connections and
controls (
- pages 8–9).
5 Connect your other electronic device(s) to the monitor
(
- pages 10–15).
6 Install the batteries in the remote control (- page 16).
7 See “Learning about the remote control” (- page 17) for
an overview of the buttons on the remote control.
8 Program the remote control to operate your other
device(s) (
- pages 18–22).
9 AFTER connecting all cables and devices, plug in the
power cords for your monitor and other devices.
Press POWER on the monitor control panel or remote
control to turn on the monitor.
10 See “Menu layout and navigation” for a quick overview of
the monitor’s menu system (
- page 23).
11 For details on using the monitor’s features, see Chapter 6.
12 For help, refer to the Troubleshooting section
(
- Chapter 7).
13 For technical specifications and warranty information, see
Chapter 8.
14 Enjoy your new monitor!
263237HLC56_EN.book Page 7 Monday, June 5, 2006 3:46 PM