6
Introduction
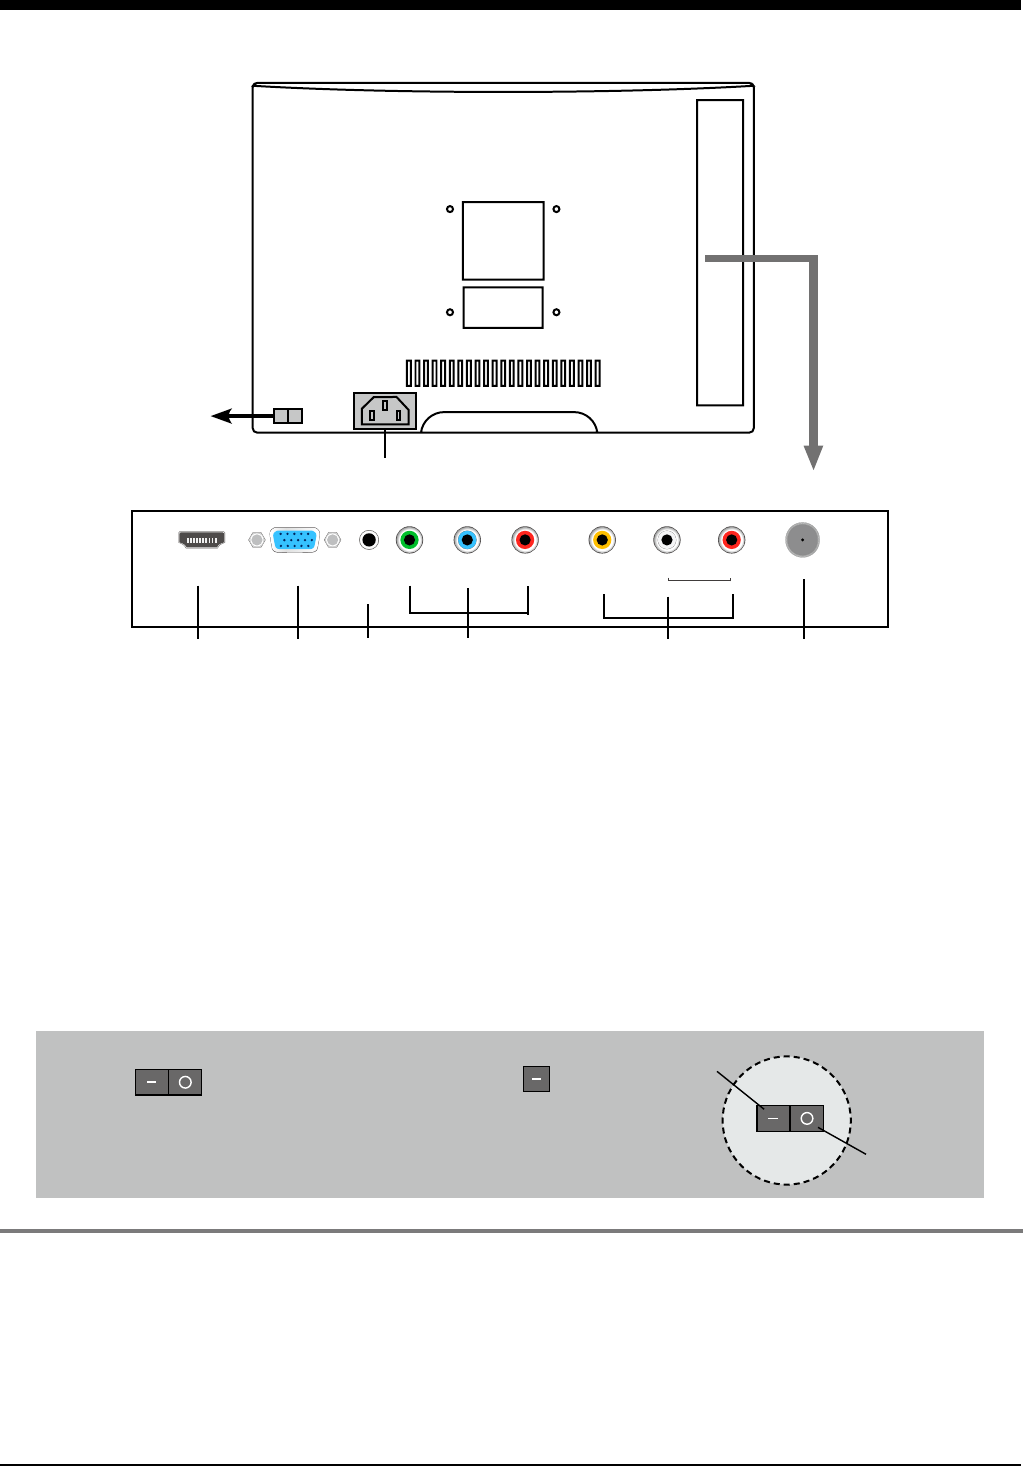
2. Rear View
SWITCH
1 AC POWER IN
- To turn on the LCD TV
Press on the back of the LCD TV to rst.
- Be sure to turn off the power and unplug both units
from the wall outlet before making any connections.
Power on
Power off
8
Wall Mounting
The TV is provided with mounting holes for a VESA approved wall mounting bracket(NOT
SUPPLIED). Remove the Two Posi screws holding the base to the base bracket and lift the
base away (do not remove the base mounting bracket). Mount the VESA bracket using
4 x M4 x10 Iso metric threaded screws (not supplied). Do not use screws longer than 10 mm,
damage will occur to the internal parts. Fit the wall bracket securely following the manufacturers
instructions.
1. AC POWER IN: Connect to an earth 100-240V,50-60Hz AC outlet with the Power Cable.
2. HDMI: Connect it to the HDMI of DVD or other equipment.
3. VGA: For PC display.Connect it to the D-Sub 15 pins analog output connector of the PC.
4. PC AUDIO: Connect it to the audio output terminal of PC.
5. YPbPr: Connect them to the YPbPr video output terminal of DVD.(used in YPbPr source)
6. VIDEO: Connect it to video output terminal of DVD.
L/R in: Connect them to the audio output terminal of DVD(shared with YPbPr)
7. RF: Connect antenna or cable 75 Ohm coaxial to receive TV signal.
8. SWITCH: Switch on or off the power suply.
2 3 4 5 6 7
HDMI VGA PC Y Pb Pr VIDEO L R RF
audio in Audio in


