iPUMP 6400 QUICK START GUIDE iPUMP 6400 QUICK START GUIDE
8000009-03 Rev. A 4 Professional Video Professional Video 9 800009-03 Rev. A
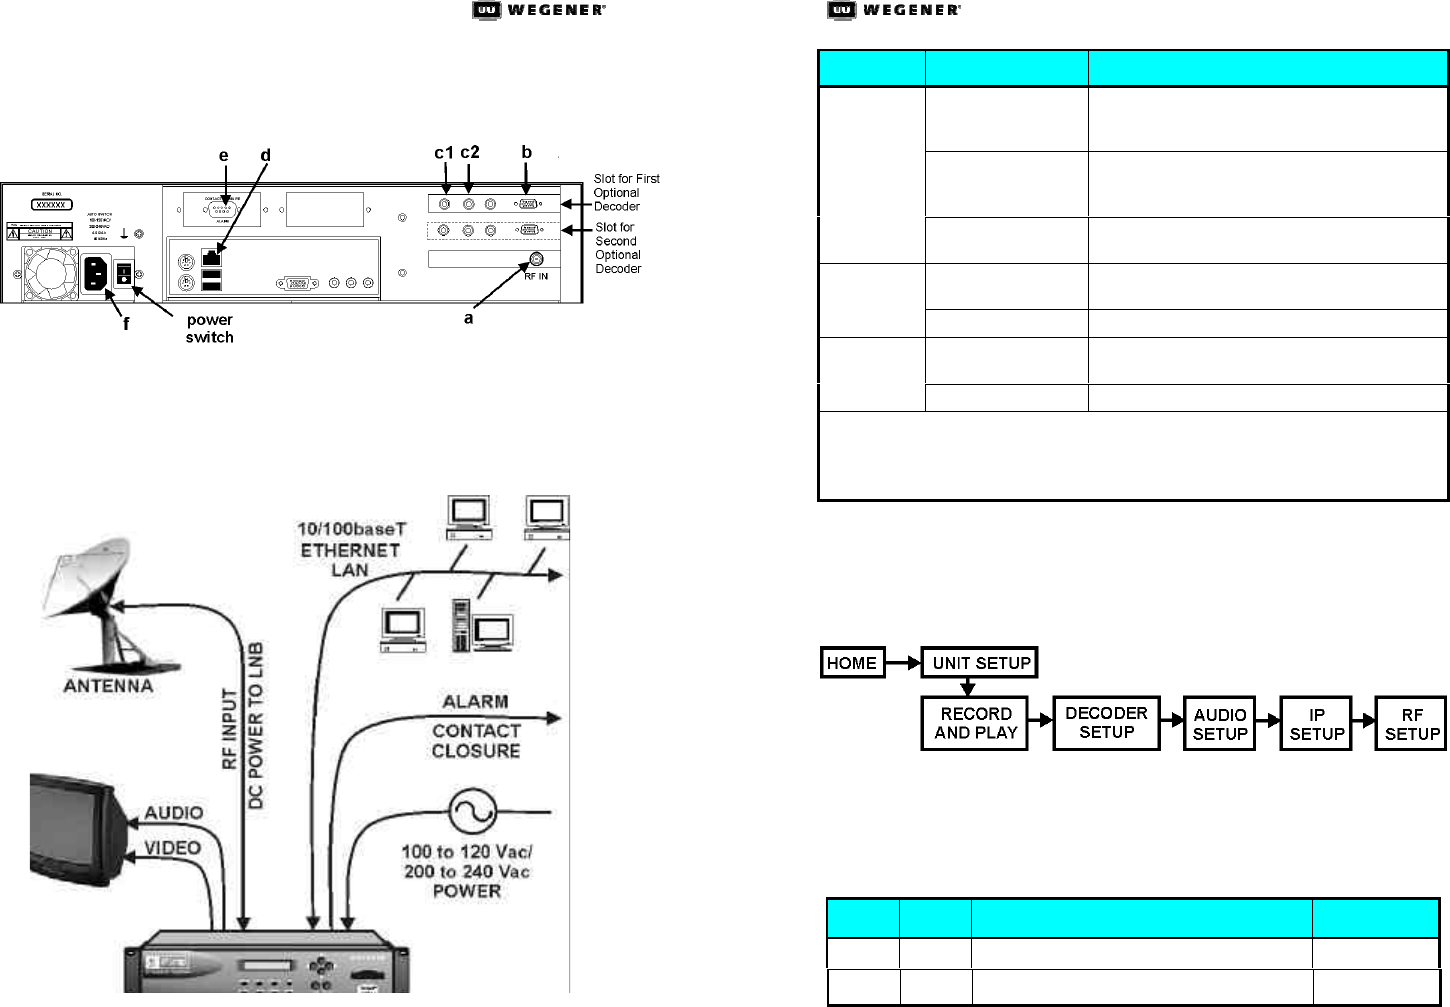
i. Y our LAN line to the iPump's Ethernet port (dd) [10/100baseT;
female RJ-45 connector]
Figure 1. iPump Rear-Panel Connectors
The Alarm port (ee, Figure 1) on the rear panel may be used to
provide a contact closure during alarm conditions or on
command from Compel. See the iPump User’s Manual for
complete connector and signal details.
Figure 2. iPump Connections
Note: Do not connect devices to the mouse, keyboard and other
connectors not described here. They are for factory use only.
LED Label Color and State Meaning
GREEN constant Current transport stream is protected by
conditional access (CA) and iPump is
authorized and descrambling.
GREEN slow blink Current transport stream is protected by
conditional access (CA) but iPump is
unauthorized.
AUTH
Off Tracked channel is not scrambled ("in the
clear").
AMBER constant
One or more warning conditions exist. Read
warning information from front-panel LCD.
WARNING*
Off No warning conditions exist.
RED constant One or more alarm conditions exist. Read alarm
message from LCD.
ALARM*
Off No alarm condition exists
* Only one alarm or warning condition is displayed at a time on the LCD. When
multiple alarm or warning conditions exist, those conditions are displayed in the
order of importance. The most critical condition is displayed first and others may be
viewed by pressing the right arrow button ww.
7. Set up or adjust your Set up or adjust your iPump's RF settingsiPump's RF settings at the front
panel. (If your unit has the optional ASI input, this step is not
necessary - go to step 7). From the home screen, navigate to the
RF Setup screen as follows:
Note: Use the arrow buttons to move left and right through the
menu screens and the ENTER button to move down a level.
Use the ESC button to move upward through the menu
screens. By pressing ESC repeatedly, you can always return
to the iPump home screen.
Step Press Display / Field Details Screen Type
a. ENTER UNIT SETUP Menu
b.
ww
UNIT SETUP


