5
1.2 Operator panel
1
NAMES AND FUNCTIONS OF PARTS
1.2 Operator panel
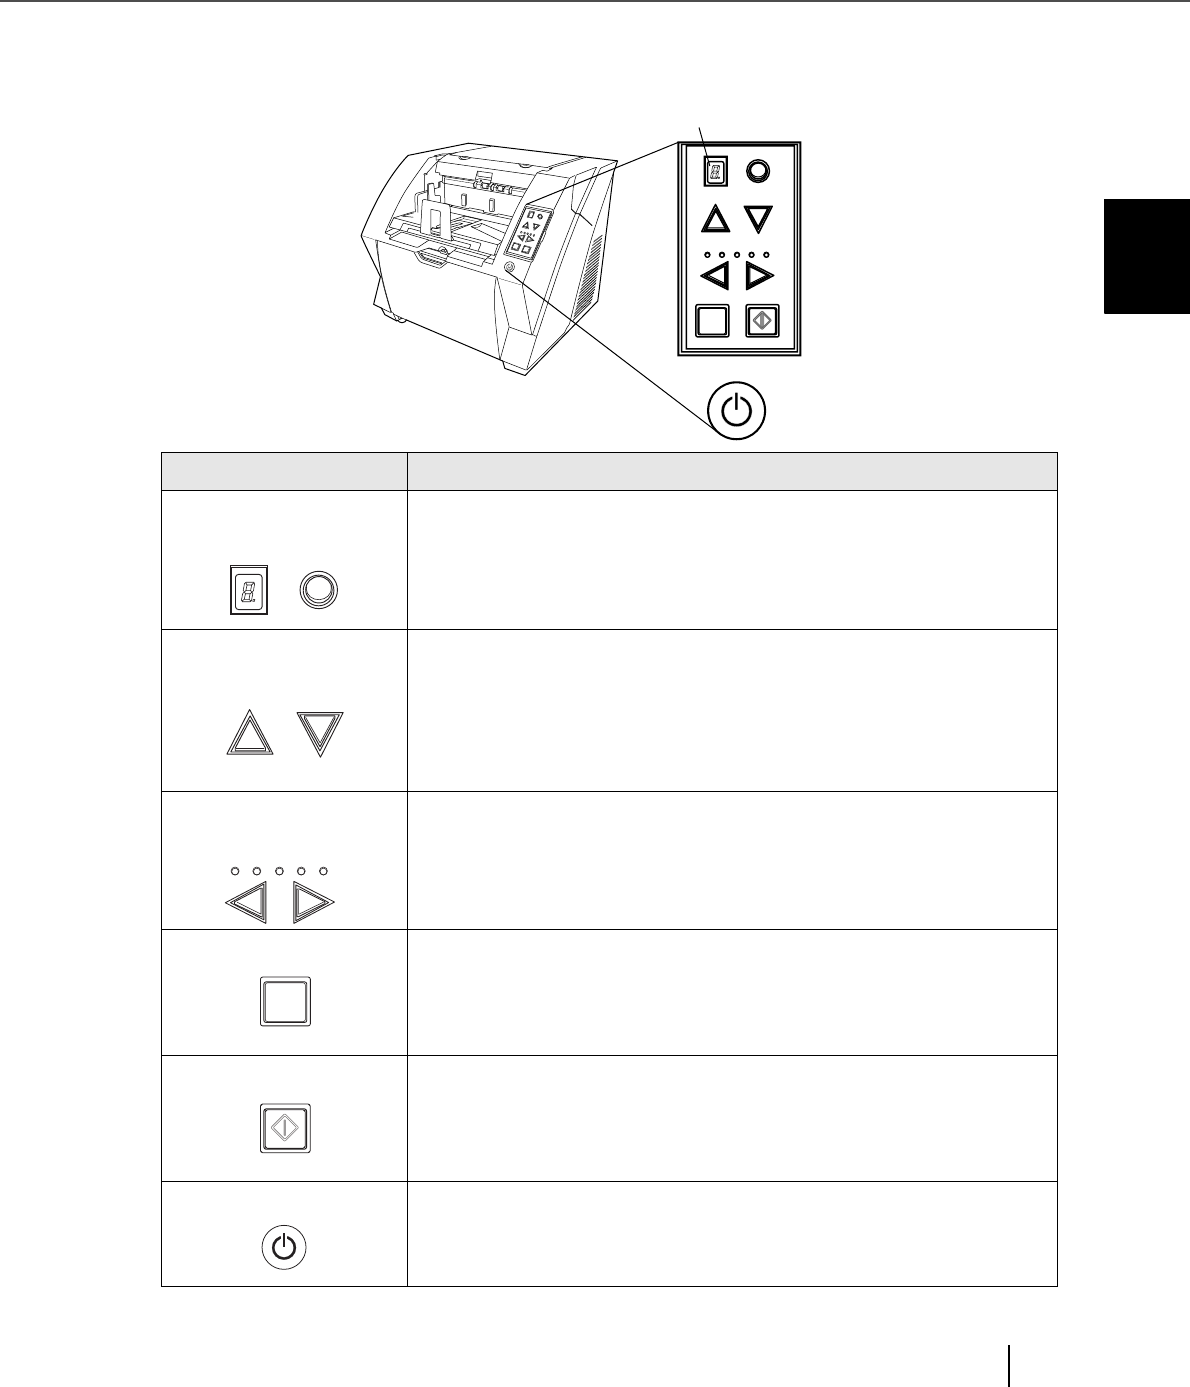
The operator panel is located on the right side of the scanner. The panel consists of a Function Number
Display, buttons and LEDs.
Name Function
Function Number dis-
play and Function button
Shows the status of the scanner.
For details, refer to "Indications on the Function Number Display" (page 6).
Hopper height
adjustment button
Use these buttons to adjust the height of the Hopper to the Upper/Middle/
Lower Positions.
The hopper moves automatically to the right position after recieving a scan-
ning command. However, this may cause a delay before the actual scanning
starts. To avoid unnecessary waiting time, it is recommended to set the hop-
per height prior to scanning. For details, refer to “2.5 Setting the Hopper
Height” on page 15.
Document thickness
adjustment button
Use this buttons, to set the paper thickness of the documents.
(Normally no need to change from the default setting)
For details, refer to “2.9 Setting the Paper Thickness” on page 29.
[Send to] button Use this button to start linked application.
When this button is pressed at manual feed mode, the scanning stops immedi-
ately.
(* About the settings, refer to section “2.14 Before Using [Scan] / [Send to]
button” on page 60, or the TWAIN Driver help.)
[Scan] button Use this button to start linked application.
When this button is pressed during scanning operation, the scanning is can-
celled.
(* About the settings, refer to section “2.14 Before Using [Scan] / [Send to]
button” on page 60, or the TWAIN Driver help.)
Power button Use this button to turn the power ON/OFF.
When the power is turned on, the button is illuminated in blue.
Functi on
Hopper Height
Paper Thickness
Thin
Send to Scan
Thick
Send
to
Scan
P
ower Thic
k
ness
Hopper Heigh
t
Functio
n
T
hick
T
hi
n
Paper Thickness
Th in Th ick
Scan


